Using Your Calendar
- Lucy Barber (Deactivated)
- Elvis Merino (Unlicensed)
- Joel Morgan Kearney (Unlicensed)
- Jalesa Campbell (Deactivated)
Your calendar view will show you everything that's on your schedule and blocking off your availability for booking. This includes your open, checked in, completed, and no show appointments as well as any time off periods you've added. You can find your calendar view under the Appointments Menu, you can then switch between Month, Week, & Day view.
In this documentation, we will go through how to:
- How to filter booked appointments in your calendar
- Read & navigate to your appointments
- Change appointment times
- Find your appointment availability
Switching views in the calendar is pretty self-explanatory, but hopefully through this documentation you will understand when it's most beneficial to use each view.
How to create filters for your appointments calendar
Using the appointment filter feature will give you the ability to toggle between filters that contain common views that matter in your business. This will allow you to store different combinations of staff, locations, and reasons that you would like to see on your calendar or in your appointment lists views at a quick glance.
The appointment filter consists of six sections:
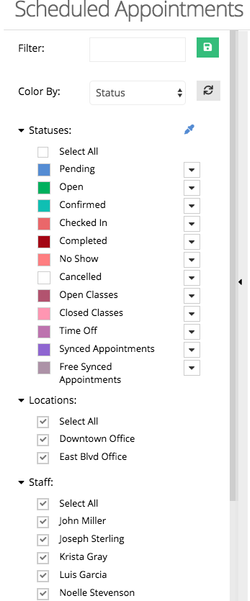
Filter: Here is where you can create filters based on predetermined criteria, once a filter is created and saved, it can be used at a later time.
- Color By: Colors can be assigned to Locations, Staff, and Reasons (Services/Classes) this feature will allow you to have a visual representation of what each appointment in your calendar is.
- Statuses: These are the different appointment and class statuses as well as synced events from externals calendars
- Locations: These are the locations you've added in TimeTap
- Staff: If you are an Administrator or Account Owner you will see all users who are able to take appointments listed here. Location Super Users will only see those users for the location they have been assigned to, Staff members with the security level of User on the other hand will only see their own name listed.
- Reasons: Services, classes offered to your clients
Before we start using the filter tool let's assume that I own a phone and computer repair business, I offer basic computer troubleshooting and software installation at my East Blvd office and phone and tablet repair at the Downtown Office location. If I want to know how many appointments have been booked at each location and with each staff member the filter feature is very helpful.
First I want to know how many appointments have been booked at the Downtown location.
In the dropdown menu next to 'Color By' I will choose Location (1), under the Location list I will select the Downtown office (2), the arrow to the right of the location name allows you to select a color for the location(2a). Under the staff list I can either select all staff member or only those at the location I chose(3). Reasons are the services I offer in all locations, when filtering appointments I can either select all or only those I offer at the location I chose.
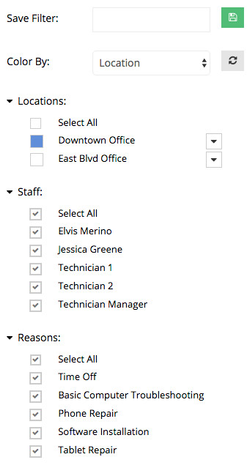
After entering the parameters I need in the filter, the Calendar to the right will update and will show me all appointments for the Downtown office in blue:
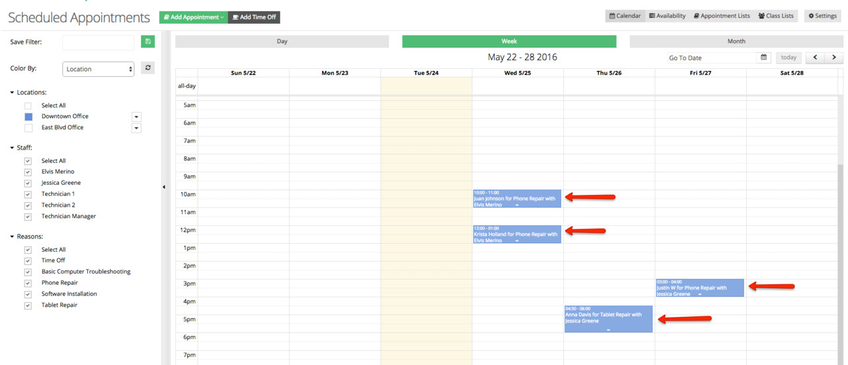
At this point I know that there are two appointments scheduled at the Downtown location, now I want to know who will be assisting the customers during this appointments. I will go back to the filter and change 'Color By' to Staff, leave the Downtown Office location checked.

I will then select a different color for each staff member:
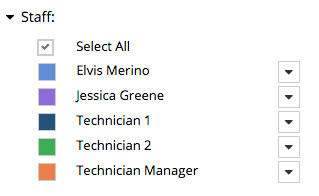
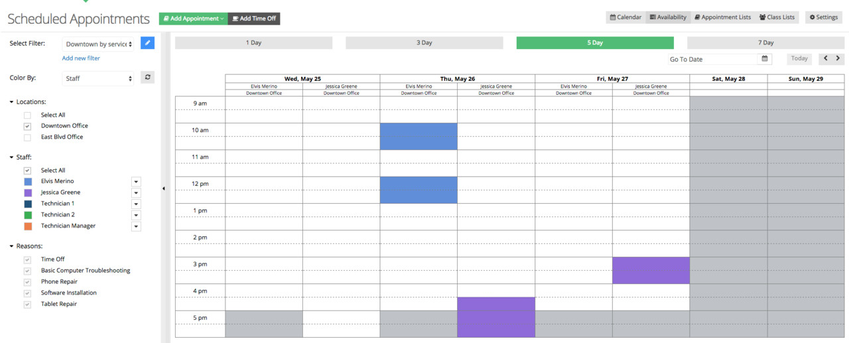
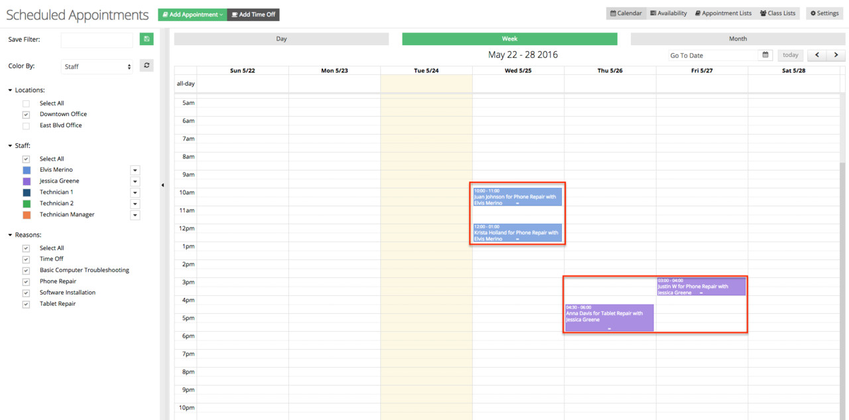
After leaving all Reasons selected, I will see in the calendar to the right of the filter all appointments scheduled at the Downtown Office, all appointments labeled in blue are scheduled with Elvis and the appointments in purple are scheduled with Jessica:
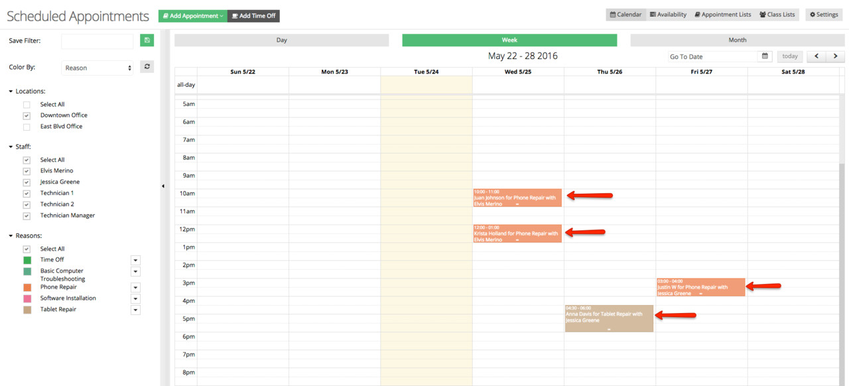
If I want to have a visual representation of what each one of those appointments is then I can choose to show each service with a different color, to do so I will go back to the filter and change 'Color By' to Reason, leaving the Downtown Office location checked and all staff:

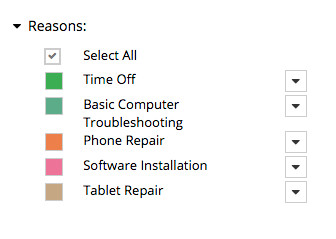
I used the arrows next to the services to assign a different color to each one of the services my business offers:
If I take a look at the calendar to the right of the filter, I will see that the services offered at the Downtown Office are now labeled by color, Phone Repair appears orange and Tablet Repair appears in light brown:
Lastly, I want to keep filter I just created so I can quickly use it a later time when I want to see appointments booked at the Downtown Office and show services in different colors. I will type 'Downtown by service' in the Save Filter field and click the Save button:
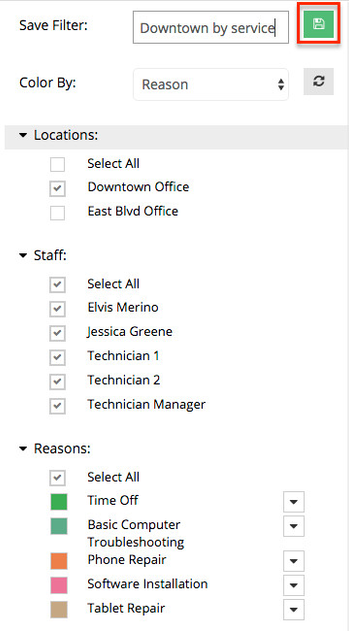
After the filter has been Saved, it will be added to a list and dropdown arrow will appear next to the name, where I will be able to select other filters I've created. To add a new filter to the list simply click 'Add new filter' select your criteria, enter a name for the filter and click the Save button.
If you want to randomly assign colors to Statuses, Locations, Staff, and Service & Classe click the "blue pencil"( ) icon that appears in the section you wan to assign colors to. The icon will appear on the section you select in the "Color By" dropdown:
Once you have created a few different filters and gotten a feel for how filters are used, you may need to edit one for some reason and will surely need to delete a filter at some point. To edit an existing filter, you will first need to choose the filter you wish to edit from the Filter dropdown on the upper left of your appointments calendar:
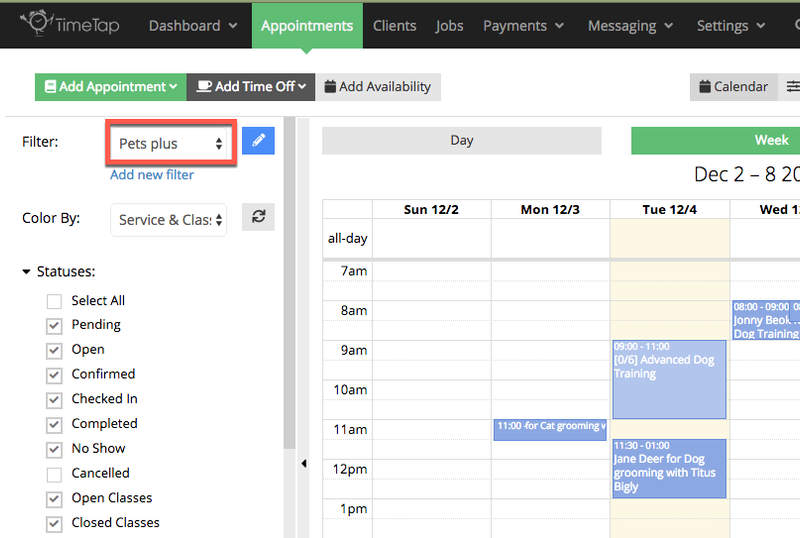
When you click on the dropdown, you will see a list of all the filters you have created that you can choose from. For the task at hand, we will be editing the "City locations" filter to remove the Office 1 location since it is located in the suburbs and not the city proper, and you want the filter to reflect commercial-district locations only. After you uncheck the box on the left of Office 1, you will already have edited your first filter!
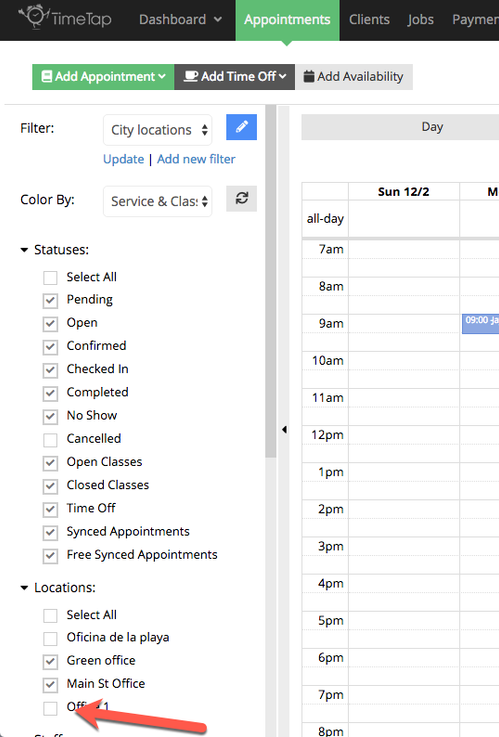
Once you have made the requisite changes, your filter will save automatically. To delete a filter you are no longer using, you will want to click on the blue button directly to the right of the Filter dropdown:
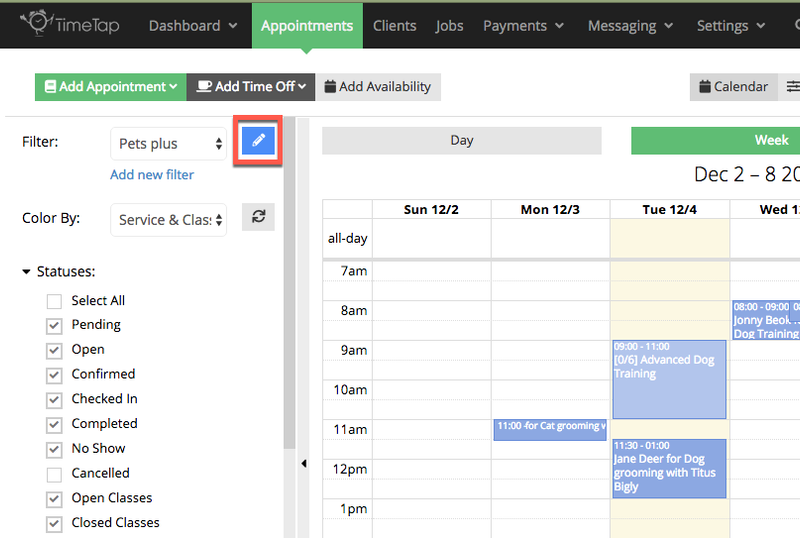
That will pull up the "Manage your selection filters" window, which you can use to delete any filters you want to get rid of by clicking the blue Delete button to the right:
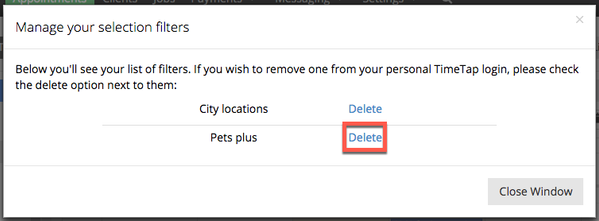
As soon as you do, the filters gets deleted and is no longer visible.
The appointments that you see displayed on your calendar view list first the appointment time, then the Client name and finally the Service name:
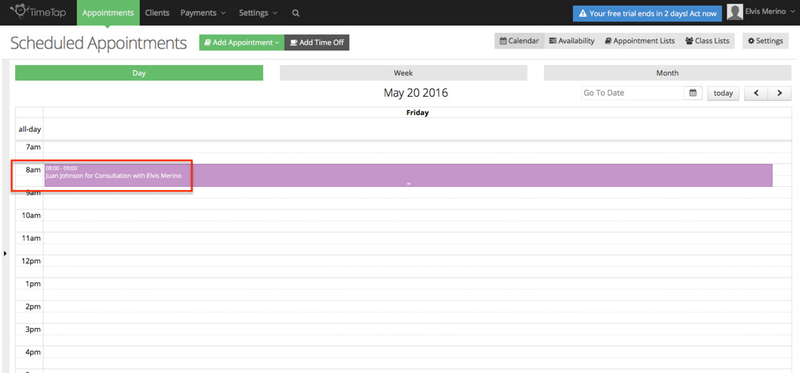
You can create a new appointment from the calendar screen just by clicking on a blank area of your calendar. If you want to view more details about any of the appointments, simply double click on the appointment you see on the calendar and you'll enter into its appointment detail screen:
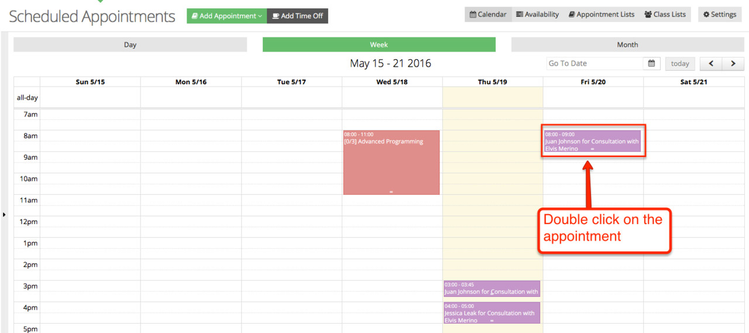
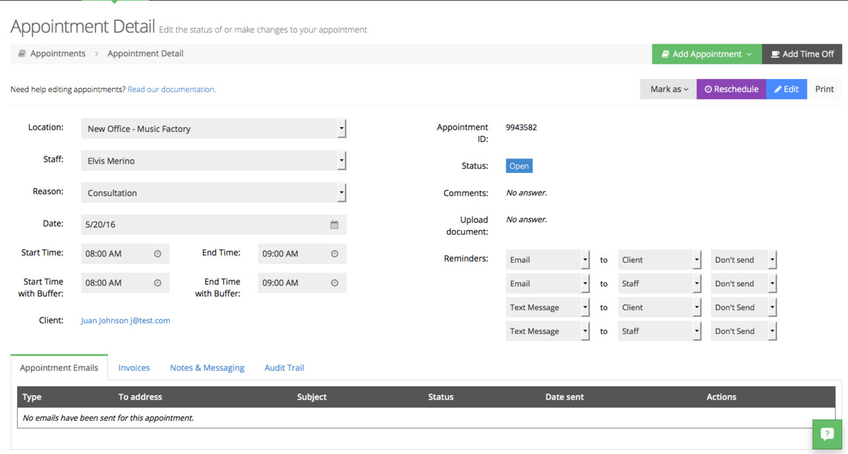
Once you've double clicked the appointment you will be see all the appointment details:
Each appointment that's on your calendar is drag and drop enabled.
On the week & day views, you will see that each appointment has two little bars at the bottom of it:
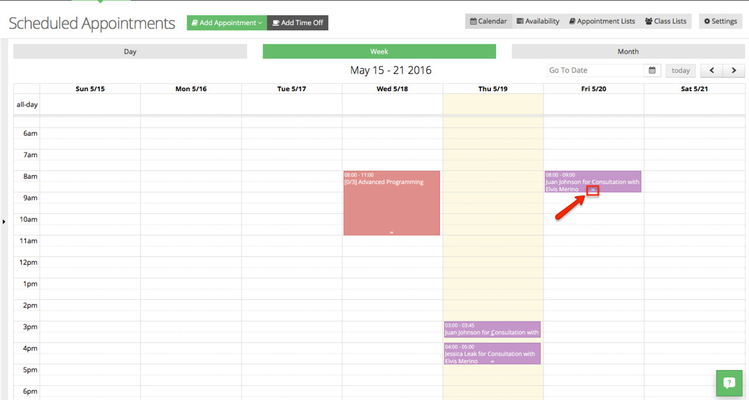
You can click on these two bars and drag the appointment to a new end time. Once you drag it to a new time, you will get a pop up window asking if you're sure you want to change the time. You will also be given the option to notify your client and the staff member assisting the customer of the change. Within this window you are also to a note to send to your client and the staff member, once you are OK with the changes you made click Update Date/Time:
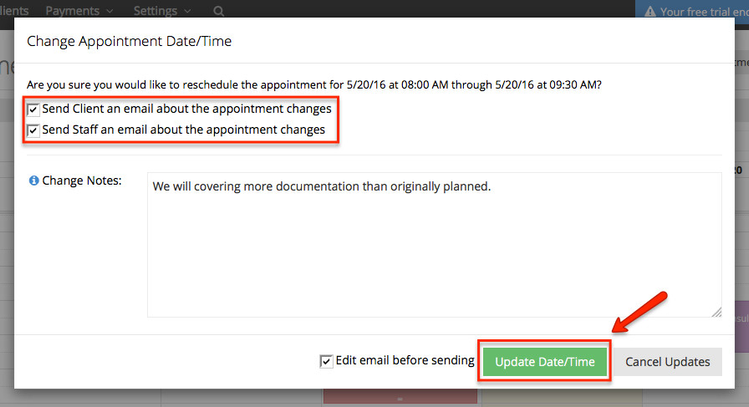
If you made the change in error (hey, it happens!) you can just click "Cancel Updates" and the appointment will revert to the normal time.
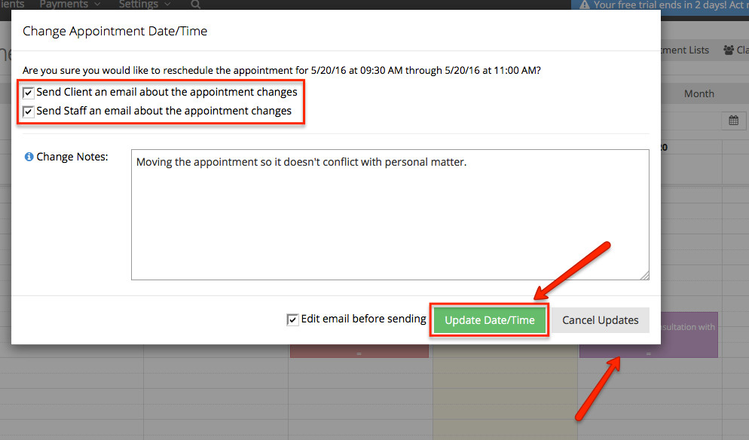
You can also drag the appointment to a totally different time and date on your calendar just by clicking it and moving to the new date and time you'd like. Once you drag it to a new time, you will get a pop up window asking if you're sure you want to change the time. You will also be given the option to notify your client and the staff member assisting the client of the change. Within this window you are also to a note to send to your client and staff, once you are OK with the changes you made click Update Date/Time:
If you know what hours of availability you've set for a given day, then it is easy to look and see what room you have left to schedule clients for appointments with a quick peak at your week or day calendar.
Let's say I know I have 8am-5pm set up to take appointments. I can look at my calendar for a given day and see what timeslots are already booked:
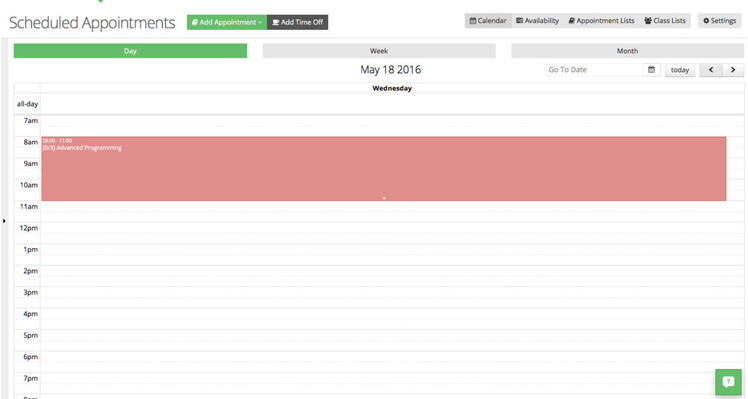
From here, it's easy for me to see that I have a class from 8:00am-10:00am, and I can start seeing clients after 10 am.
Seeing a quick view of your availability is easier on the calendar screen than on the List views because you see the spots that are filled right next to the spots that are available.
Another way to quickly see your availability is using the Availability view:
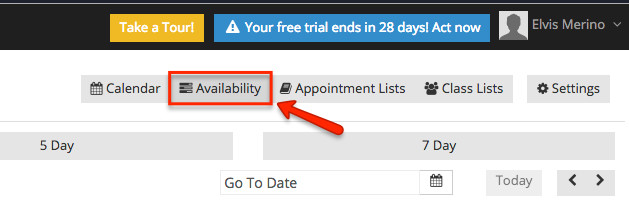
In this view the grey block represent the days and hours you are not available, in this example and I am not available to offer services Saturday or Sunday. My appointments are also clearly labeled and show in blue, based on the filter criteria I selected: