Clients' Access in the Scheduler
You can allow clients to book or view appointments for their spouse, children, etc., by granting access to other clients in the backoffice. Clients can also add their spouse, children, etc., in the scheduler and schedule appointments on behalf of someone else.
In the following example, we'll assume that our client Robyn Edwards wants to be able to schedule tutoring appointments for her two children, Alice and Hugo. Our client Robyn will have to login (if an existing client) or register (if a new client) in order to be able to book appointments on behalf of someone else.
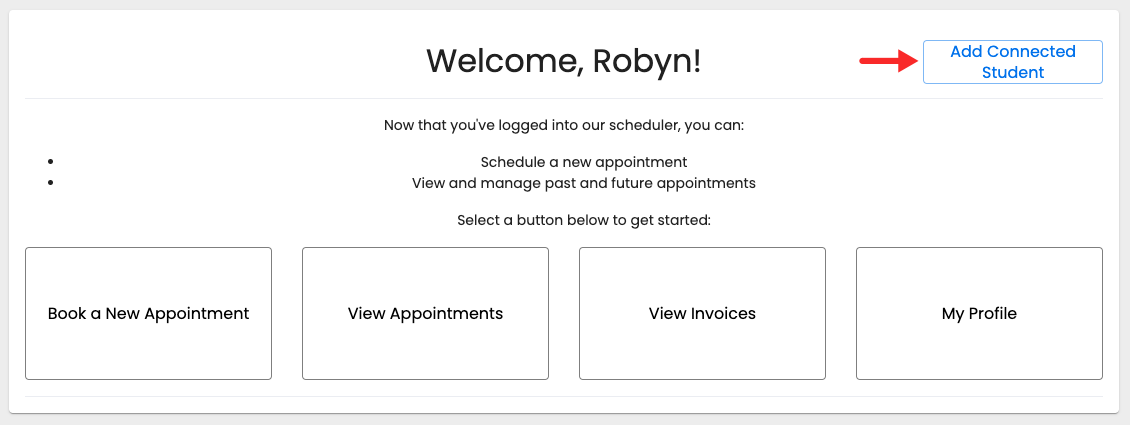
After our client logs in, she will see the option to "Add Connected Client" ("Add Connected Student" in this scenario):
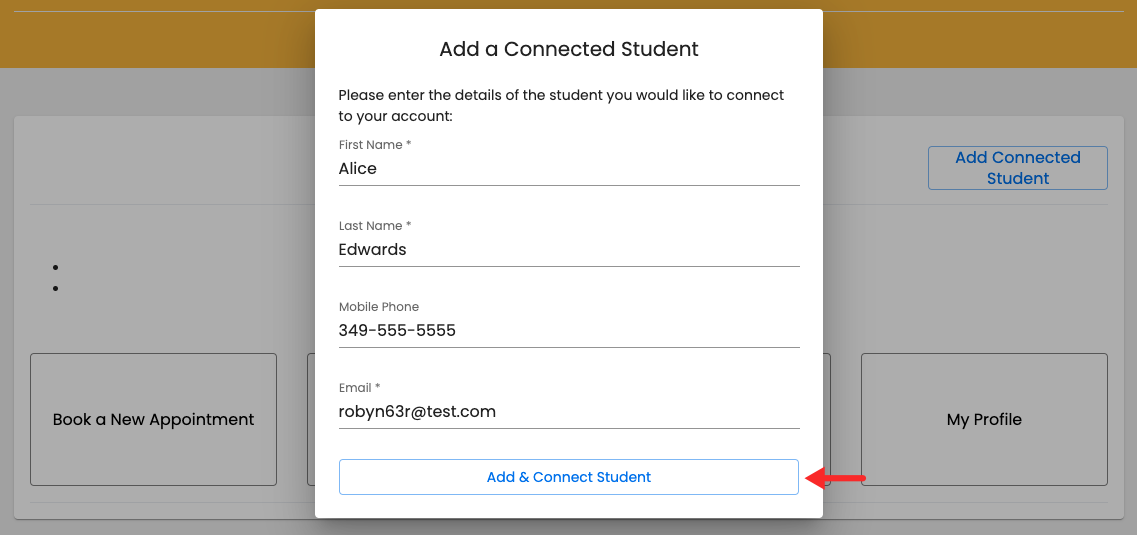
After the client clicks the button to add a connected client, a new window will appear where she will be able to enter the information of the new client she wants to book appointments for. The client may enter the same email and phone number she provided in her own profile if she wants to receive email notifications for the appointment she is booking for her children. If the client wants to receive confirmation and reminder emails in 2 or more email addresses, she should enter them separated by a comma. After the information has been entered, she'll click "Add & Connect Student" (Client):
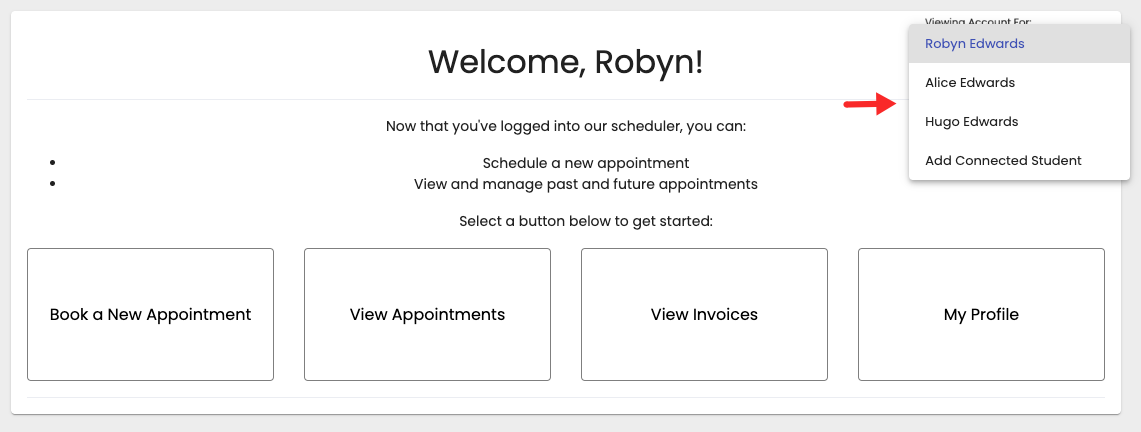
After the new client has been added, Robyn will be able to toggle between profiles in the "Viewing Account For" dropdown located in the top right corner:
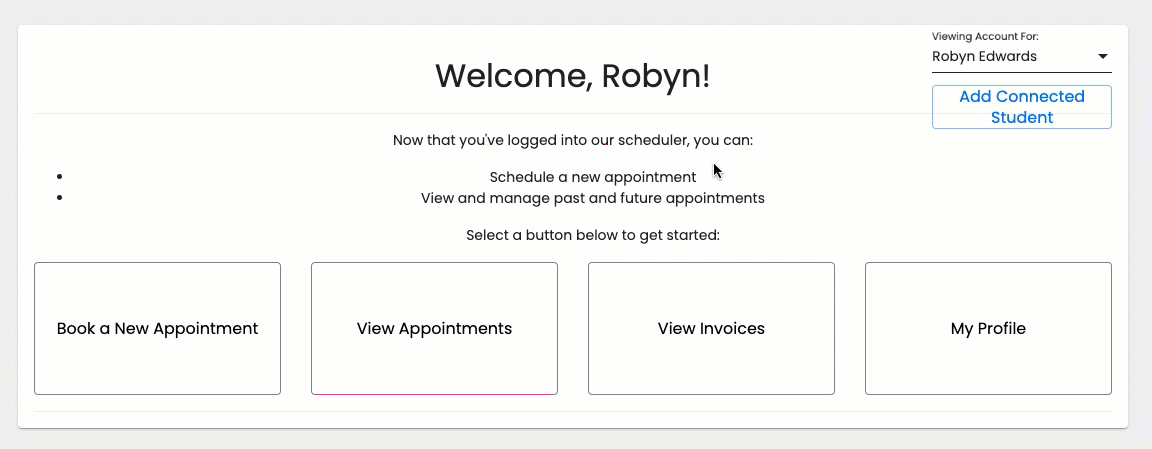
As the client adds more connected clients, their names will appear in the same dropdown:
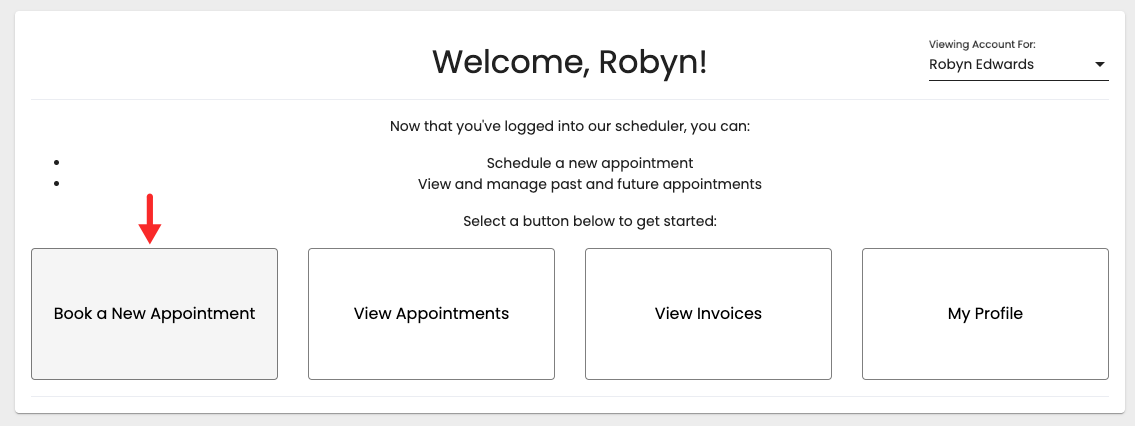
After all connected clients are added, the client can click the button to book a new appointment:
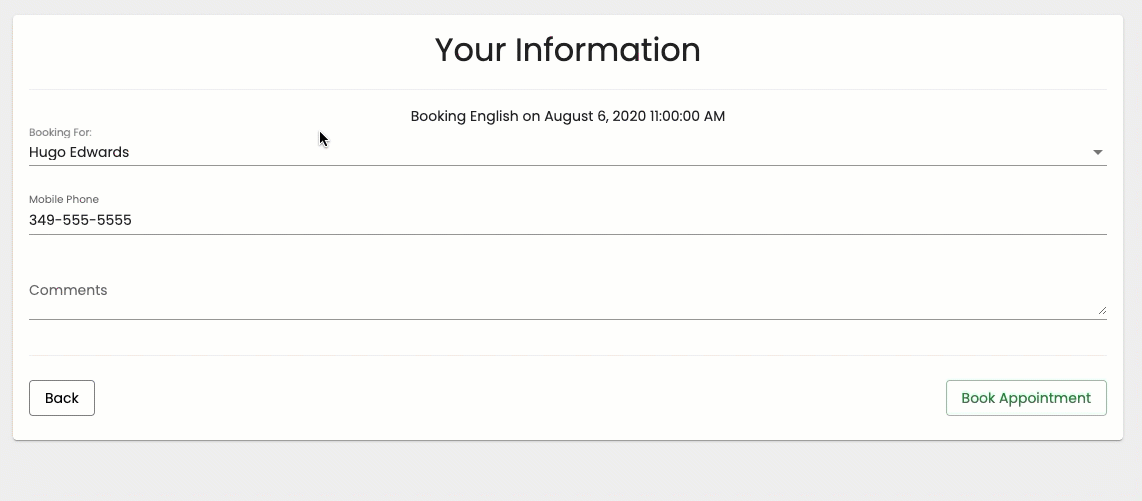
After choosing the service, time & date, the client will be directed to the Client Information panel where she will be able to select the connected client she wants to book for: