Booking Multiple Appointments
- Rachel Mitchell (Unlicensed)
- Elvis Merino (Unlicensed)
Booking Multiple Appointments allows the client to book multiple appointments in one visit to the scheduler. For example, if a client would like to book multiple tutoring sessions over the next 2 weeks because they have a test coming up, they will be able open the scheduler, select multiple appointment dates and times over the next few days or weeks, and sign up for all of them in one visit instead of having to go through the scheduling flow multiple times.
Booking Multiple Appointments is a feature that can be turned on at the service or class level, or, if you want all services and classes to have this feature, it can be turned on at the account level.
Please note that the Booking Multiple Appointments feature is only available in the new version of the scheduler. To learn more about how to switch your scheduler to the new version, please refer to our Scheduling Rules & Logic page.
In the sub-documentation on this page, you'll find the steps for:
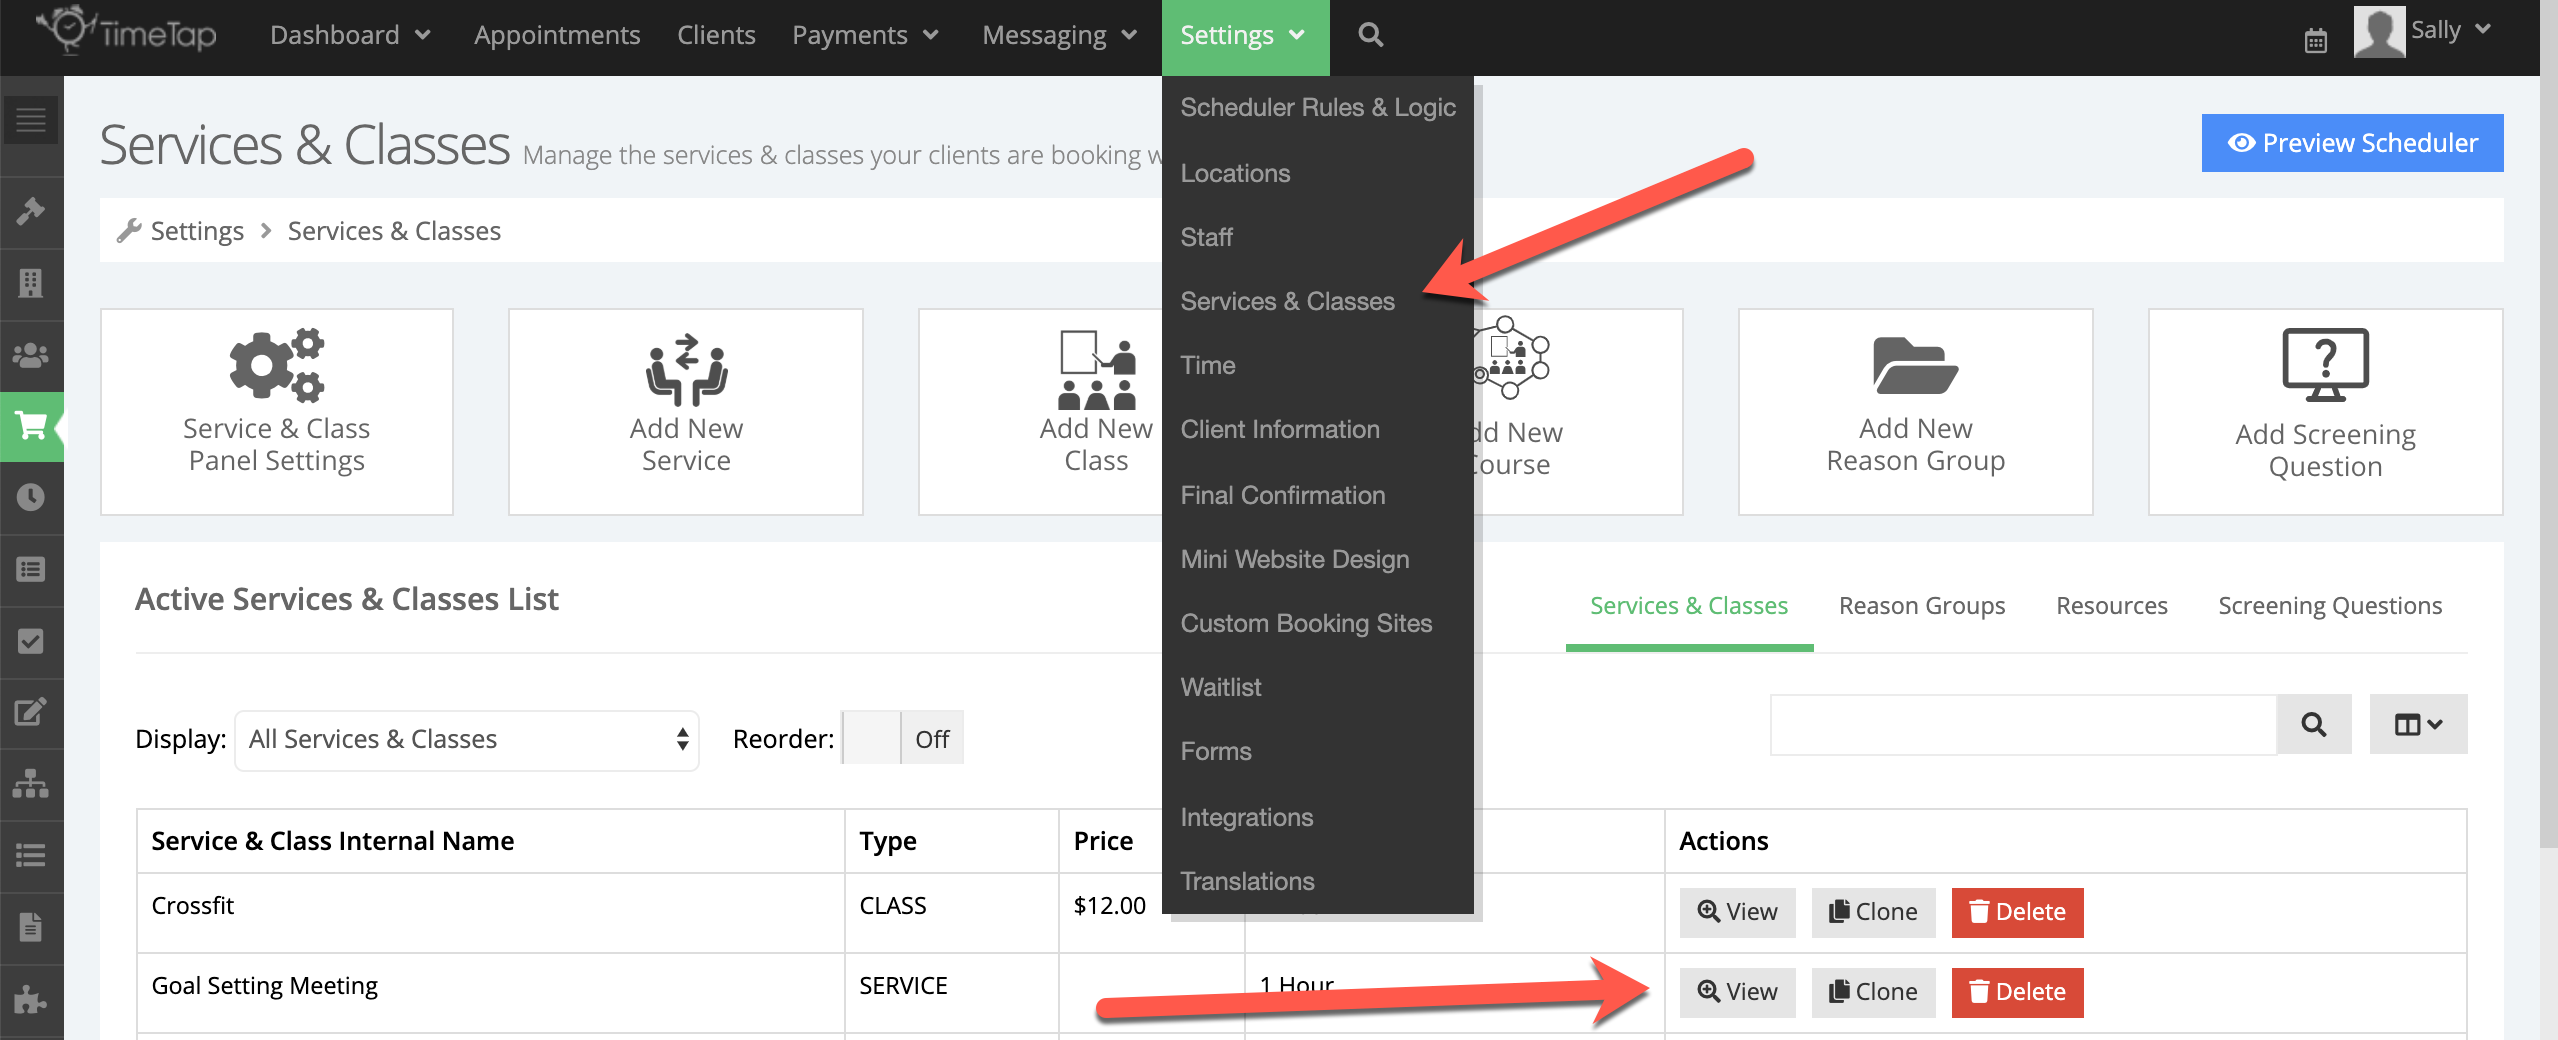
Let's say that you only want clients to be able to book multiple appointments for one service. You will need to go into the individual service profile and turn this feature on. To do this, you'll select Settings → Services and Classes. You'll then select "View" next to the service you'd like to allow this feature to be used for:
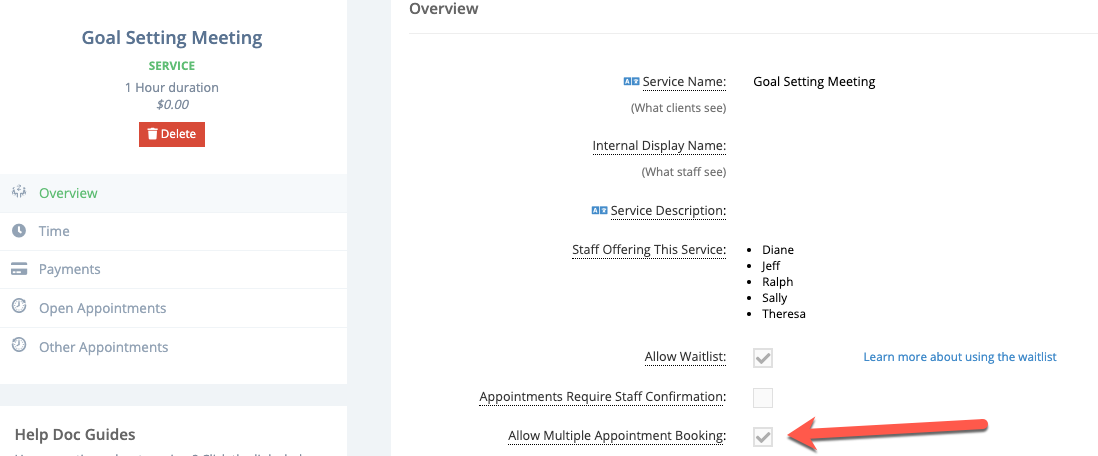
Once on the service profile page, you'll select "Edit" in the top right corner. You'll then check the box next to "Allow Multiple Appointment Booking" to allow this feature to be turned on for this service only. Don't forget to click the green Save button in the top right corner:
If you love the idea of allowing clients to book multiple appointments for all services and classes that you offer, you can turn on the Booking Multiple Appointments feature on for all services and classes within the account.
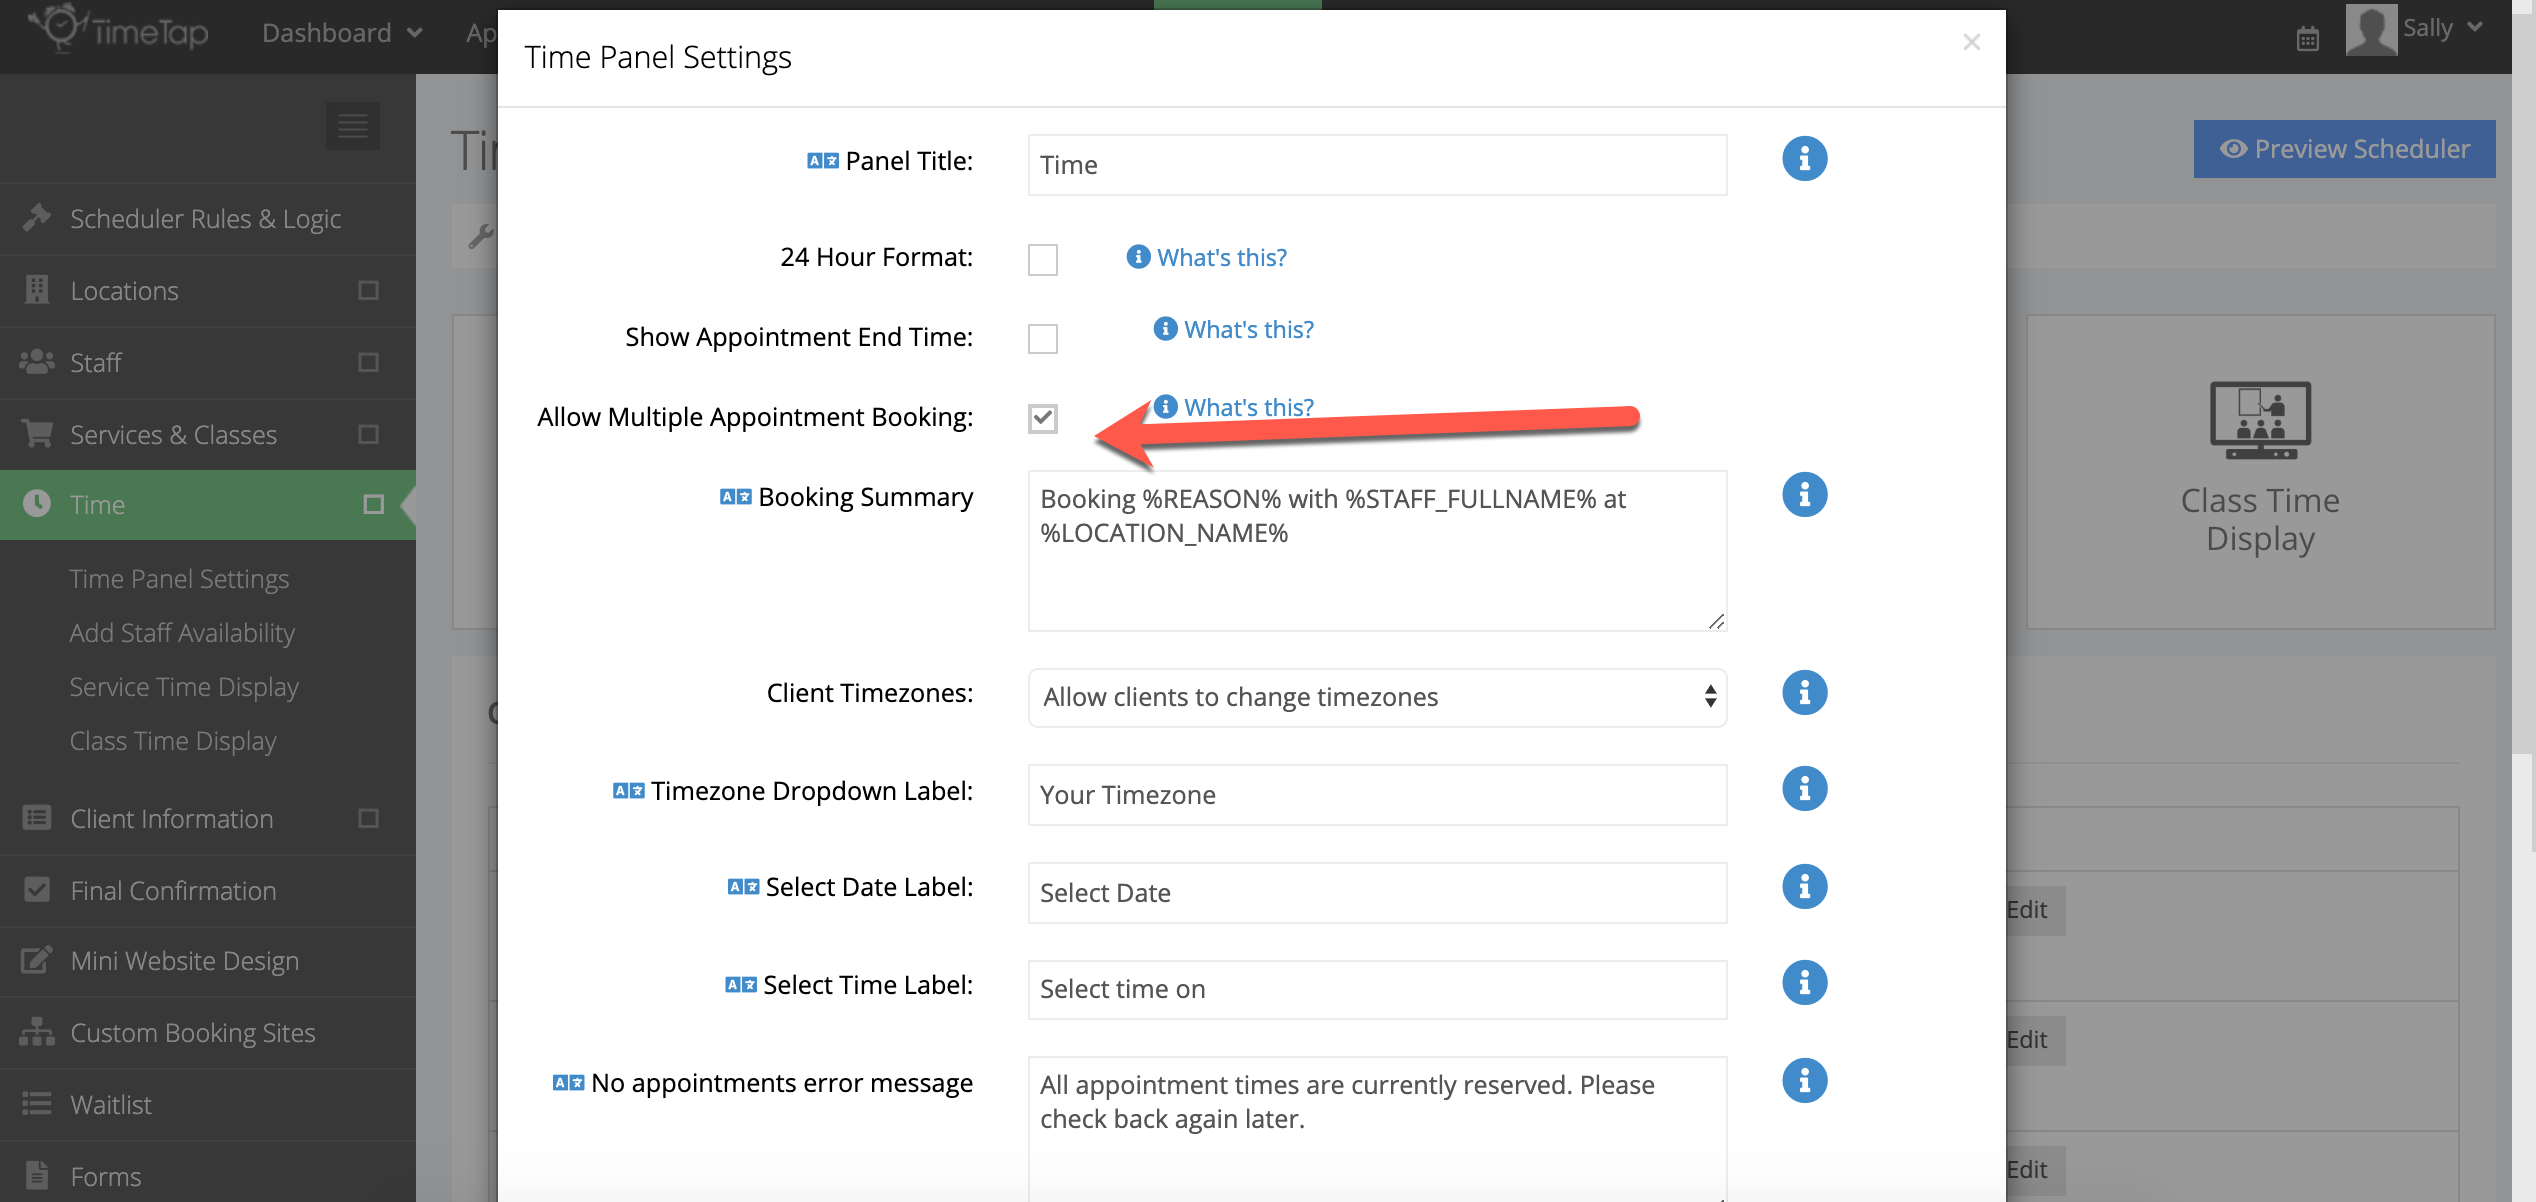
To do this, you'll go to Settings > Time. Once on the Time page, you'll then select "Time Panel Settings":
You'll then want to check the box next to "Allow Multiple Appointment Booking." Checking this box will turn on the ability for clients to book multiple appointments for all services and classes. One thing to keep in mind, clients will only be able to book multiple appointments for one service at a time:
Once you have set up the services and classes you want to allow clients to book multiple appointments for, it's time to book those appointments!
Open the scheduler and select all applicable values - staff, location, and service. Once you have selected those and made it to the Time panel to pick the day and time, you'll notice that you can see how many times are selected in the right corner of the screen.
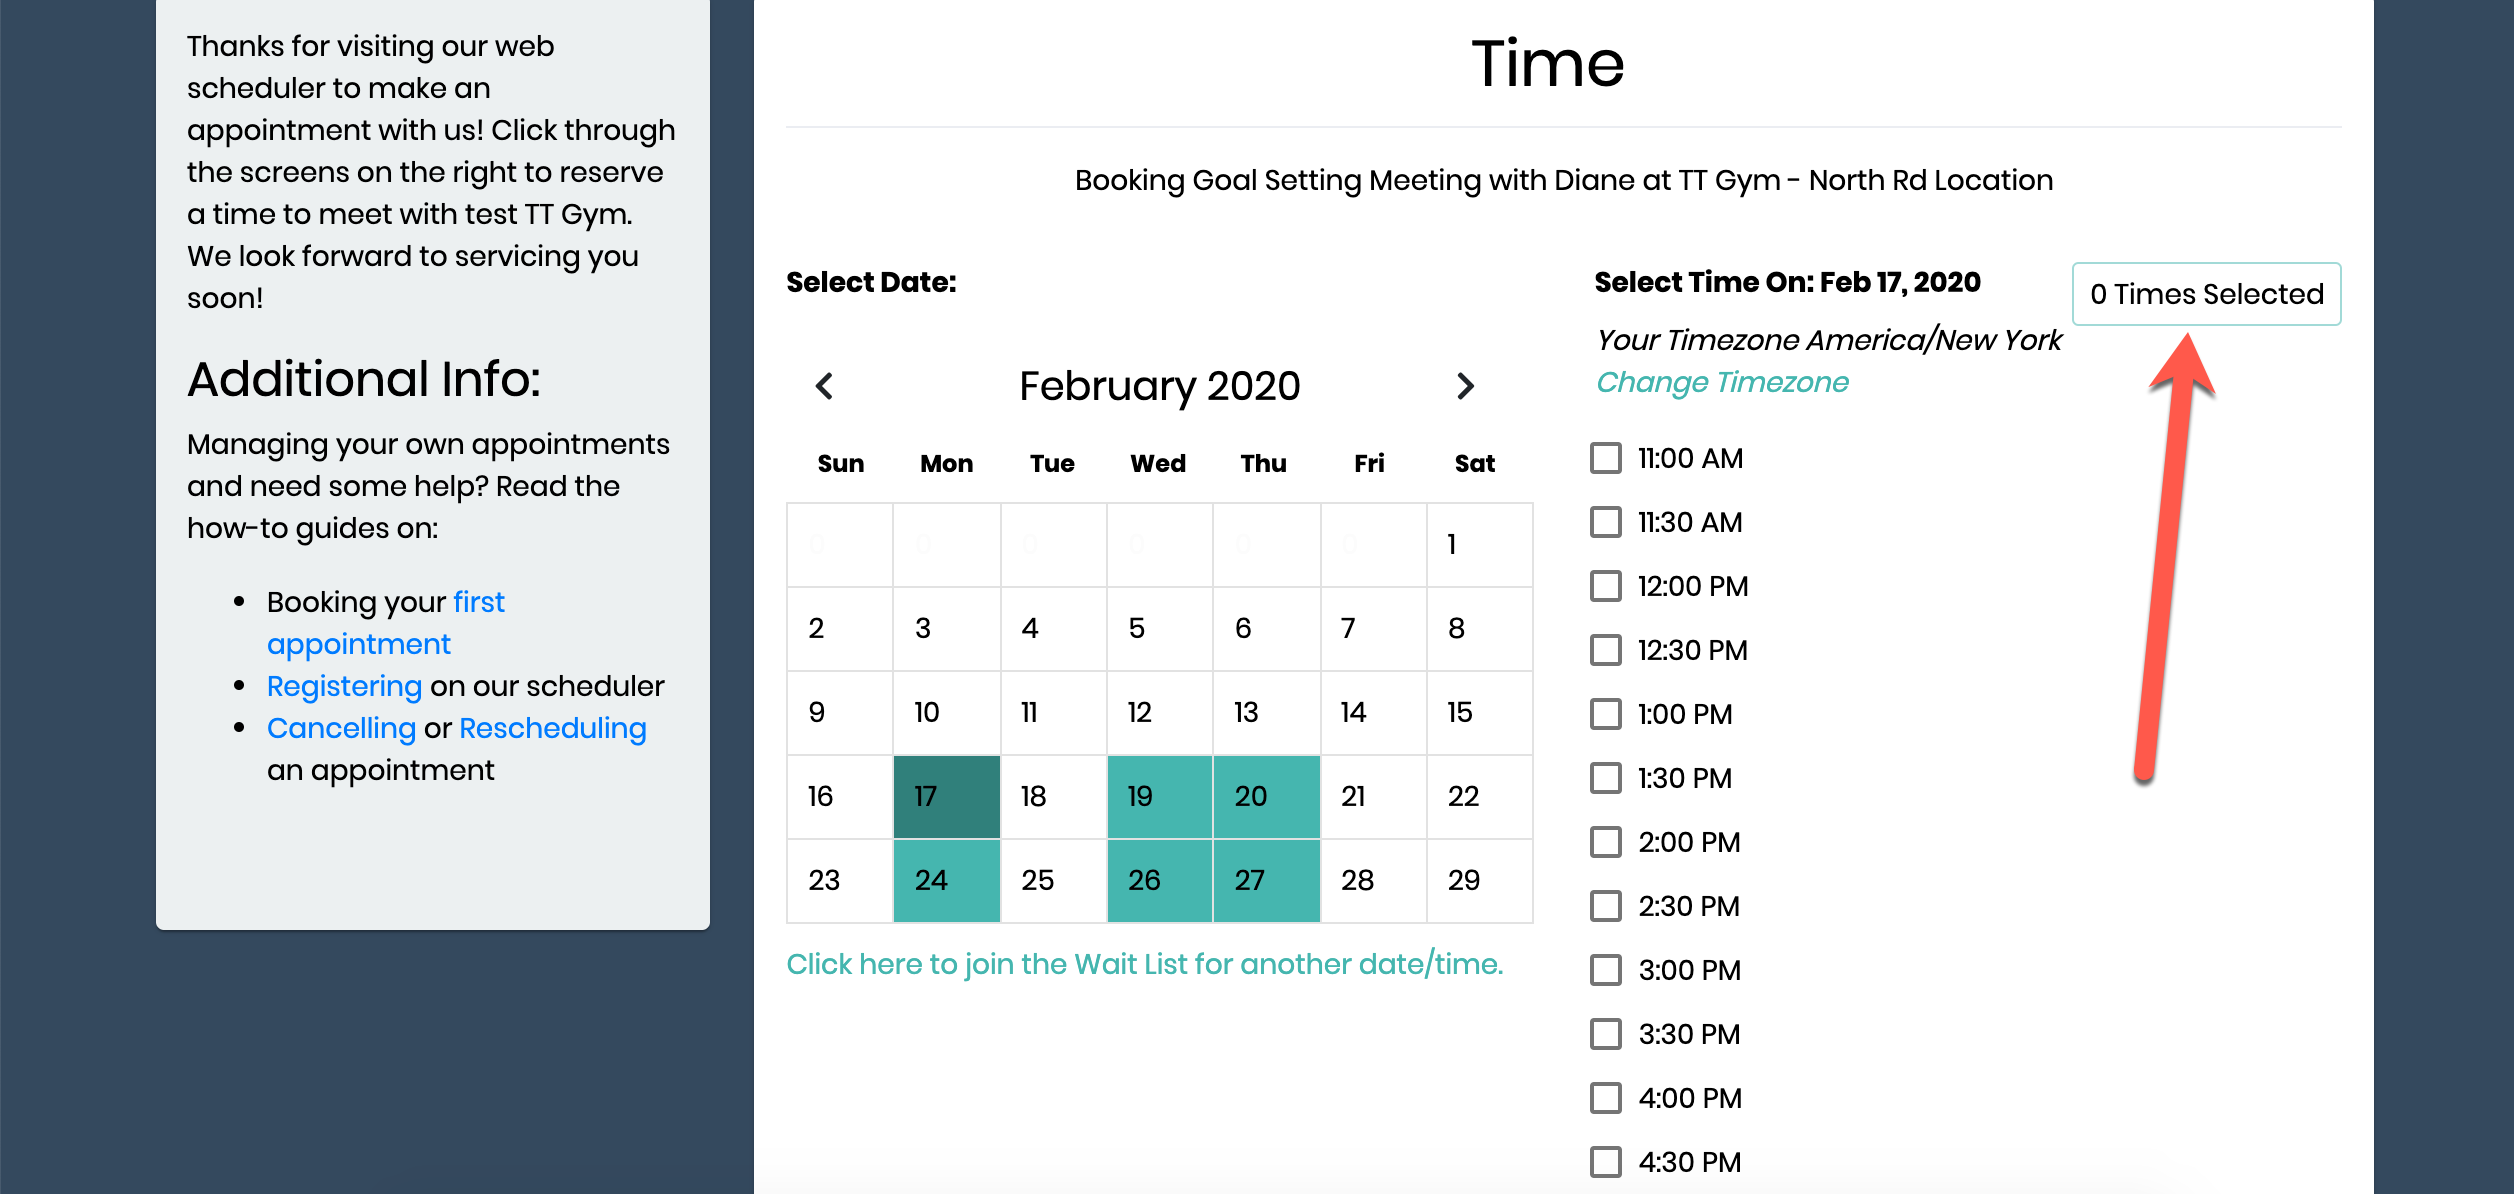
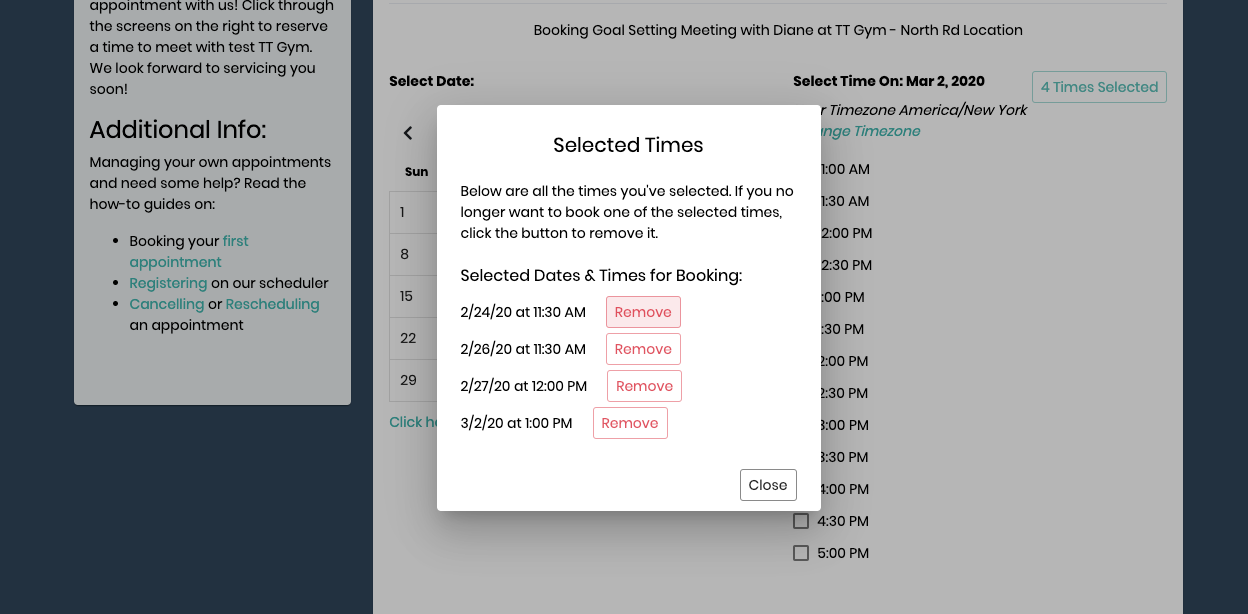
Let's say that I would like to schedule 4 appointments on different days at separate times over the next 2 weeks. I can select the day and time of the first appointment, then click on a different day and time, select the box, and so on for the 4 appointment times I would like. You will notice that the times selected will accrue in the Time Cart located on the top right corner. Once you are done selecting all the days and times, you can click on the Time Cart and it will show you the days and times that you selected. You can also remove dates and times on this window:
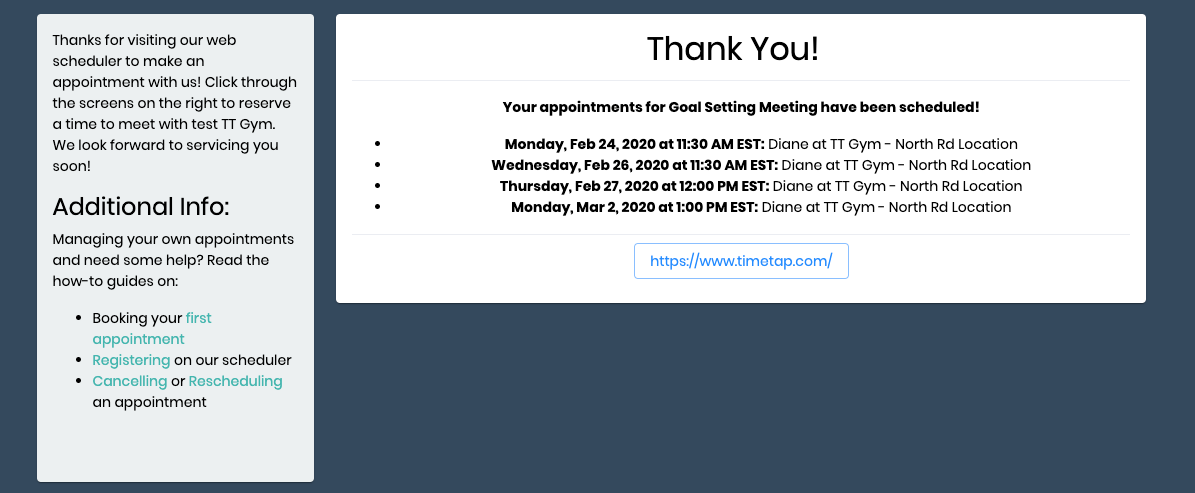
Once all your dates have been selected, click Next at the bottom of the page, enter your Information and save the appointments. Once saved, your confirmation page will show you all the appointments scheduled.
We will cover how clients can pay for their multiple appointments in a different page.