Putting your scheduler on your website
- Lucy Barber (Deactivated)
- Elvis Merino (Unlicensed)
- Jalesa Campbell (Deactivated)
If you want clients to be able to schedule appointments right on your website (instead of the mini website that TimeTap provides) you'll want to embed the scheduler on one of your web pages. TimeTap makes this easy to do with the prepacked embed code. Simply take this code and place it in the html editor of your website.
To find the embed code, go to Settings → Scheduler Rules & Logic:
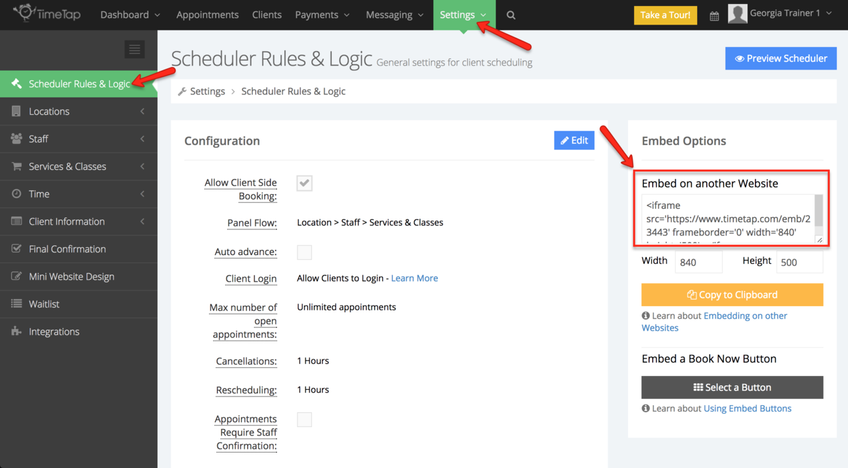
On this page, look at the right hand side to see the Embed code that you can place on your website. You can customize the width and height of the embed-able scheduler so that it fits the dimensions you want it to on your webpage.
After you've determine the width and height you want, press "Copy to Clipboard" and you are ready to head on over to the html editor of your website. If you're not sure where an html editor is located on your website, consult your content management systems' help docs to find it (or you can paste this code into an email and send it to your web editor ![]() ).
).
We have documentation on using the html editor in some common content management systems linked below:
- Embedding scheduler through a Squarespace site
- Embedding scheduler on Vistaprint
- Embedding scheduler on Weebly
- Embedding scheduler using Wix
Once you've got your scheduler on your site, it is time to start directing clients to your scheduler and watching the appointments roll in from website visitors!