| Anchor | ||||
|---|---|---|---|---|
|
The settings menu consists of a left hand side bar which breaks down configuring your schedule into the different components that go into your scheduling process:
- Scheduler Rules & Logic: where you can configure the welcome messages your clients see before viewing your appointment availability as well as grab embed codes
- Locations: where you can customize information around where your meetings take place
- Staff: where you can define who will be rendering the appointments your clients book as well as their schedule for appointments
- Services & Classes: which is what is relayed to your clients as the reason they're booking
- Time: where all the settings around how appointment time-slots are displayed are housed as well as adding staff availability for appointments
- Client Information: where you can set up the fields you want to capture before an appointment is confirmed and the confirmation message after the appointment is booked
- Mini Website Design: where you can customize the messaging and branding of the scheduling page your clients visit
- Emails & Messaging: where you can manage your email & messaging settings to include sending clients email & text message reminders
In this documentation we will go through a brief synopsis of what's housed in each area. You can click through the synopses given to go to the specific documentation page for each component and learn more about how to use them.
What you can do:
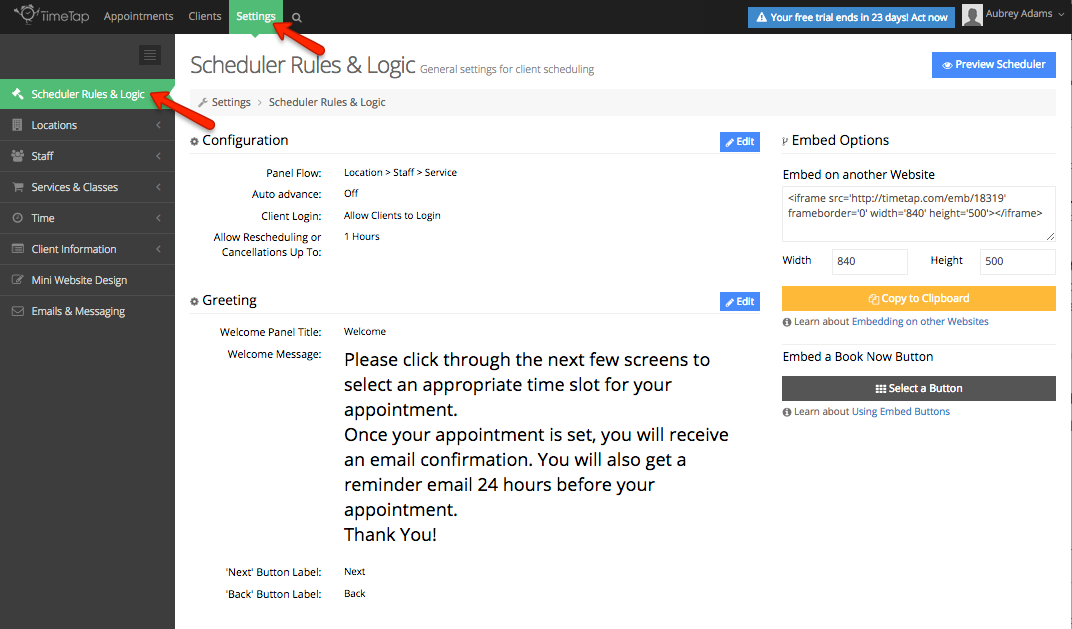
The first item underneath the Settings menu is the Scheduler Rules & Logic page. Here you'll be able to customize the initial message clients see when they visit your scheduler as well as selecting options to either embed the scheduler on your site or link to your mini website with a "Book Now" button.
In the future, as you add locations or staff to your account, you will also be able to customize your scheduler's flow and choose to have clients be "auto advanced" through the scheduler if there is only one option on the page they're viewing.
Where you'll find it:
Look under Settings → Scheduler Rules & Logic:
What you can do:
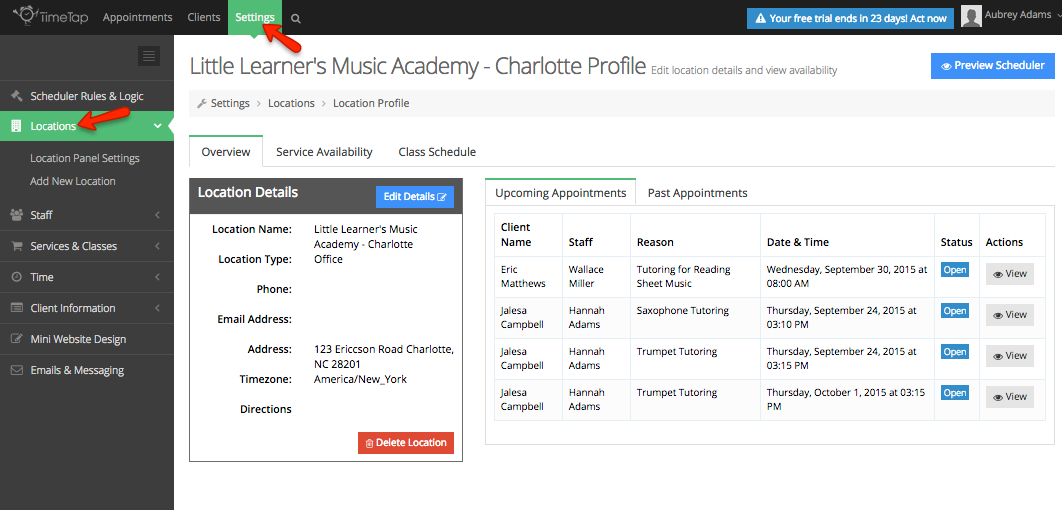
Locations are where your appointments are set to take place. It can be a physical location (like your office or clinic or whatever you refer to it as) or it could be a virtual location (like the phone, Skype, FaceTime, etc.). It could also be that you go to clients' homes to render services and thus the location is picked by the client. Whatever it means to you, you'll set up your locations and add your availability at the underneath Settings → Location.
From here, you'll be able to customize the details around your Location's Profile as well as view upcoming and past appointments at your specific location. You can also customize and configure your availability from your Location Profile's Availability tab. In the future, this will become the portal for access to all As an additional feature, if you are a TimeTap Plus user you can also access all of your locations and the place where you can add new locations where you're taking appointments.
Where you'll find it:
Look under Settings → Locations:
What you can do:
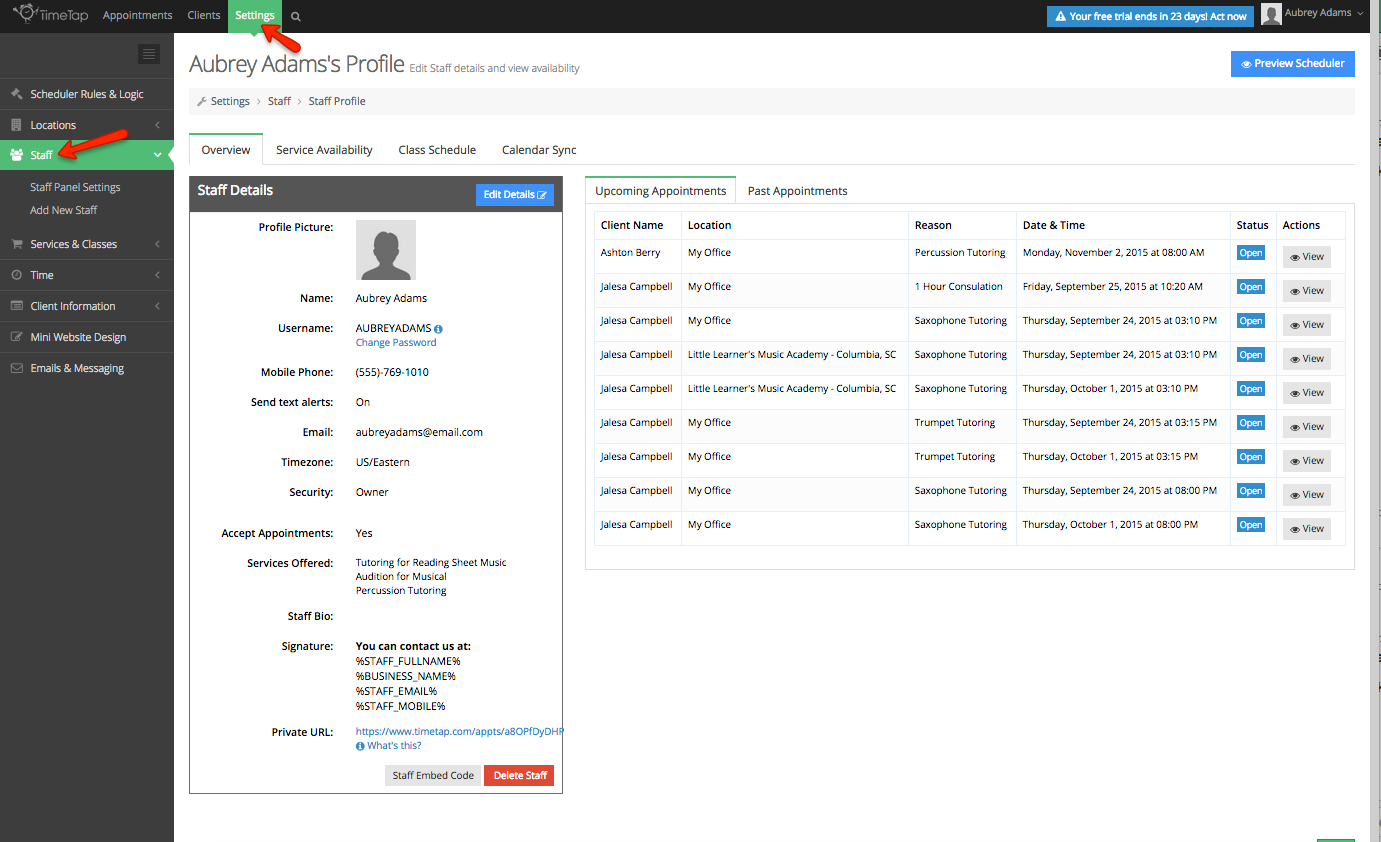
The staff persons listed on your account are relayed to your clients as the person who will be rendering the service they booked. You can make this a generically named person (like Office Worker 1) or it can be a specific person who your clients choose because they've booked with him/her in the past and liked their experience.
You can customize each staff person's profile with their contact information which will show up in the staff signature of the emails for any appointments booked with him/her. You can also configure the staff person's availability for appointments from within this view.
You can also access the additional staff you add to your account here as well, and set up customizations for the client booking process for when they're selecting staff.
Where you'll find it:
Look under Settings → Staff:
What you can do:
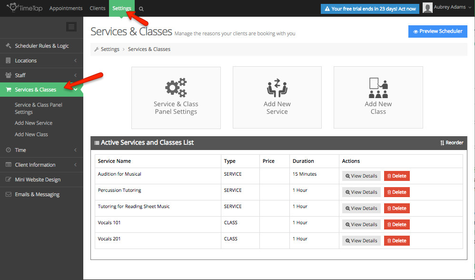
Adding different types of services & classes to your account gives your clients more options to choose from when they are booking an appointment with you. You may not have multiple services & classes that you offer, and that's just fine.
Should you have more services and classes that you offer, however, the Services & Classes page is where you'll be able to add to and customize the reasons for appointments that your clients have to choose from. You can tweak the Service & Class Panel display settings, add a new service, add a new class, reorder the default way they're sorted, remove them, and customize settings on their service profiles and class profiles.
You also have the option to add a private service or private class to help clients learn a new language, learn a new subject as an independent study, or even master how to play the piano. Stay tuned for all that we have coming up for you to be able to do with your appointment offering types.
Where you'll find it:
Look under Settings → Services & Classes:
What you can do:
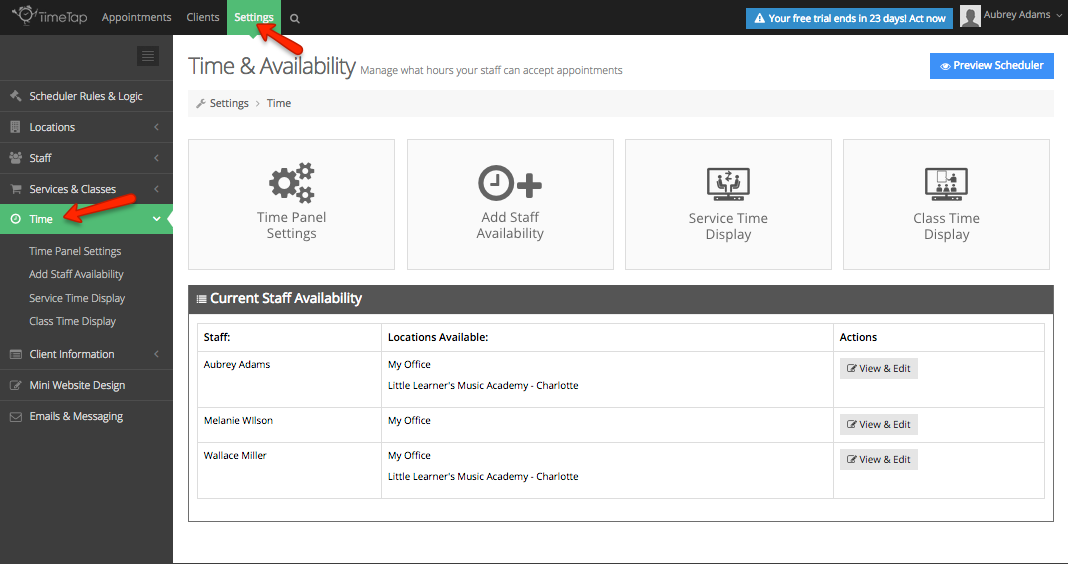
One of the most important things on your TimeTap account is (go figure) your Time settings. Your time settings cover everything from what availability you have for appointments to how close to the start time of the appointment a client can book with you.
In the Time & Availability page, you'll be able to configure your Time Panel settings (including latest & advanced appointments, timezones, and appointment start times) as well as add in availability for your staff to take appointments.
When you have more than one staff person on your account, this is a good place to come to get a quick overview of all of their availability from the Current Staff Availability table. You can easily view and edit staff availability by clicking the "View & Edit" button to remove or even add availability.
Where you'll find it:
Look under Settings → Time:
What you can do:
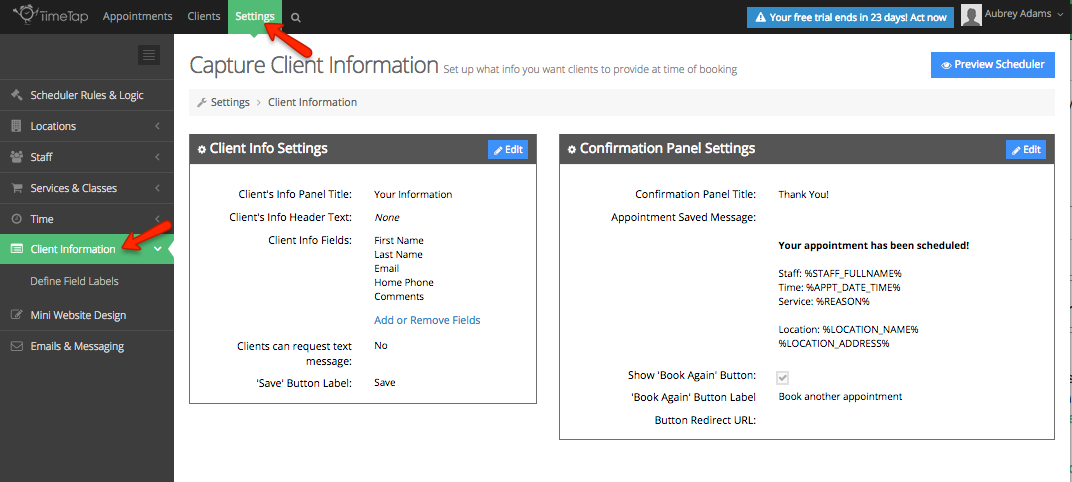
Housed underneath Client Information are the settings for the information fields you want to capture from clients as they are booking with you as well as the confirmation messages they receive after they've saved their appointment.
You can go through and define the field names and labels that your clients see as they're booking their appointments and use some custom tags to really refine the appointment scheduled message they read immediately after booking.
As we add features to the application, you'll also be able to set up questionnaires for clients to fill in before coming in for their appointment as well as custom messages for the client to see when payment is due to secure their appointment.
Where you'll find it:
Look under Settings → Client Information:
What you can do:
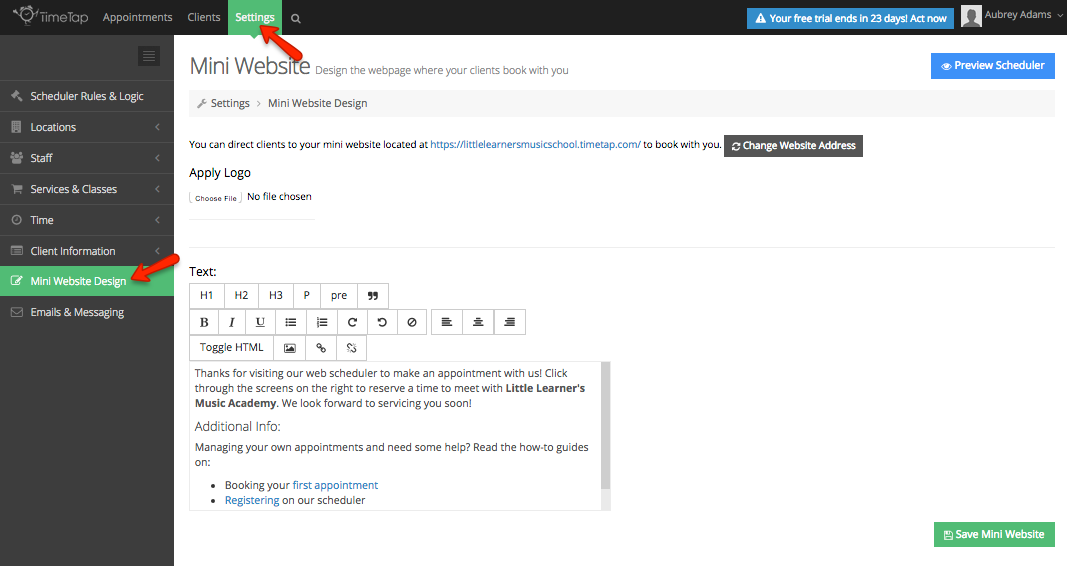
You can use the Mini Website Design page currently to find a quick access link to your mini webpage as well as upload a logo and customize the text on the left hand side of your mini website. For greater customization, you can change your mini website url.
We will shortly release the functionality to customize the background colors on the mini website so stay tuned for that!
Where you'll find it:
Look under Settings → Mini Website Design:
What you can do:
The Emails & Messaging page provides a place where you can edit your email and text messaging reminder settings. In addition to these features, if you are a TimeTap Plus user, you will also be able to customize your client and staff email templates to include using our email tags for dynamically filling in your emails with information. There are default email templates for clients and staff members for the message that you would like to send whether it's an email for a newly created appointment, a reminder email, or even an email letting clients know that a change has been made their appointment. Just as for clients, there are default email templates for staff created for efficient notifications.
In addition to our email templates, if you are a TimeTap Plus user you can also have text message alerts sent directly to your clients' cell phones and staff members' cell phones. This is especially handy for quick and easy reminders for an upcoming appointment.
Where you'll find it:
Look under Settings → Emails & Messaging:
