Scheduler Rules & Logic
Underneath Settings → Scheduler Rules & Logic, you'll find several customization features which will make your clients feel like the booking process is really catered for your business.
In this specific piece of documentation, we'll take a quick tour of the Scheduler Rules & Logic page found at the top of your left hand menu when under the Settings menu from the top navigation. Access the links below for further topics covered under this area of our documentation site:
- Working with your Scheduler's Configuration settings
- Customizing your Greeting Message & Client Login Settings
- Embedding the Scheduler on a Website
- Selecting a Book Now button
- Previewing your Scheduler
- Booking by Invitation Only
The links above will direct you to pages which describe how to use each of the features found on this page. Now, onto the tour.
A Tour of the Scheduler Rules & Logic page
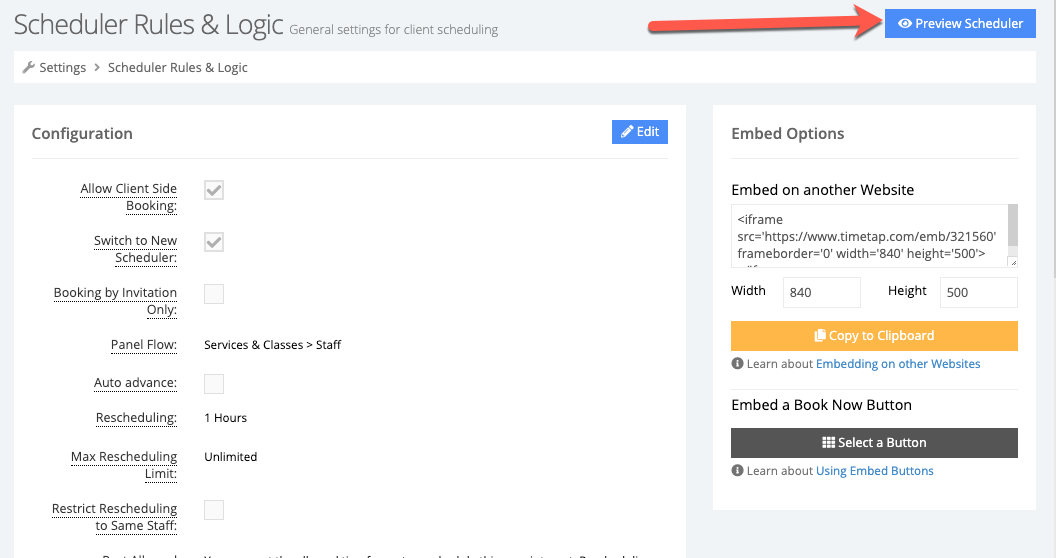
The Scheduler Rules & Logic page is the top item on the left hand menu when you select "Settings" from the top navigation bar:
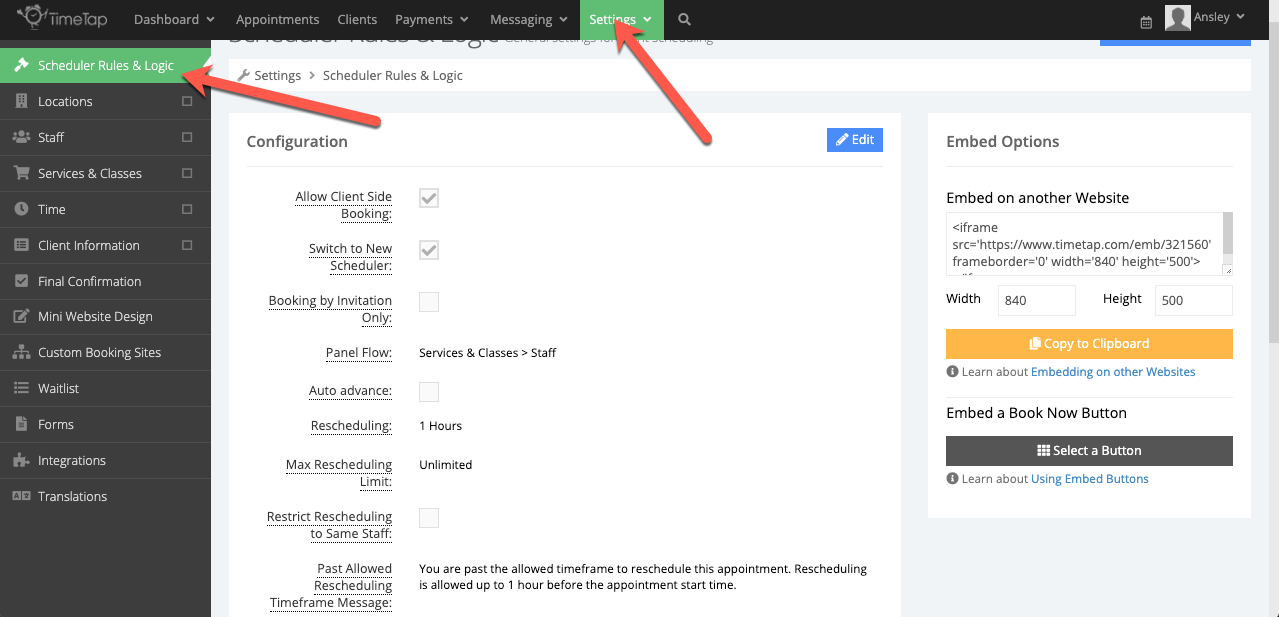
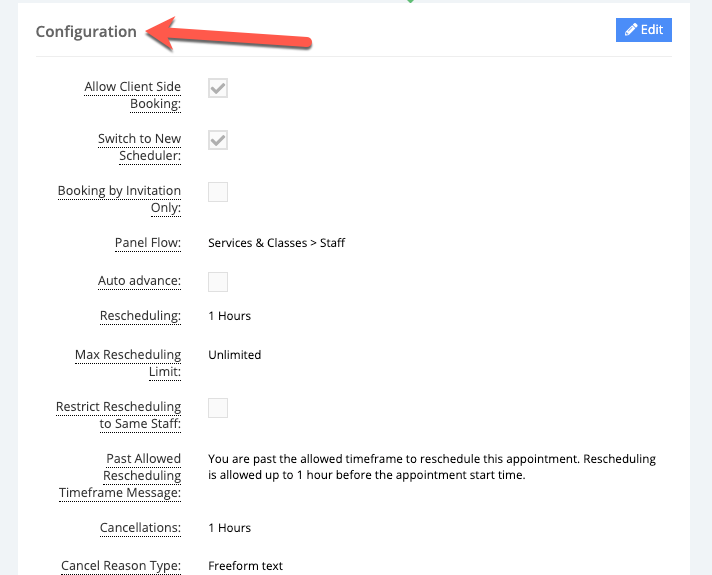
On the left side of the screen you will have different options to configure your scheduler:
- Allow client side booking: Check this box if you want to turn off client side booking
- Switch to New Scheduler: We have recently released a new version of our scheduler. Check this box if you'd like to switch your account over.
- Panel flow: This sets the order of the screens on the scheduler where clients go to book appointments
- Auto advance: Check this box to allow the scheduler make selection for clients on panels with just 1 option and automatically advances clients in the flow
- Rescheduling: Once a client has an appointment scheduled, this defines how close to the appointment's start time the client can reschedule
- Cancellations: Once a client has an appointment scheduled, this defines how close to the appointment's start time the client can cancel it
- Cancel Reason Optional: Check this box if you want to allow clients to cancel appointments without having to provide a reason for cancellation
- Appointments Require Staff Confirmation: This will put clients appointments in a pending status and await your confirmation before their appointment is officially put on your schedule
- Zip Code Filter: This makes it so that if you have a large number of staff or locations, clients can enter in filter criteria to find the one closest or most relevant for what their looking for
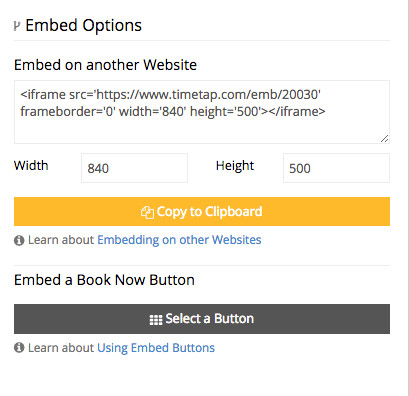
On the right hand side of the page, you'll see you have your Embed Options. You have the choice to embed the whole scheduler on a separate website or you can grab an embed button to link clients to your mini website. You can place that embed button on your website or you can insert it in the signature for the business emails you send out:
On the top right of this page (and every page in the Settings menu) you'll see a blue "Preview Scheduler" button. This will open up a new tab on your browser so that you can quickly click through and look at any changes you may have made while in the Settings menu. If anything looks out of place and you're not sure what went wrong, you can always contact TimeTap support for help with how to fix it: