Class Profile
- Lucy Barber (Deactivated)
- Matt Bryant (Unlicensed)
- Elvis Merino (Unlicensed)
- Jalesa Campbell (Deactivated)
Your class profile hosts all of the main details around your class as well as the full schedule for the class. From your class profile, you'll be able to edit your class details, view upcoming appointments made for your class sessions, and manage the schedule that your class meets on.
In this documentation, we are going to go through how to:
We have a another page dedicated to managing your class schedule as well as adding in new class schedules.
If after reading through this documentation you still have questions on how to manage your class profile or schedule, please feel free to reach out to our support team. We'd be happy to get you detailed answers to whatever you're trying to accomplish with the class feature.
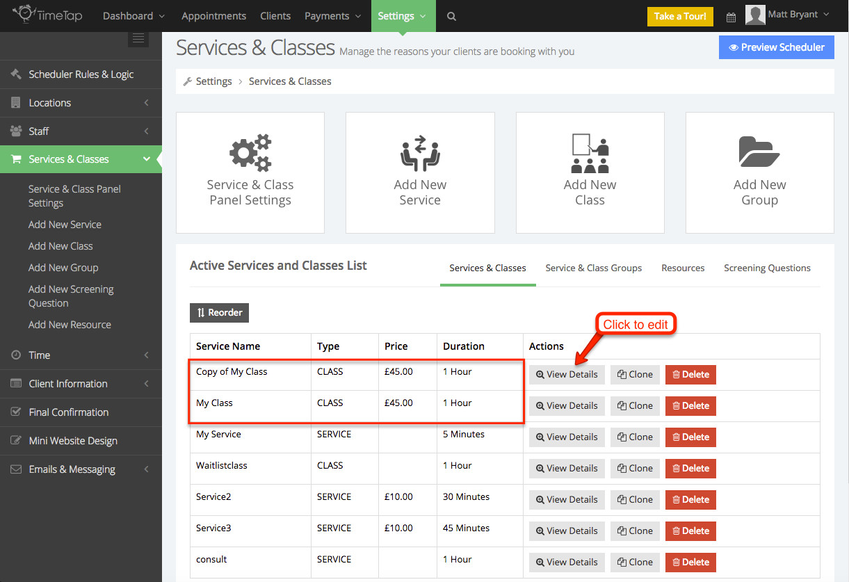
To get to the profile view for your Class, you'll want to first navigate to your Settings → Services & Classes screen:
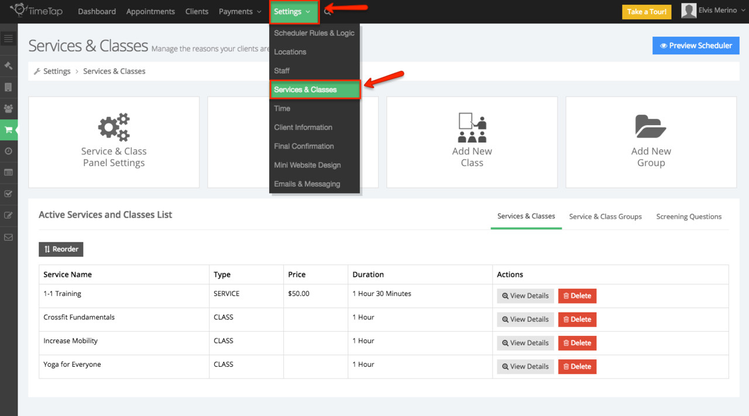
Find the class that you wish to view the profile for in your "Active Services and Classes List" and click the "View Details" button in the "Actions" column to the right of its name:

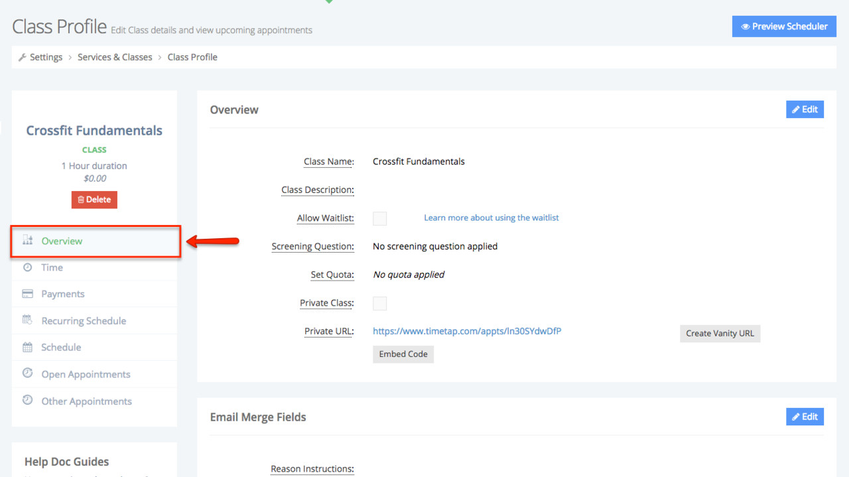
This will take you to the Class Profile screen for that class. From here you will see the details about the class:
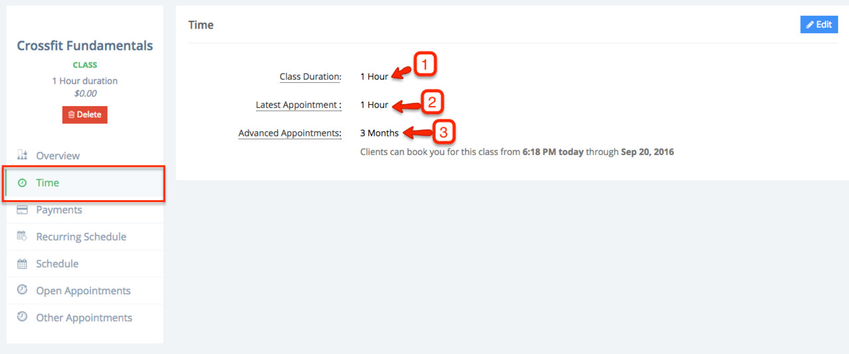
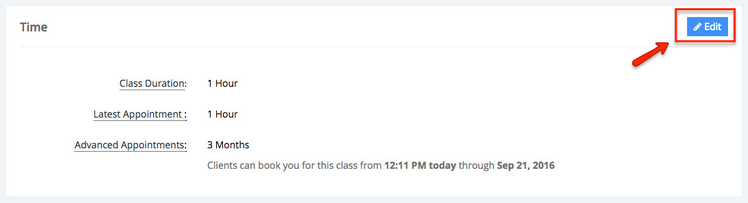
Selecting the Time tab will allow you to see the duration of the class (1) as well as how close to class session's start time a client can book (2). You will also see how far in advance your clients can click to see your availability for a session (3) you can modify this settings by clicking the Edit button:
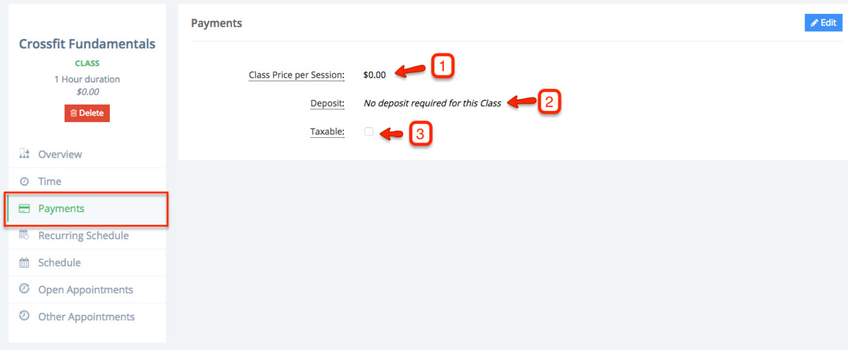
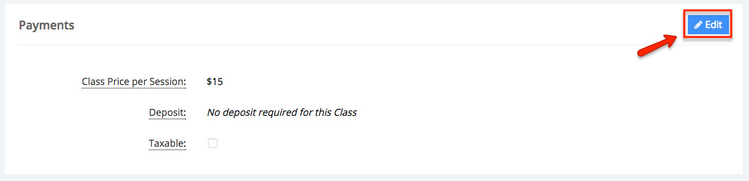
The Payment tab gives you an overview of the payment settings for this class. Class Price per Session (1) indicates how much an appointment for a session of this class will cost a client. If clients book multiple sessions, then this price will be applied per session that they book. Deposit (2) tells you the amount of the deposit required at the time a session is booked. If you collect tax at the time payment is collected for a class make sure to check the box Taxable (3). You can enter your business's tax rate under Payment > Payment Settings.
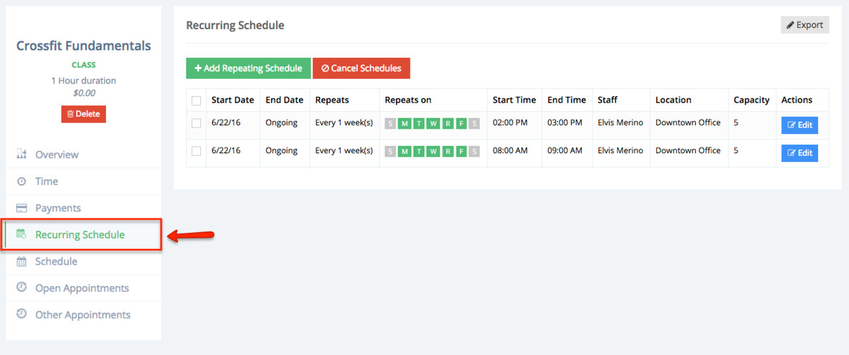
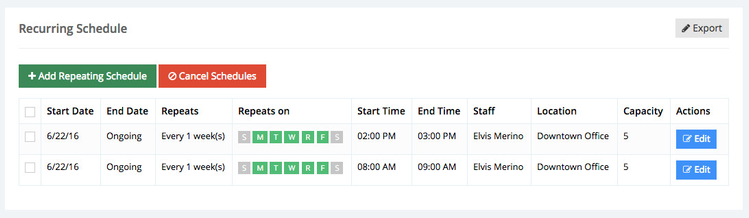
If you would like to see any existing repeating schedules for when the class will meet click Recurring Schedule:
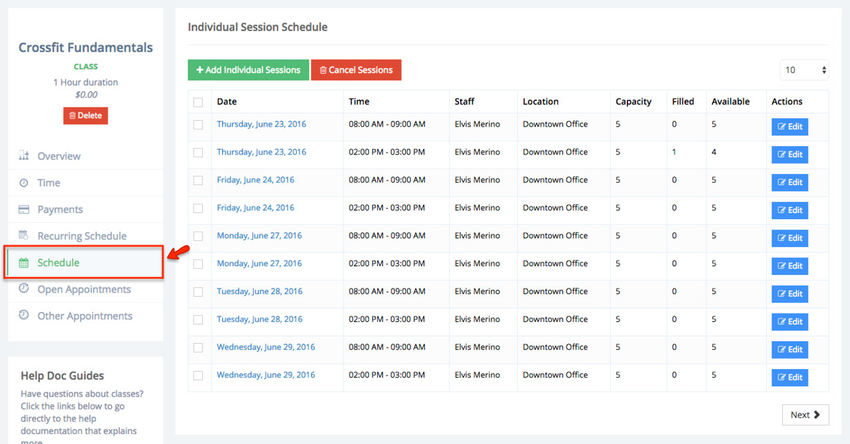
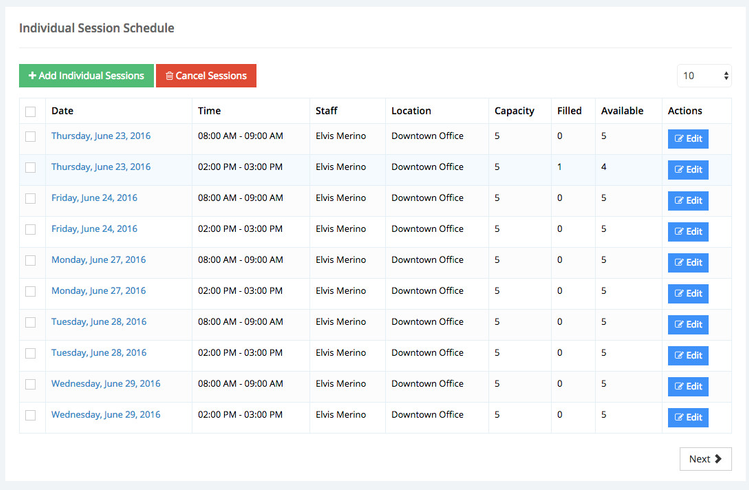
To see individual session dates when when class will meet on click Schedule. It's within the class schedule tab that you'll see all the upcoming scheduled dates and times for the class sessions that are on any of your staff members' schedules.
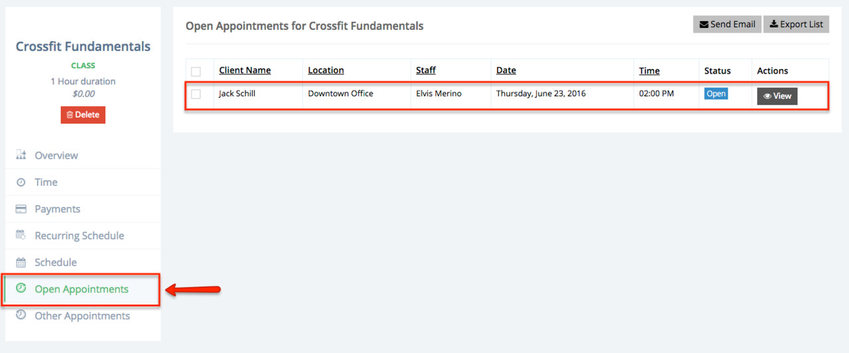
To see any upcoming appointments for the class sessions click Open Appointments, meaning the appointments your clients have booked go to Open Appointments:
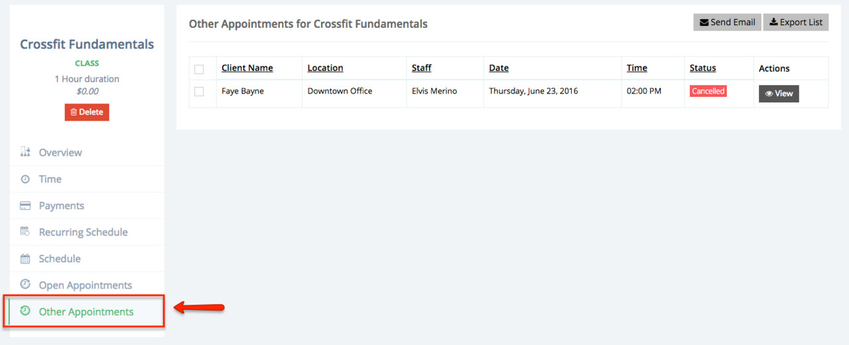
If your client decides to cancel a class session, or you have marked an appointment as No Show these appointment will appear in the Other Appointments tab, as well as appointments set to Complete:
Now that you have gotten an overview of the different tabs with your class profile, we can focus on how to make modifications.
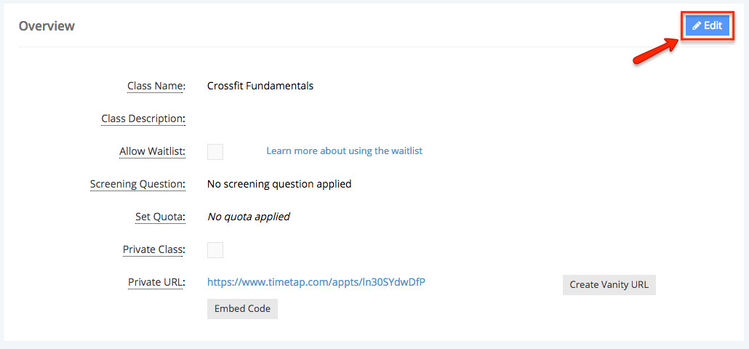
First we will take a look at the Overview Tab, these are the option you can modify:
- Class Name: This is what will be displayed to clients as the reason for why they are booking an appointment. It is also what any staff member will select as the reason for the appointment when they are booking from TimeTap's Back Office.
- Class Description: This displays underneath the name of the class when a client is booking an appointment with you. This is generally used to either describe what will happen during the class or any prerequisites for booking.
- Allow Waitlist BUSINESS PLANS ONLY: The waitlist feature allows clients sign up for the waitlist for a class session or services once all seats in the class session are taken or your availability for the service is completely filled.
- Screening Questions BUSINESS PLANS ONLY: Screening Questions will allow you to make sure that clients meet certain criteria before they are allowed to see the times that you are available for appointments.
- Set Quota BUSINESS PLANS ONLY: Puts a cap on the number of appointments that can be booked for the class in a given time frame. The time frame options are: in a lifetime, per year, per month, per week, and per day.
- Private Class: Checking this box, this service will only be shown at the service private URL and in the back office when staff are setting up appointments for clients.
- Private URL: If you only want to show clients options to book for this class, send them to this URL. This URL can also be embedded in your website by clicking the button Embed Code.
- Create Vanity URL BUSINESS PLANS ONLY: Vanity URLs can be created to substitute your private URLs for Locations, Staff, Services, Classes, Service Groups, and Location Groups. This makes it so you have a friendly link to send your clients instead of the alphanumeric combination that makes up the private URL.
- Class Embed Code: This is very similar to your general scheduler's embed code, except if you use this embed code you will be embedding a scheduler that only allows booking into this specific class. This is a great option if you have a website with separate pages for each of your classes and/or services and want to have specific schedulers for each of them.
In order to make modifications to these settings you must click Edit first and remember to click Save once you're done making the necessary adjustments:
The Time Tab allows you to modify the following:
- Class Duration: This is the default duration that is applied for every instance that the class meets. We refer to each meeting date and time of a class as a class "session". You can override this when adding an individual session to make the individual session last for a longer or shorter period of time than the default session duration.
- Latest Appointment: This is how close to the session's start time a client can book.
- Advanced Appointments: This is how far out in the calendar a client can click to see your availability for a session.
In order to make modification to these settings you must click Edit first and remember to click Save once you're done making the necessary adjustments.
Please note: if you changed the Session Duration, this will not automatically update any of your existing class schedules. You will need to go in and re-save your class schedules with the updated session duration.
The Payment tab allows you to modify the following:
- Price per Session: This is how much the class costs each time the client registers for a date. So, let's say that you have a class with a price per session of $15 and it is set to meet every Monday. A client books an appointment for the next three Mondays. Thus, his/her total cost is 3 sessions x $15/session = $45.00.
- Deposit: If you don't require the full price of the class upon booking, but only want to collect a deposit amount, enter the amount in this section. Keep in mind that you must have a price entered in order to put in a deposit.
- Taxable: If you collect tax when someone books an appointment, check this box. You can enter your business's tax rate under Payments > Payment Settings.
In order to make modification to these settings you must click Edit first and remember to click Save once you're done making the necessary adjustments.
Cloning a class creates a copy of an existing class, and can save you some set up time if you offer similar classes. You can clone a class, then make any necessary adjustments to the clone, like it's name or duration.
To clone a class, open the Active Services and Classes List under Settings → Services & Classes. Once on this screen, you'll see your active services and classes listed, with the Clone button under the Actions heading between View Details and Delete:
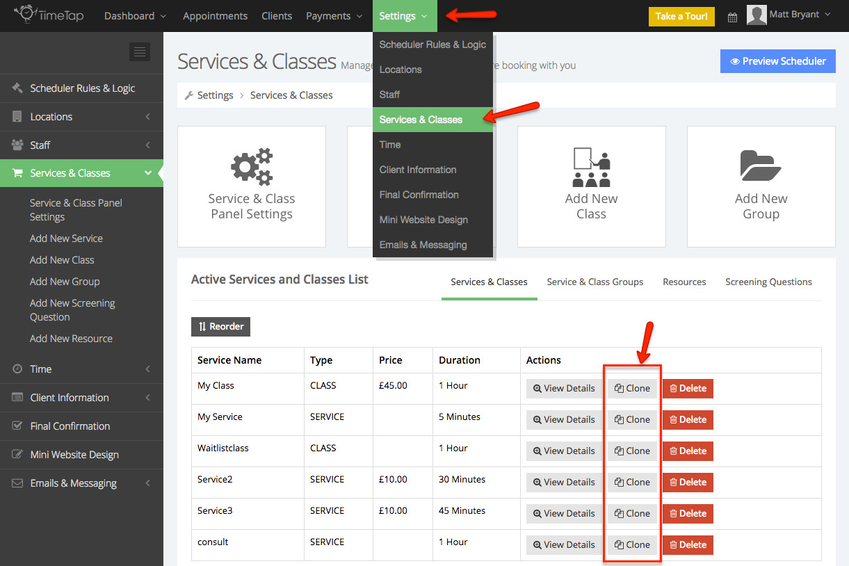
Once you click Clone to clone a class, you'll see it appear above the class you cloned with the name "Copy of <your class name>" with the same values for type, price, and duration. You can now click View Details to edit the profile of your clone class:
The remaining tabs in your class profile screen are your Recurring Schedule, Schedule, Open Appointments, and Other Appointments.
The Recurring Schedule tab will show existing repeating schedules. From this tab you can edit, add, or delete a recurring schedule.
To view the individual class session schedule go to the Schedule tab. Here you will be able to see every individual class session. Once in this tab you are able to edit, add or delete individual sessions:
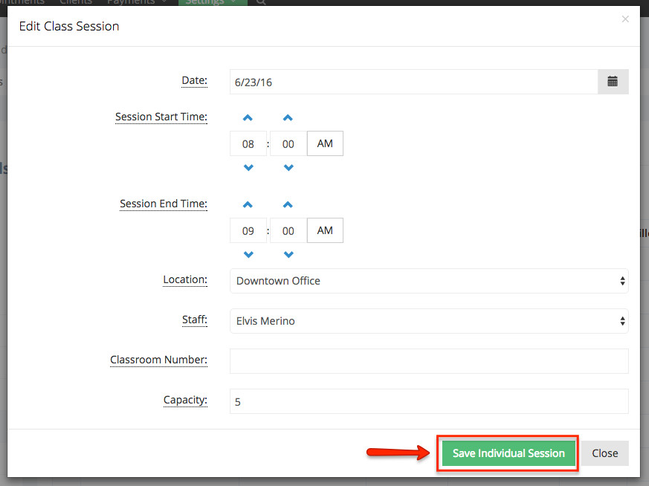
While still in the Schedule tab you can modify individual sessions by clicking Edit next to the session you would like to modify. You are able to change the date in which the session takes place, Start and End time, Location, Staff. Class Number, and the sessions capacity. Make sure to click Save Individual Session after you've modify the class session.
If you would like to see the Open appointments for class ( clients who have booked appointments), click Open Appointments. From here you can click View next to the appointment to view appointment details:

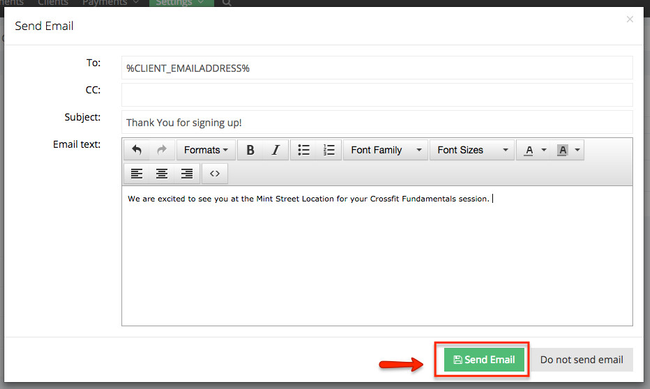
While in the Open Appointments tab you have the option to send an email to your client by checking the box to the right of their name and clicking Send Email:

This will bring up your Bulk email template in a new window which gives you the chance to modify it before you send it to your clients:
Finally while still in the Schedule tab you can export a list of all Open Appointments by clicking Export List:

This will open a new window where you are able to add the information you would like to see in the list. Once you have the information you want, click export list and a .xls document will begin downloading to your computer:

Finally, the Other Appointments tab shows you all Cancelled, No Show, an Completed. From this tab you are able to View appointment details (1), send an email to the client (2), and Export the appointments in .xls format (3):

We've got a full page of documentation available here that goes in depth about how to do any of the above items. If you have any questions about managing your class schedule after reading through this documentation or the documentation linked above, please contact our support team and we'd be happy to answer them for you.