Completing Appointments
- Lucy Barber (Deactivated)
- Elvis Merino (Unlicensed)
Appointments can be marked as Completed from any other status. Once an appointment is listed as "Completed" it can then only be Re-Opened, Cancelled, or marked as No Show. It cannot be Checked In from Completed status.
If you mark appointments as Completed, you have the option to send out an email to the Client and/or the Staff about the completed appointment. It will also help you stay organized in the TimeTap back office as you'll be able to neatly see the appointments that you have successfully completed in a given time period.
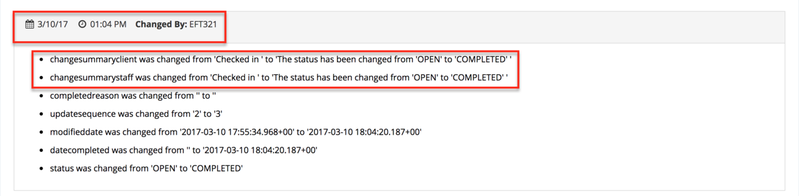
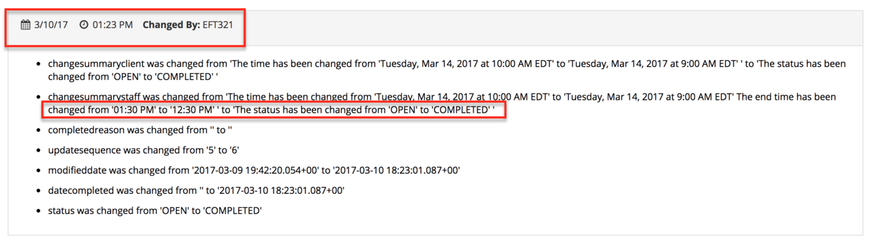
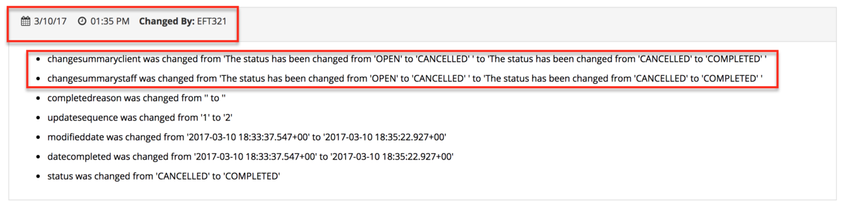
A time stamp of the status change will be listed on the Audit Trail for the appointment that you marked as Completed. This is just another way to stay organized or backtrack as to when you took a certain action.
In this documentation, we will go through how to:
- Check Out "Checked In" appointments so they are Completed
- Complete appointments in Open status
- Change Cancel status to Completed
- Change No Show status to Completed
- Finding & Viewing Completed Appointments
We will also discuss what can be done once appointments are listed as Completed and how you can make these changes in both List views or the Appointment Detail view.
When a client comes in for his/her appointment, you have the option to mark them as Checked In. If you do this, then you can reciprocally check the client out of his/her appointment once it is finished and mark the appointment as Completed. You can do this either through the appointment detail view or through the Checked In list view.
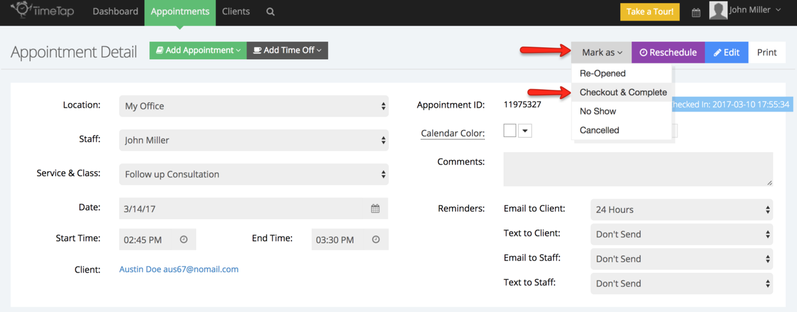
To mark the Checked In appointment as Completed from the Appointment Detail view, select the "Mark As" dropdown option and click "Checkout & Complete":
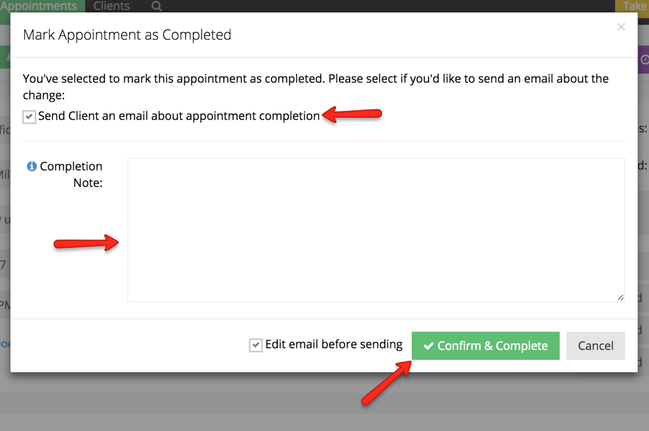
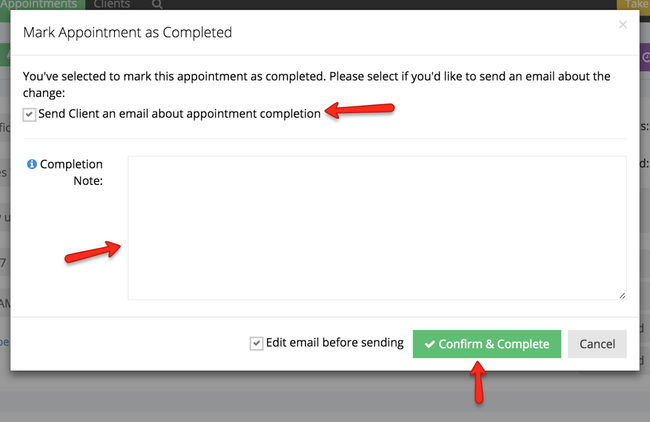
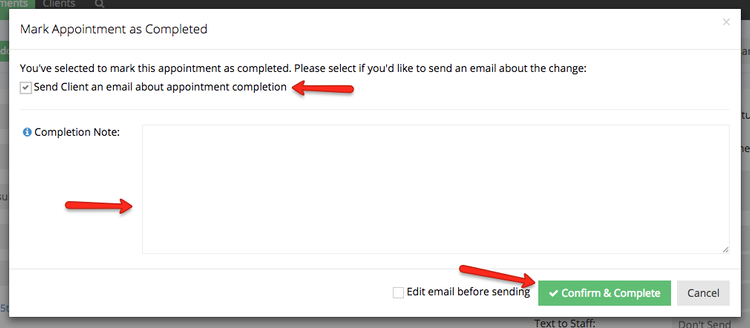
At this point, you will be prompted with the option to send an appointment completed email to the client. You can select who you want to notify about the completed appointment and then add a Completion Note that will be inserted into the body of the email:
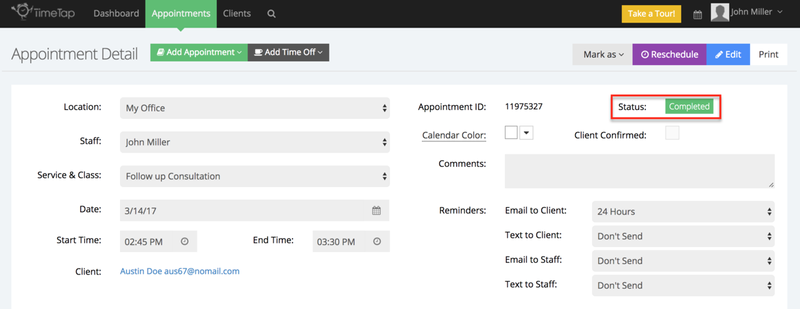
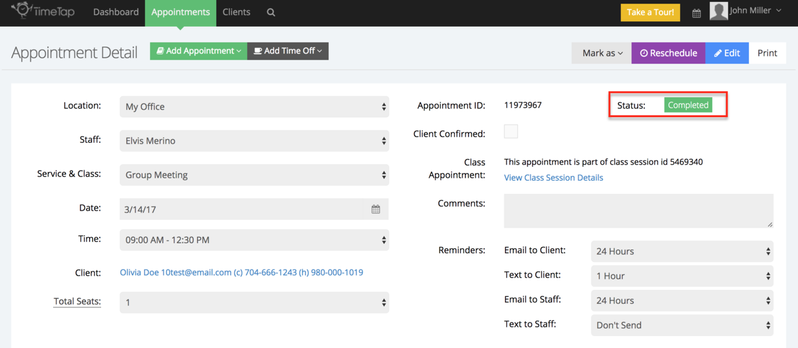
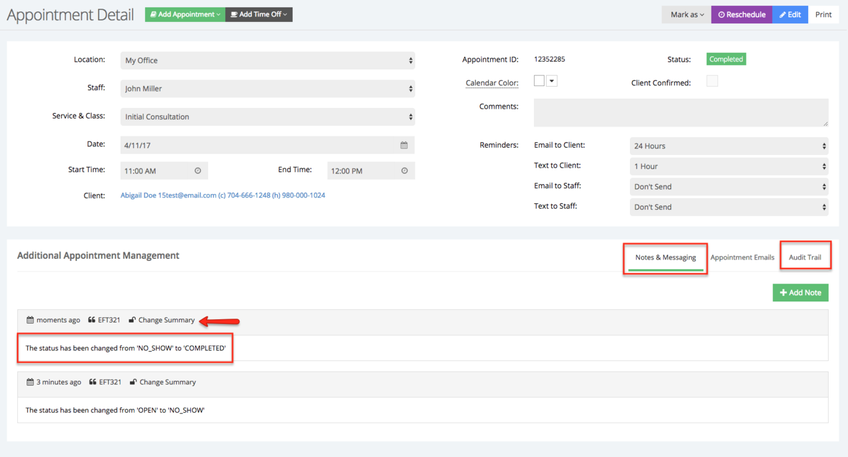
After you press Confirm & Complete, the appointment detail record will update and show the appointment status as "Completed":
You will also see a time stamp of the status change on the Audit Trail:
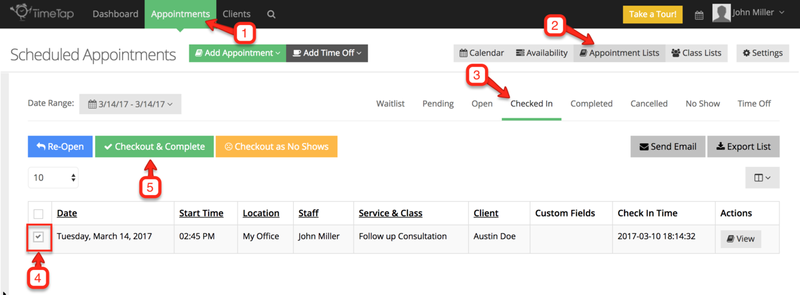
Checked In appointments can also be marked as Completed from the Checked In appointments list. To do this, navigate to Appointments → Appointment Lists → Checked In and select the appointments from the list that you want to mark as Completed. Then hit the "Check Out & Complete" button:
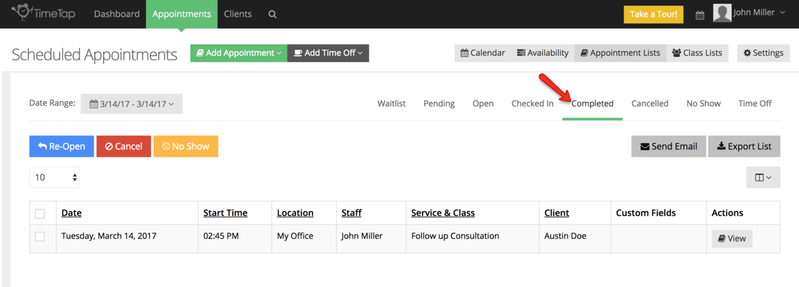
After confirming that you do indeed want to Check Out & Complete the selected Checked In appointments, the appointments you marked as Completed will display in the Completed Appointments list:
You may not be using the "Check In" sub status to manage your appointments. That's A-Okay. You can mark appointments as Completed without having to check them in first. Open Appointments can be marked as completed from either the Appointment Detail or Open List views.
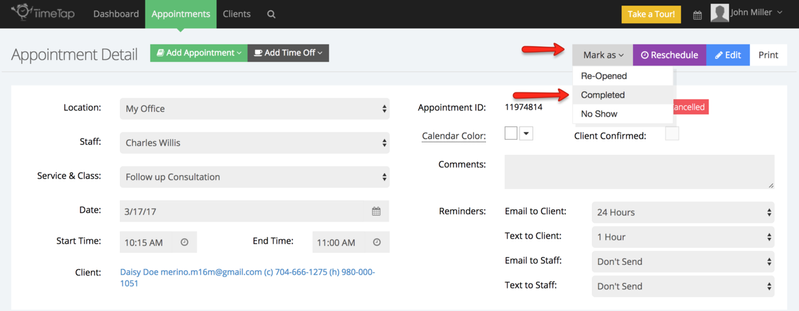
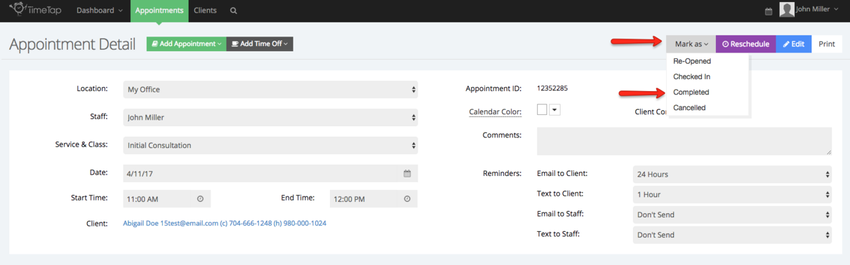
To mark the Open Appointment as completed from the Appointment Detail view, click the Mark As dropdown and select "Complete":

At this point, you will be prompted with the option to send an appointment completed email to the client and to the staff. You can select who you want to notify about the Completed appointment and then add a Completion Note that will be inserted into the body of the email:

After you press Confirm & Complete, the appointment detail record will update and show the appointment status as "Completed":
You will also see a time stamp of the status change on the Audit Trail:
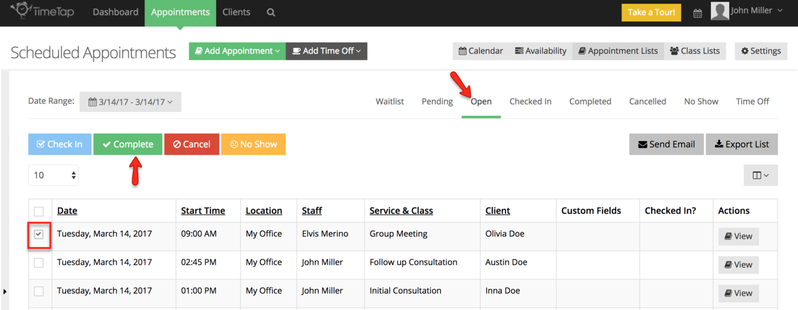
Open appointments can also be marked as Completed from the Open appointments list. To do this, navigate to Appointments →Appointment Lists → Open and select the appointments from the list that you want to mark as Completed. Then hit the "Complete" button:
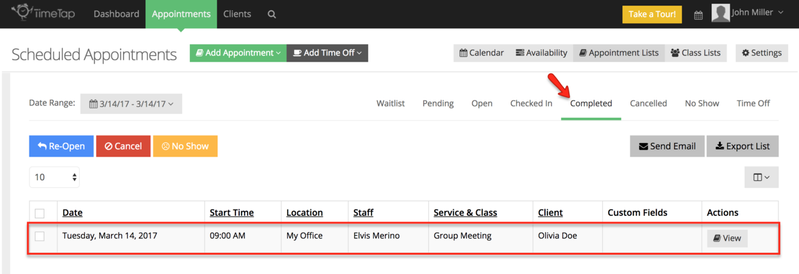
After confirming that you do indeed want to Check Out & Complete the selected Checked In appointments, the appointments you marked as Completed will display in the Completed Appointments list:
We're humans, here, and we make mistakes pretty regularly. One of those mistakes may just be categorizing an appointment as cancelled when it should have been marked as completed. If you do this, don't sweat it too much as it's easy to move a Cancelled appointment to Completed status.
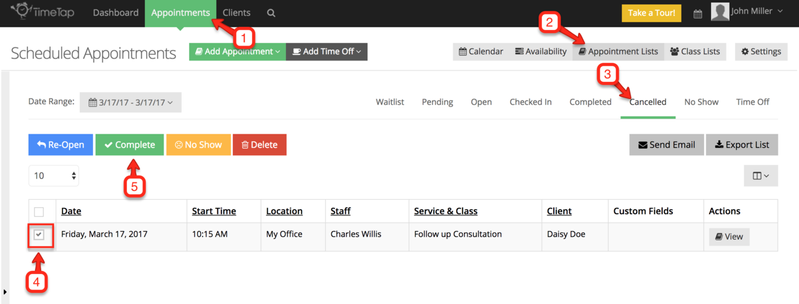
You can do this either from the Appointment Detail screen for a cancelled appointment or from the Cancelled Appointments list view. To move a Cancelled Appointment to Completed status from the Appointment Detail page, go to the appointment record and from the Mark As drop down select Completed:
At this point, you will be prompted with the option to send an appointment completed email to the client and to the staff. You can select who you want to notify about the Completed appointment and then add a Completion Note that will be inserted into the body of the email:
Once you press Confirm and Complete from the modal, you will see that the status updated to "Completed" and the time stamp for the status change is indicated in the Audit Trail:
As mentioned, you can also change Cancelled Appointments to Completed from the Cancelled Appointments list. To do this, navigate to Appointments → Appointment Lists → Cancelled and select the appointments from the list that you want to mark as Completed. Then hit the "Complete" button:
Sometimes we get trigger happy on these computer and smart phone machines. We may even preemptively mark a client as a No Show for his/her appointment only to see them saunter into our office 10 minutes later to get their appointment. Should this happen, you can move an appointment from being a No Show to being Completed as soon as they leave your office.
You can mark a No Show appointment as Completed from either the Appointment Detail page or the No Show appointment list. From the Appointment Detail page, click the Mark As dropdown and select "Completed":
At this point, you will be prompted with the option to send an appointment completed email to the client and to the staff. You can select who you want to notify about the Completed appointment and then add a Completion Note that will be inserted into the body of the email:
Once you press Confirm and Complete from the modal, you will see that the status updated to "Completed" and the time stamp for the status change is indicated in the Notes & Messaging as well as the Audit Trail tab:
As mentioned, you can also change No Show Appointments to Completed from the No Show Appointments list. To do this, navigate to Appointments → Appointment Lists → No Show and select the appointments from the list that you want to mark as Completed. Then hit the "Complete" button:
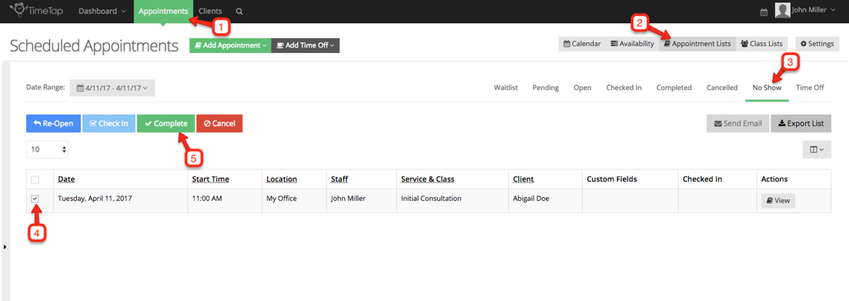
Since you have the option to make these status changes in bulk, he confirmation message as you are marking multiple appointments as completed will show a summary of how many appointments you are changing the status for:

After you confirm you want to move the No Show Appointments to Completed Status, the screen will update to show you the Completed Appointments list with the appointments you just completed in there:
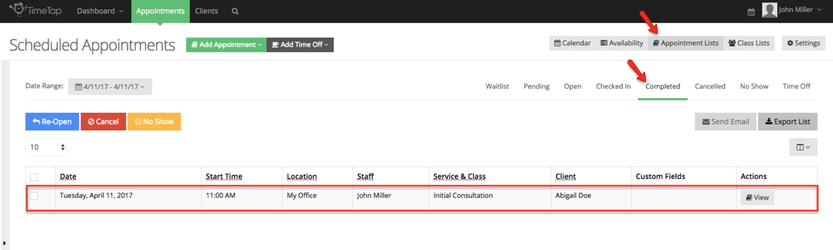
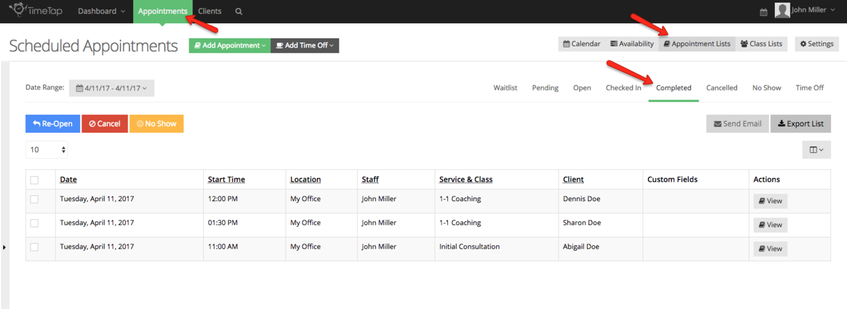
To see all the appointments you have marked as Completed, you can use the Completed Appointments list. This can be found under Appointments → Appointment Lists → Completed:
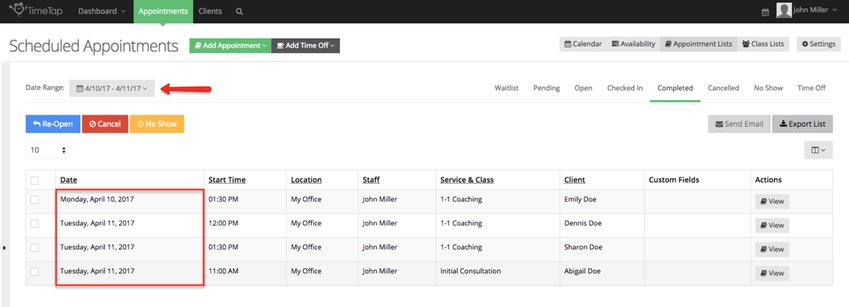
If you customize the date range for this view, the appointments that you see are based on the date the appointment was set for, not the date that you marked the appointment as completed:
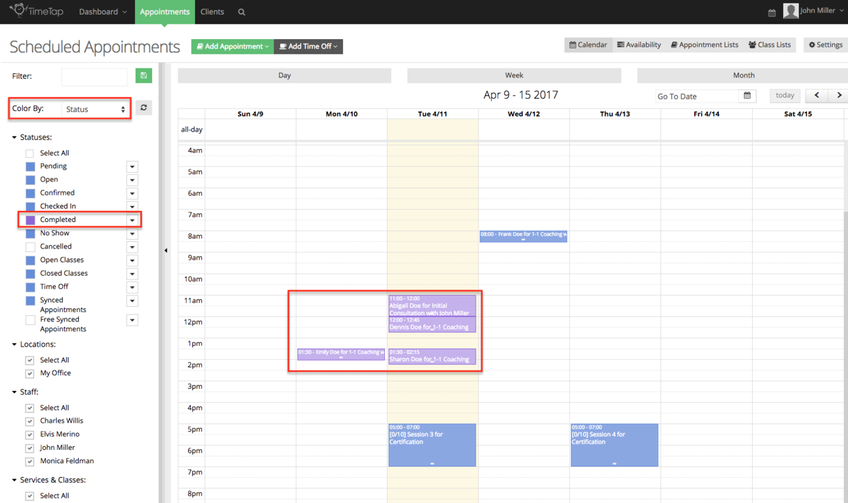
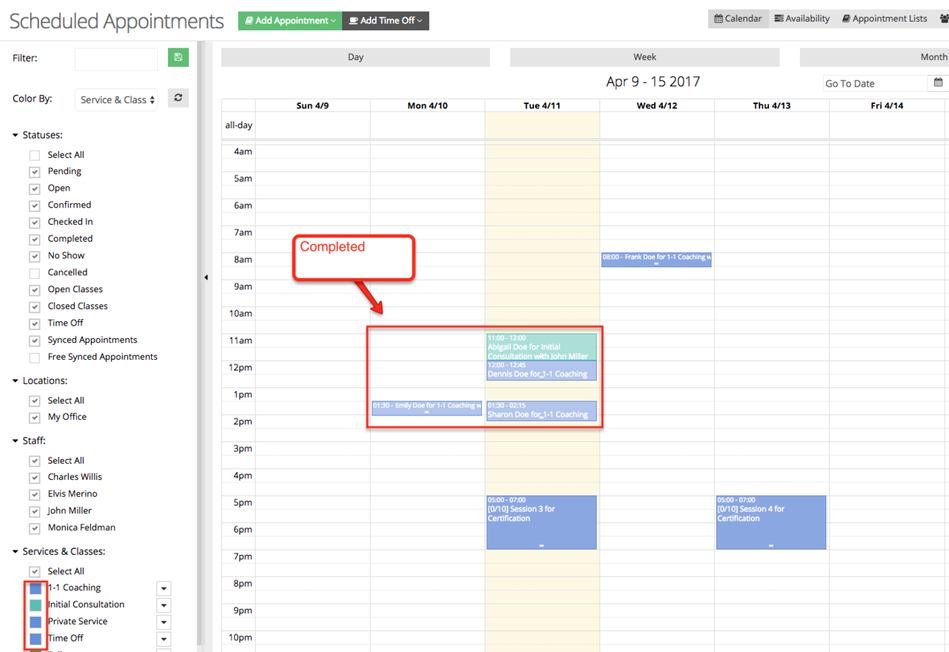
You can also find completed appointments on the Calendar view, the color of completed appointments will be less pronounced then the one assigned to the service/class/staff/location:
You can also color appointments in the calendar/availability view by status and assign a color to completed appointments: