Finding & Editing Time Off
After you've included time off on your schedule, it's important to understand how you can view that time off or make changes to it if necessary. On this documentation page, we'll go through:
- Finding Time Off on the Calendar
- Finding Time Off on the List view
- Viewing Time Off among upcoming appointments
- Editing Time Off
- Deleting Time Off
Make sure to read our documentation on adding single day or multiple day time offs before reading this as being able to find time off won't do you much good if you don't have any time off added ![]() .
.
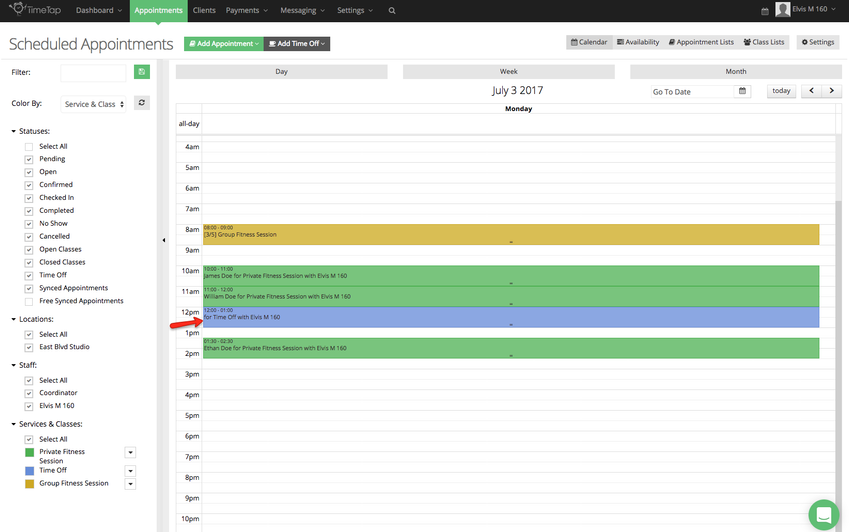
Once you have added a single day time off, it will show on your day and week view calendar taking up the full time that you have blocked off. You'll see this in this screenshot of the day view:
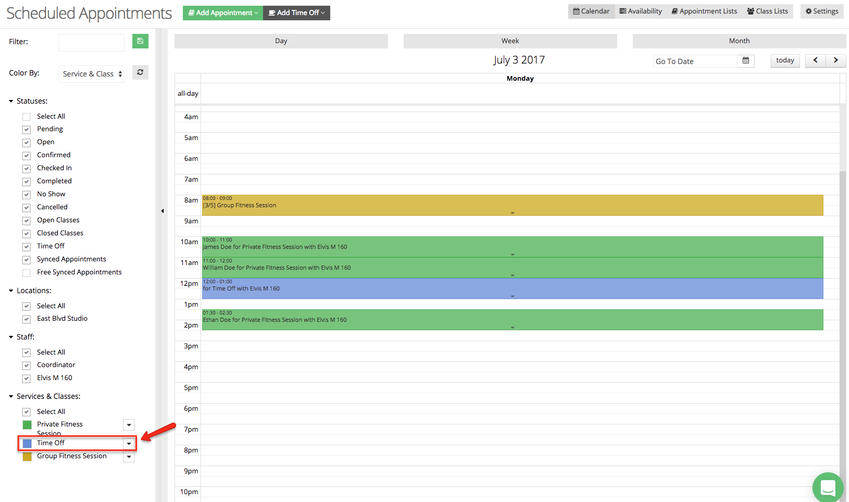
You can assign a color to your time offs in the filter tool:
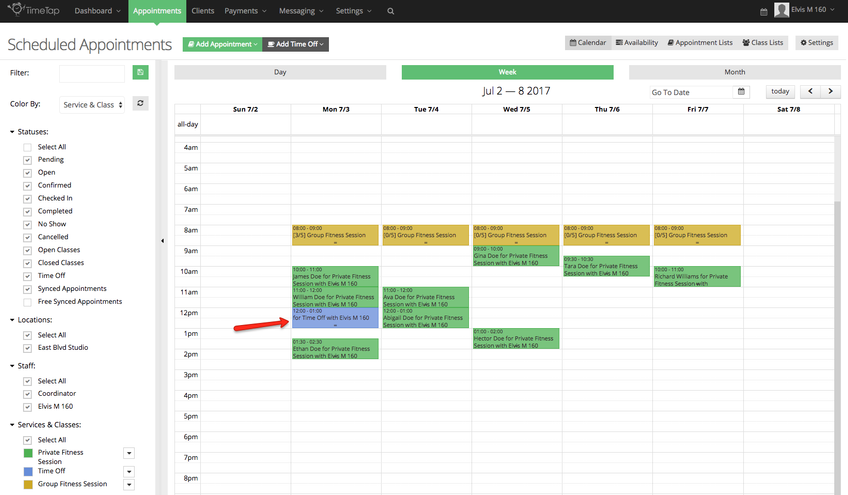
As well as this screenshot of the week view:
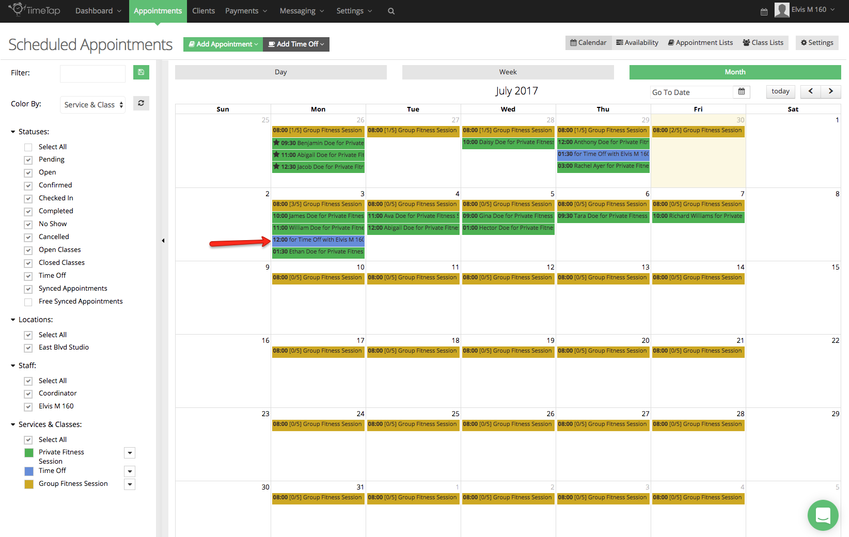
On the monthly calendar view, you will only see the start time of the time off displaying:
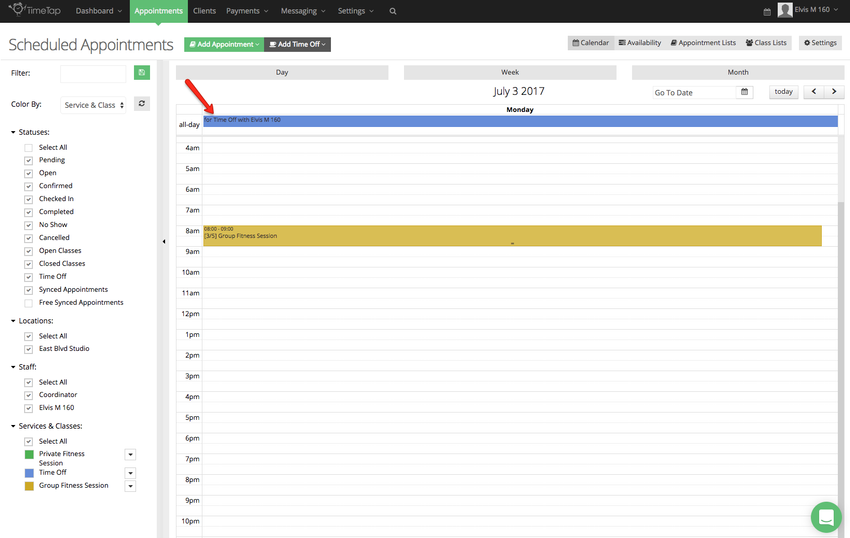
For multiple day time off, it will display on your day and week calendar views in the top "all-day" row. You'll see this in the screenshot of the day view below:
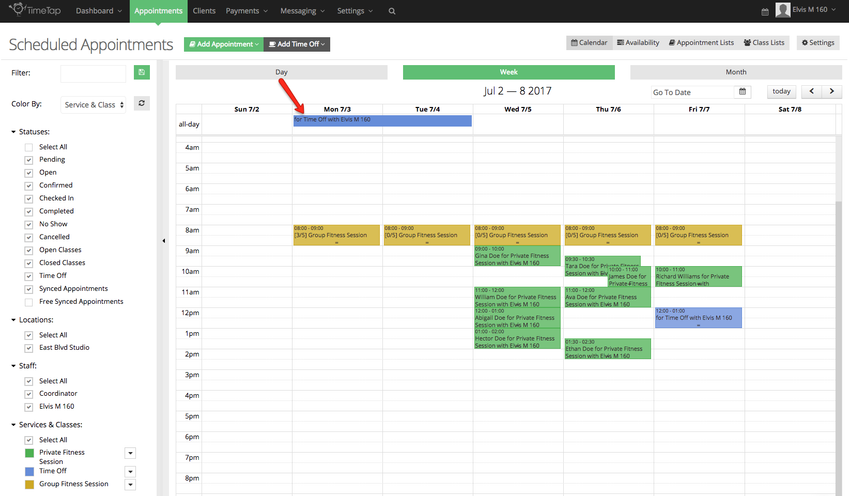
As well as this screenshot of the week view:
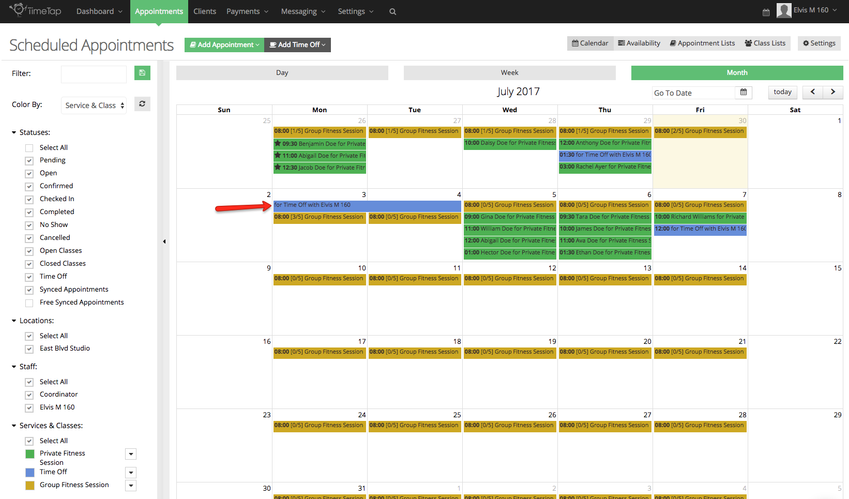
In the month view, you will see the Time Off block extend over the days that it is blocking off:
Wherever you see a Time Off on your calendar, if you click on it, you will enter into the Time Off Detail screen where you can edit or make changes to the period of time that it is blocking off your availability.
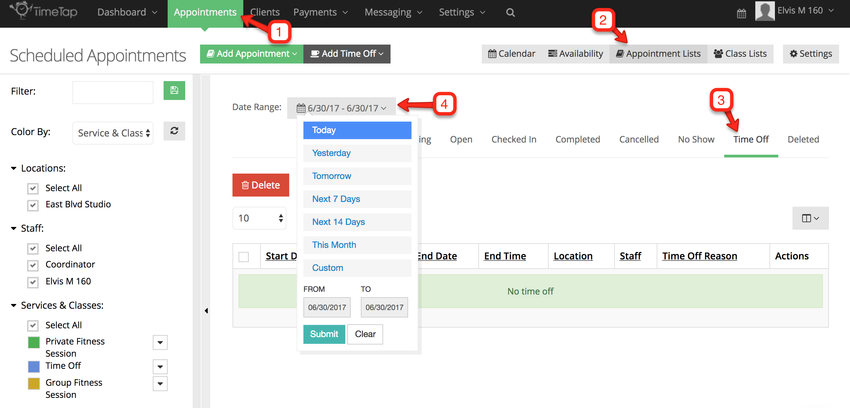
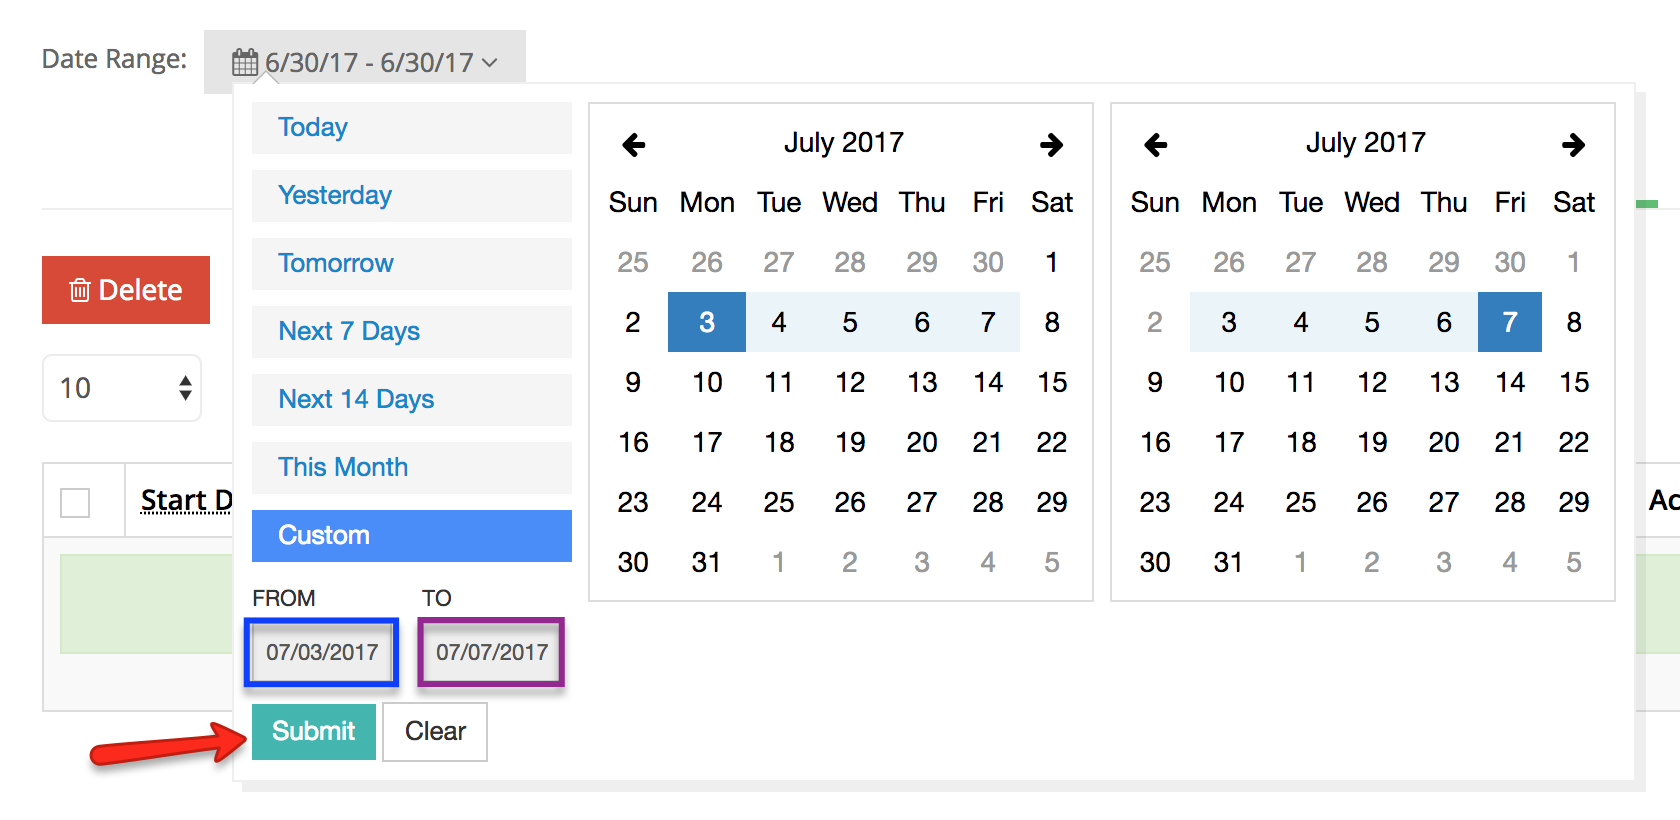
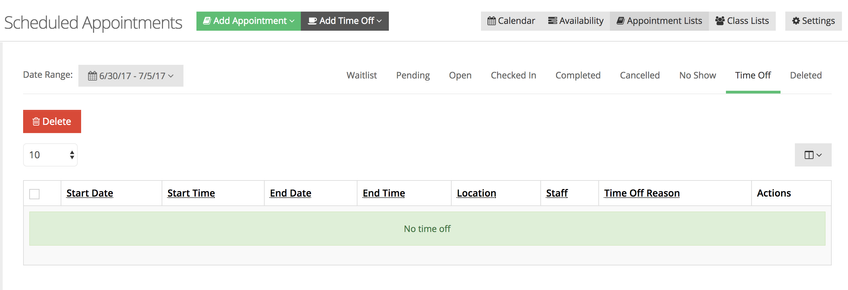
If you want to see all of your Time Off over a given time range, go to Appointments → Appointment Lists → Time Off and customize the date range for which you'd like to see what Time Off you have inserted:
You can enter in a custom start and end date for your range and then click Submit:
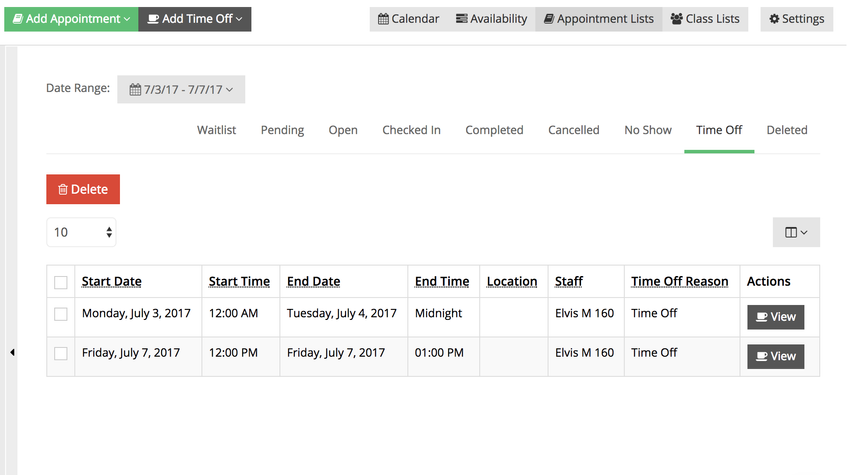
Once you click "Submit" all the time off on your schedule during that date range will appear in the Time Off list:
In the first column, you will see the start date and start time and the end date and end time. In the second column, you will see the reason that you inserted when adding the single or multiple day time off. In the last column, you will see a view button which you can click to go into the Time Off detail screen and make edits to the Time Off you've added.
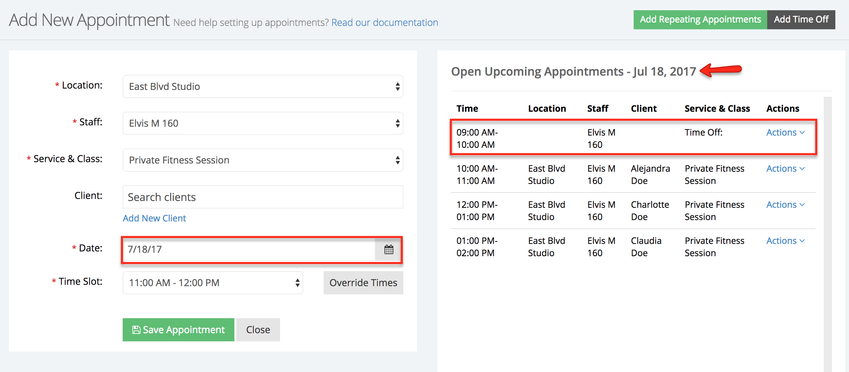
As you are adding a new appointment, you will notice any Time Off that is set to last for less than a day appearing in your Upcoming Appointments trail. When you see it on the Upcoming Appointments trail, it will just be listed as Time Off and no client or location will be assigned to it:
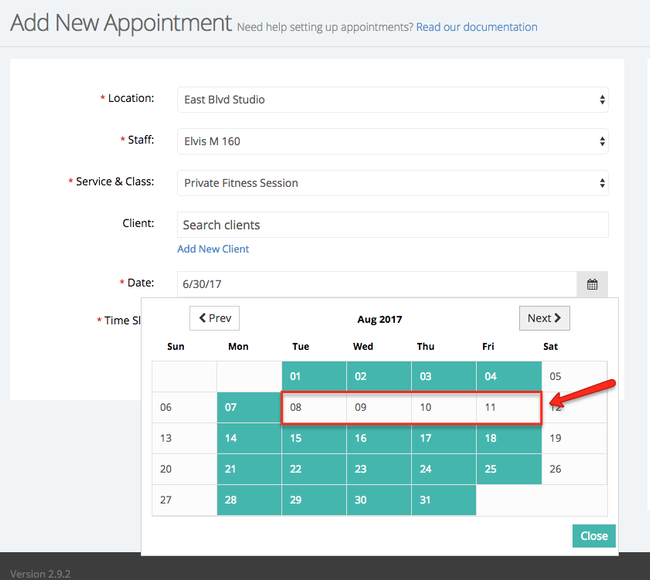
If you have Time Off that is set to last for more than a day, then it will not show up in the Open Upcoming Appointments trail. Rather, it will just block off the day from your calendar dropdown so that you can't select it. For instance, I have a Time Off set for August 8th-August 11th. As such, those dates do not show in teal (which indicates available for booking) on the date calendar when adding an appointment:
As a staff person, you can always overwrite where you have time off and put in an appointment regardless, but we try to give you the tools so that you don't make that mistake by accident.
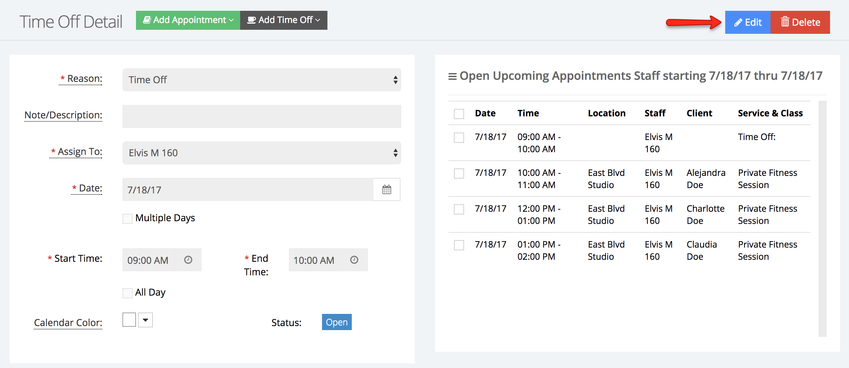
After entering your Time Off period, there may come a time when you want to make changes to it. To do this, navigate to the Time Off Detail page by finding the time off you want to edit either in the Calendar view or in your Time Off list. Once you are on your Time Off Detail page, click the blue "Edit" button in the top right:
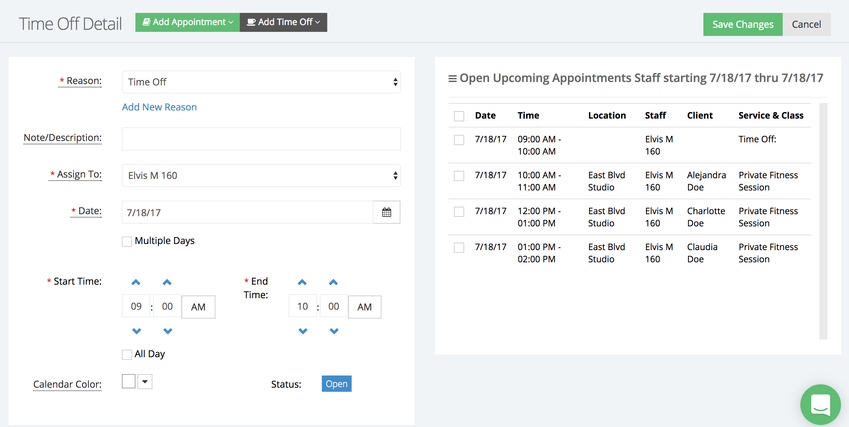
Once you've clicked the Edit button, you'll see the fields on the page switch from read only mode to editable fields. From here you can change the date(s) that the time off applies to, switch a single day time off to a multiple day time off, adjust the start and end time for the single day time off, or edit the reason you've entered for the time off:
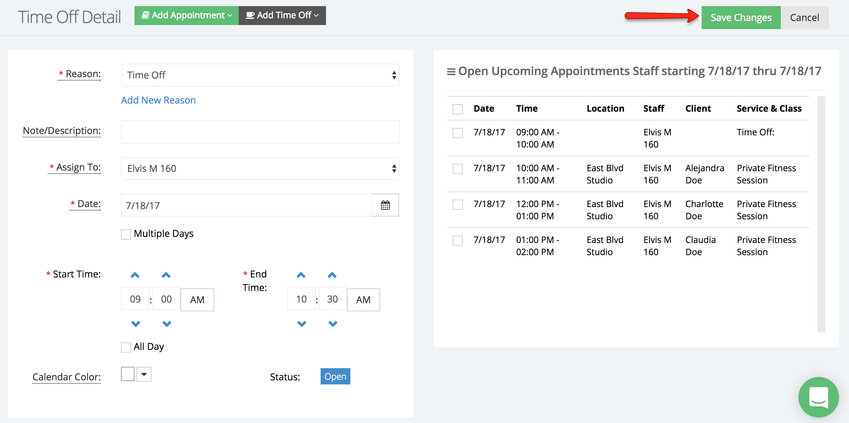
Once you've finished making the changes you want to make, you can just press the "Save Chages" button to commit the changes to your schedule:
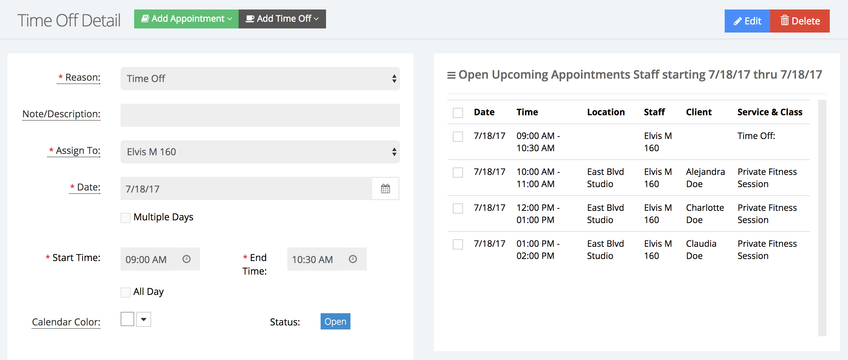
Once you have committed the changes by pressing Save Time Off, you will return to Time Off Detail in read only mode with those changes saved:
You'll also see these changes apply on either the Time Off List or where the Time Off is displayed on your Calendar.
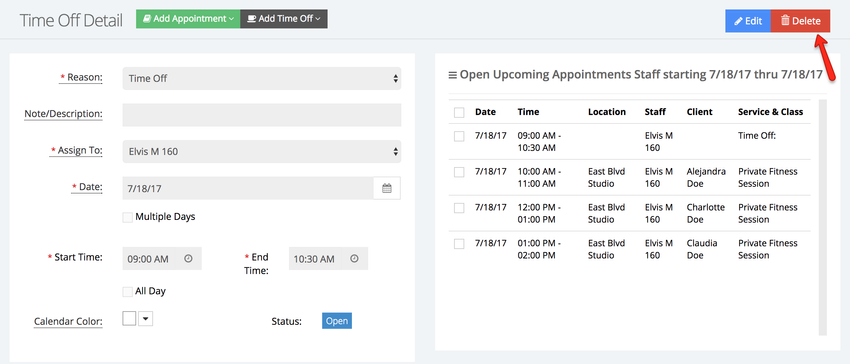
To completely remove a Time Off from your schedule and open yourself back up for booking, navigate to the time off in the Calendar view. Once you are on your Time Off Detail page, click the blue "Delete" button in the top right:
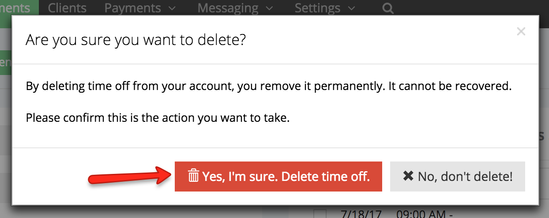
A new window will appear where you will confirm that you want to delete the time off:
After the time off has been deleted you will be taken to your Time Off List.
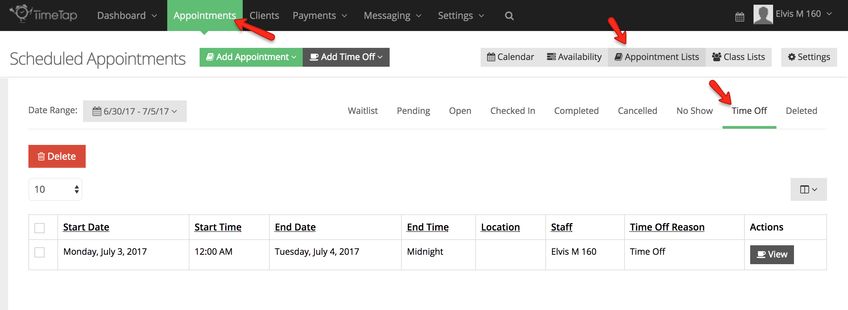
You can also remove a Time Off from your schedule and open yourself back up for booking, navigate to your Time Off List by going to Appointments → Appointment Lists → Time Off:
Customize the date range in the "View Date Range" dropdown to make sure the Time Off you want to delete is within that date range. After customizing the date range, click the checkbox next to the Time Off you want to remove and then press the grey "Delete" button at the top of the list:
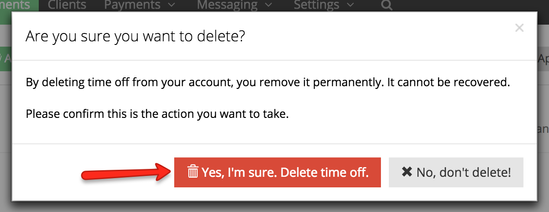
You'll then receive a small pop up to make sure you want to delete the Time Off. If you are sure you want to remove it from your schedule and open back up booking for those hours, click "Yes, I'm sure. Delete the time off.":
After clicking the red "Yes, I'm sure. Delete the time off." button, you Time Off list will reload and you'll see that the Time Off you removed is no longer among the list:
