Adding in Recruiters to Child Accounts
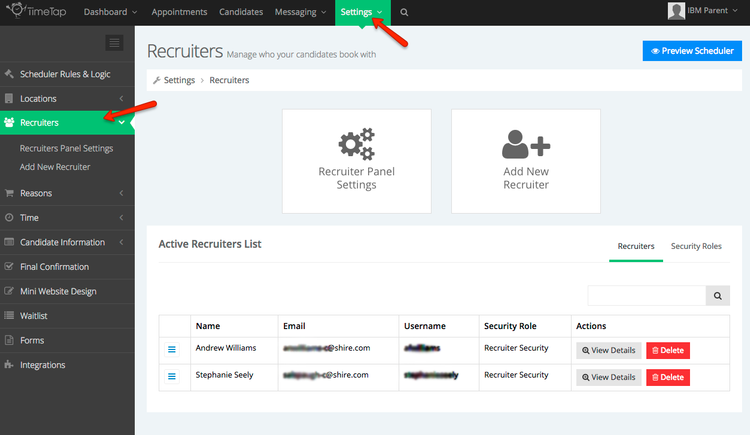
Once you've established your child account, you can add recruiters to that child account that candidates can book appointments with. To see the list of recruiters currently on any child account or to add recruiters to any child account, login to that child account and go to Settings > Recruiters:
You'll notice that all recruiters have been assigned to a special security role called "Recruiter Security". This security is a special permission role created for IBM users to grant specific access to different pages within the application. If other roles are needed for different types of people, then we can create those as well.
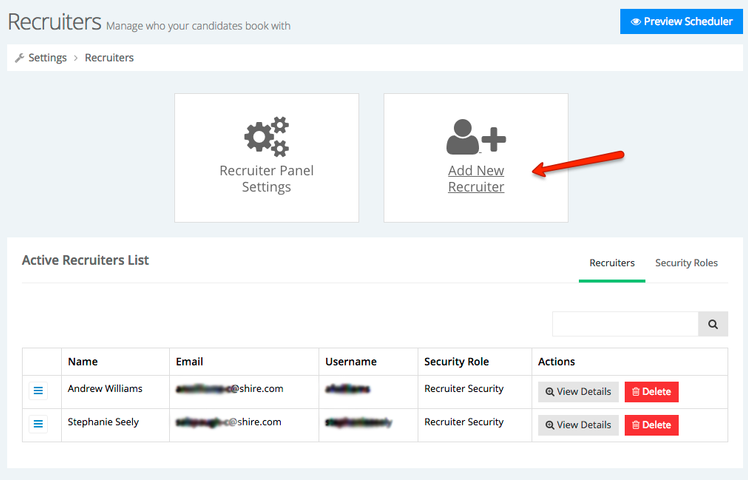
To add in a new recruiter, click the button to "Add New Recruiter":
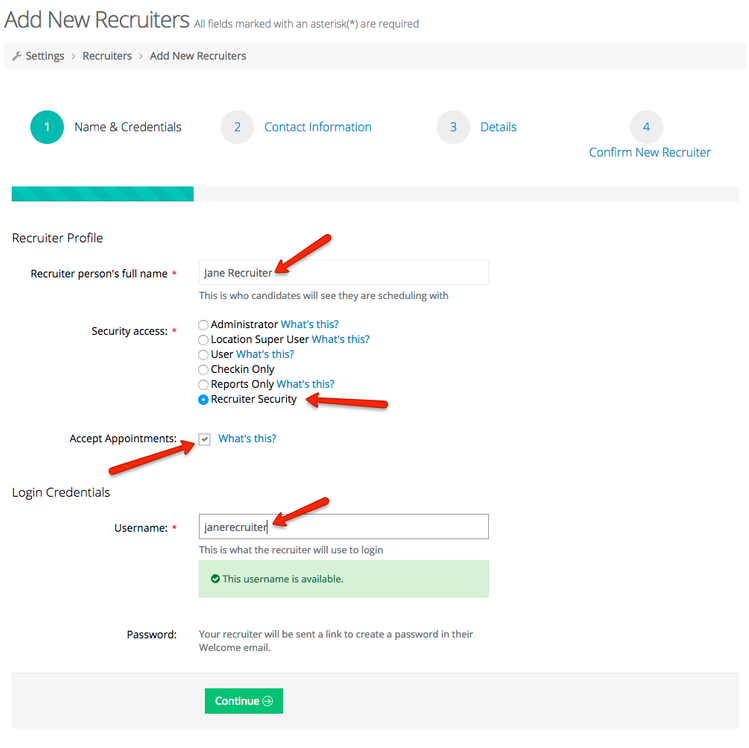
On the first page of the add new recruiter flow,
- Enter in the recruiter's name
- Select the "Recruiter Security" role
- Check off that they should be allowed to accept appointments
- And establish a unique username for them to login with:
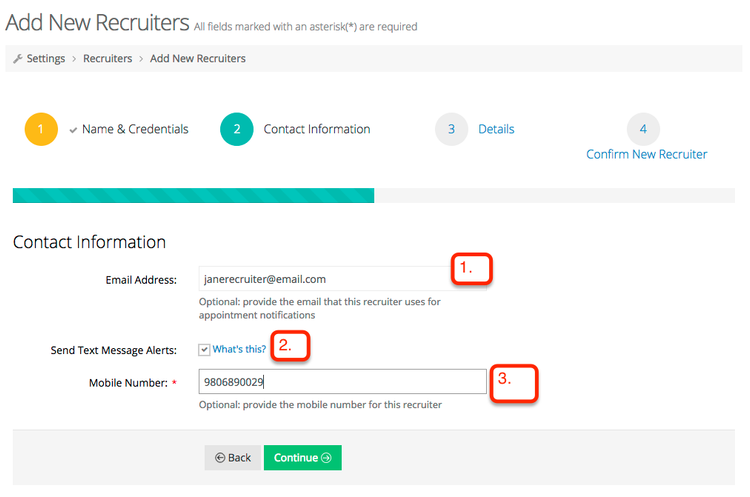
On the next steps fill out the following fields:
- Email address for the recruiter: This will be the email address that is inserted into any email templates that candidates receive with the tag %STAFF_EMAIL%. It is also the email that will receive any notifications from TimeTap of new appointments or appointment changes
- Send Text Alerts: Check this off if the recruiter would like to receive an alert when new appointments are booked or existing appointments are cancelled
- Mobile Number: This will be the number that receives text alerts as well as the number that displays on any email templates where the tag %STAFF_MOBILE% is used
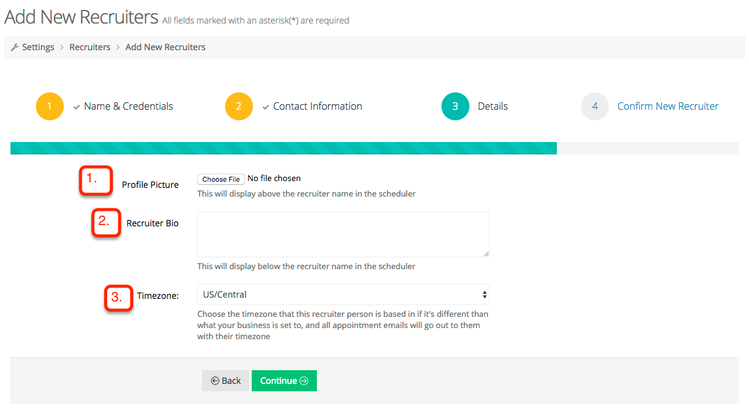
On the next page, you can optionally fill in the following:
- Upload a picture of the recruiter: This can display above their name in the scheduling flow if you choose to show recruiters in the scheduling flow
- Recruiter Bio: This is a brief description of the recruiter and can be included in any email templates with the tag %STAFF_DESCRIPTION%
- Timezone: This is the timezone that the recruiter is based out of. The timezone will default to the timezone of the business, but you can override it on a per recruiter basis
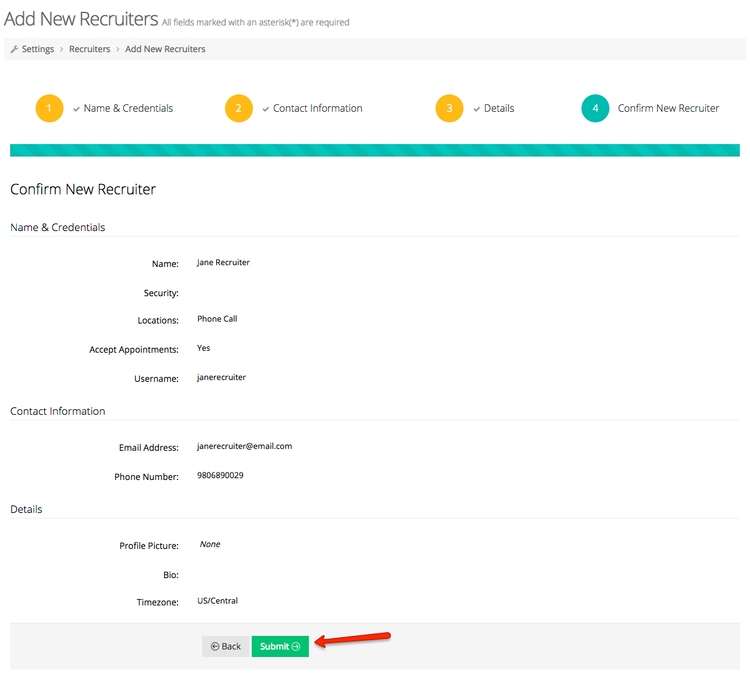
On the final confirmation page, you can see the details of the recruiter you just added and press "Submit":
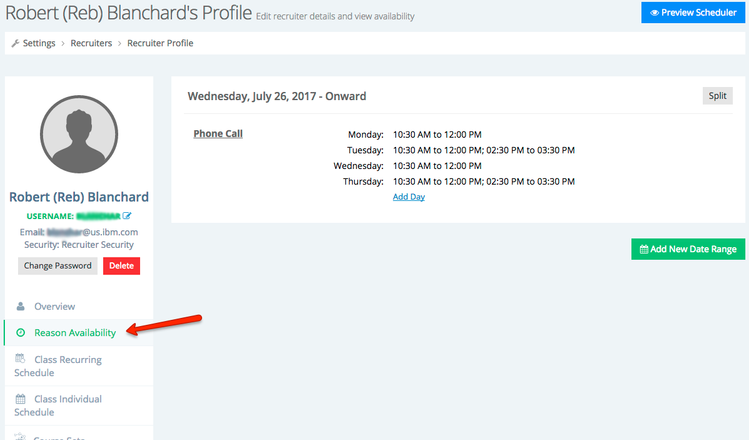
Once the new recruiter has been added, you can add hours of availability for them from the "Reason Availability" section of their staff profile:
Their reason availability will determine when they are available for appointments.
