Custom Fields
- Elvis Merino (Unlicensed)
- Matt Bryant (Unlicensed)
When you login to TimeTap for the first time you will notice that any custom fields you created in checkAppointment are already in TimeTap, as long as these fields were assigned to a service or class. In this page we will focus on
We have written extensive documentation on how to:
Method in checkAppointments
In checkAppointments if you wanted to create a custom field, first you will need to create a form, add the custom field and then attach the custom field to a class or service.
Adding New Custom Fields - Method in TimeTap
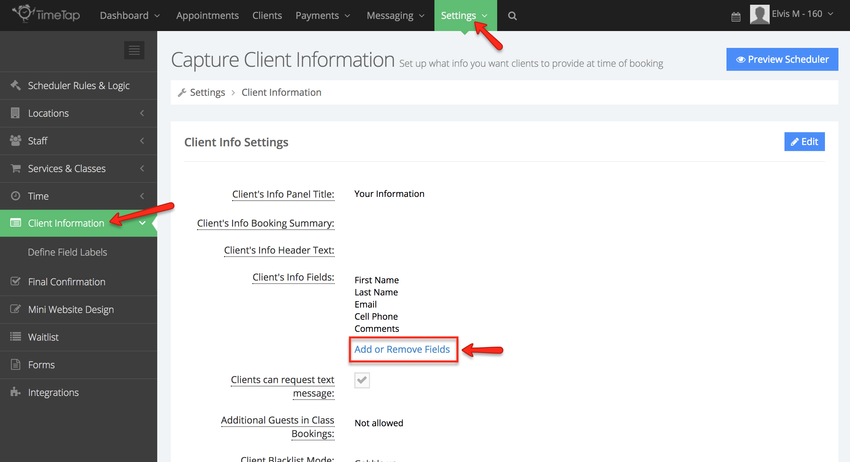
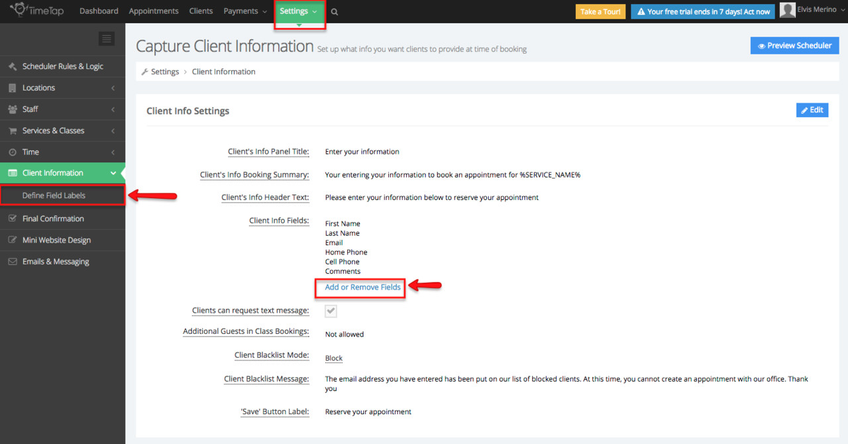
To add a new field to the Client Information panel (where your clients enter their information) go to Settings → Client Information and click either the "Define Field Labels" link from the left hand menu or the "Add or Remove Fields" link from the Client Info section (they'll both take you to the same place):
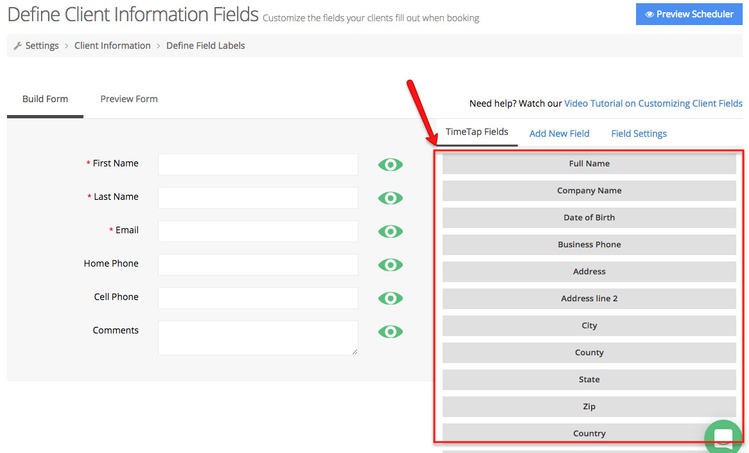
Once in the Define Client Information Fields screen you'll see all the required and optional fields you had in checkAppointments (as long as they were assigned to a service or class) appear here:
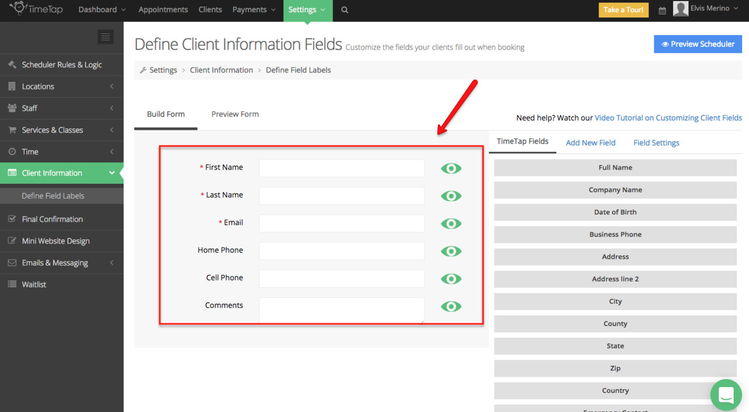
TimeTap has created some commonly used fields which you can add by clicking on them:
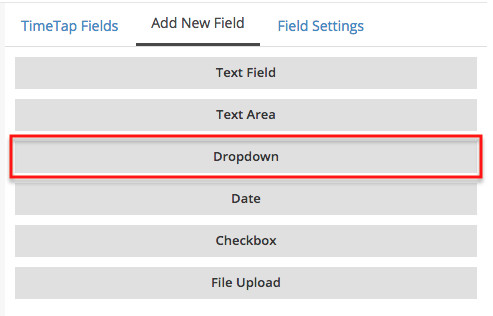
If you would like to create your own custom field, click the Add New Field tab:

In the Add New Field you will have the option the to add different types of fields from text field to the option to upload a file, in this case I will add a dropdown field:
Now we will being customizing this new field but first we will cover what each section of the Field Settings mean:
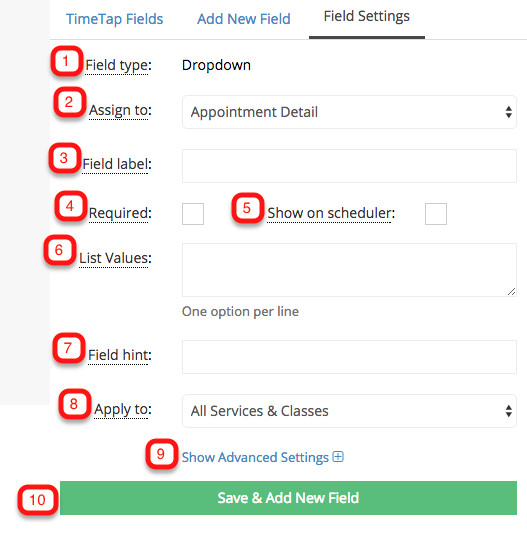
- This is the type of field you selected in the Add New Field Tab
- This is where we assign it to the client profile or to the appointment
- This is what displays next to the field and prompts the client to fill in that information
- Check this box if you would like to make this field required, leave unchecked if this field is optional
- Check this box if you would like this field to appear in your scheduler as your clients are booking appointments, leave unchecked and it will only be visible to your staff, read about it here
- This is where I will enter the options listed in the dropdown field I added. This specific section does not apply to all field types
- This displays underneath the field and can be used to provide a bit more information around what you're looking for clients to fill in there
- This is where I select to which services and classes I would like to assign this field
- This is where you can enter Regex Validation, read more about it here
- Click here to Save
If you look
After the saving the new field, this will appear at the bottom of the fields you already have. To move this new fields simply click and drag to the desired position:
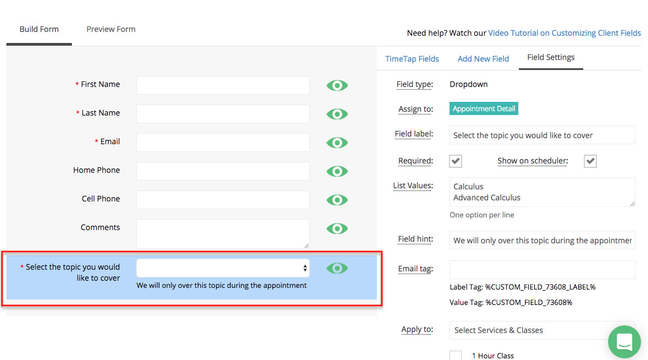
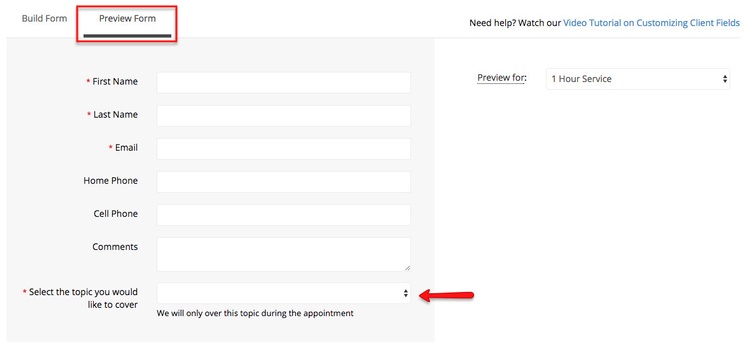
You can then click the "Preview Form" button to the right of the "Build Form" button to see how your field will look now to your clients on your scheduler:
The "label" for a field is what displays next to the field and prompts the client to fill in that information. The "hint" displays underneath the field and can be used to provide a bit more information around what you're looking for them to fill in there.
Maybe in your lingo, you ask clients to fill in their "Mobile" number rather than their "Cell" number. If that's the case, it's easy to update the label for where you're capturing that phone number to better match your business. To start just go to Settings → Client Information and click either the "Define Field Labels" link from the left hand menu or the "Add or Remove Fields" link from the Client Info section (they'll both take you to the same place):
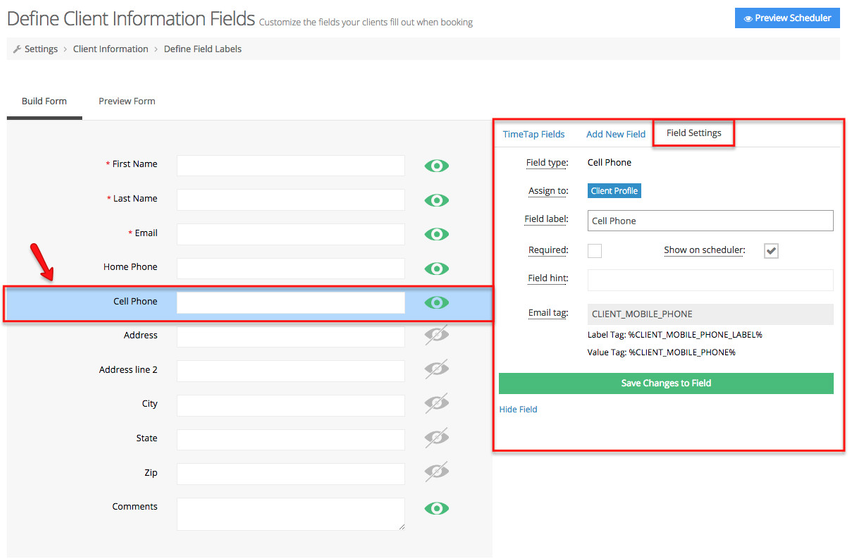
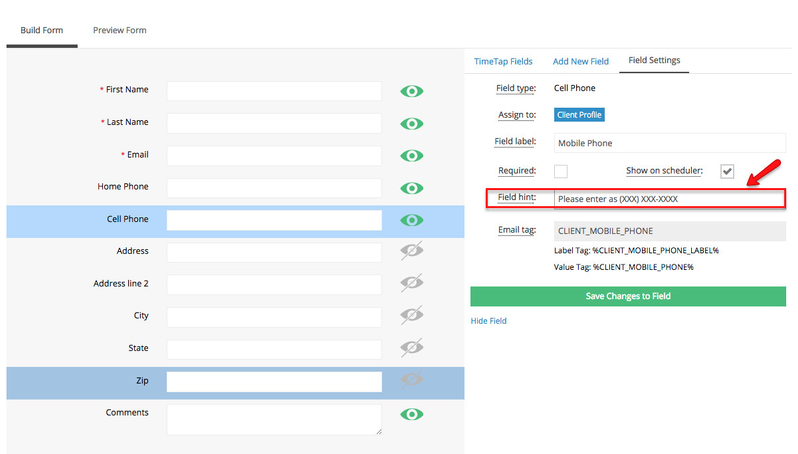
On the next screen, find the field that you need to change the label for (in this case we're looking for the cell phone field but it could be a different field for you). Click the Cell Phone field and this will open the Field Setting to the right of the screen:
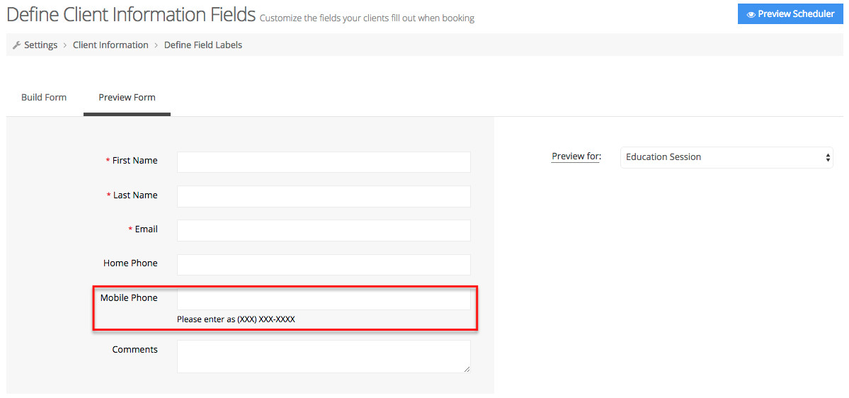
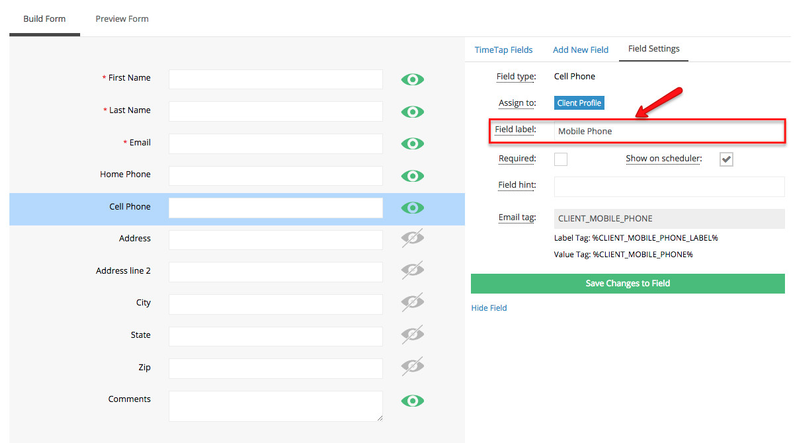
In the Field Settings go to the Field Label section and change the display name from "Cell Phone" to "Mobile Phone".
You can also add a hint that will display beneath the field and give clients and/or staff a better idea of what to put in the field. In this case, I'm going to type in a hint that tells clients and my fellow staff how I would like the mobile phone to be formatted:
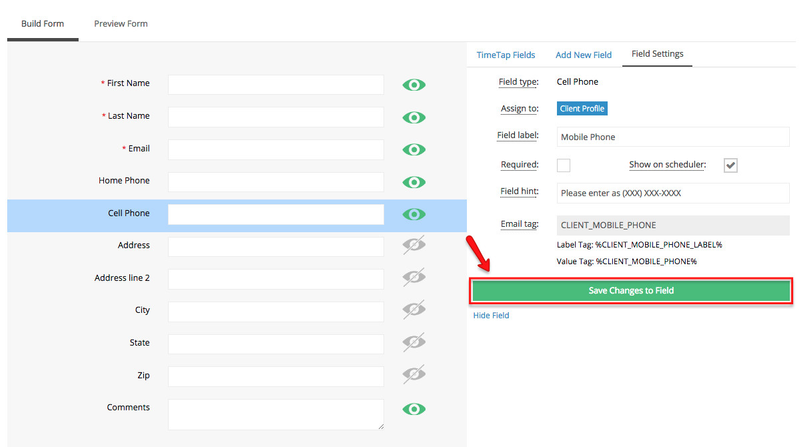
Next, you'll want to click the "Save Changes to Field" button which will commit the changes that you've made to your field label and hint:
You can then click the "Preview Form" button to the right of the "Build Form" button to see how your field will look now to your clients on your scheduler:
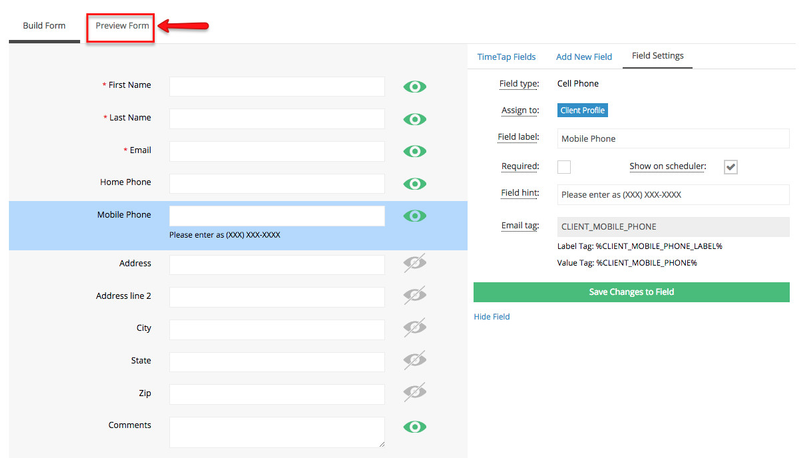
Now you should be able to see the field added to your client form: