Check In Kiosk for Class Sessions
- Elvis Merino (Unlicensed)
- Natalie Barton (Unlicensed)
The Class Session Details page offers the option to launch a Check In screen where you can allow your client to check themselves in or register for a class for a specific class session. The Check In screen found within the Class Session Details page is different than the Check In screen found under Dashboard > Check In Screen. The one found under Dashboard is intended to allow clients to Check In for a class and service based appointment by entering a set of criteria in order to search for it. While The Check In screen found in the Class Session Details page will display a list of attendees for the class session you choose. Your clients will still have the option to search for their appointment, but only within the class session you selected.
In this page we'll cover how to:
- Launch the Check In Kiosk
- Allow Walk In Registrations to be Added via Check In Kiosk
- Search for Class Sessions Within a Check In Kiosk
For the following example we'll assume that we have a class scheduled on July 23rd, 2019 at 2pm. When the class takes place we'll setup a check in station (laptop, tablet, computer, etc) where we will allow clients to check in to let us know they attended the class. We'll begin by locating the class session in the calendar view (can also be found in class profile, staff profile, and location profile) and double clicking on it to view the Class Session Details:

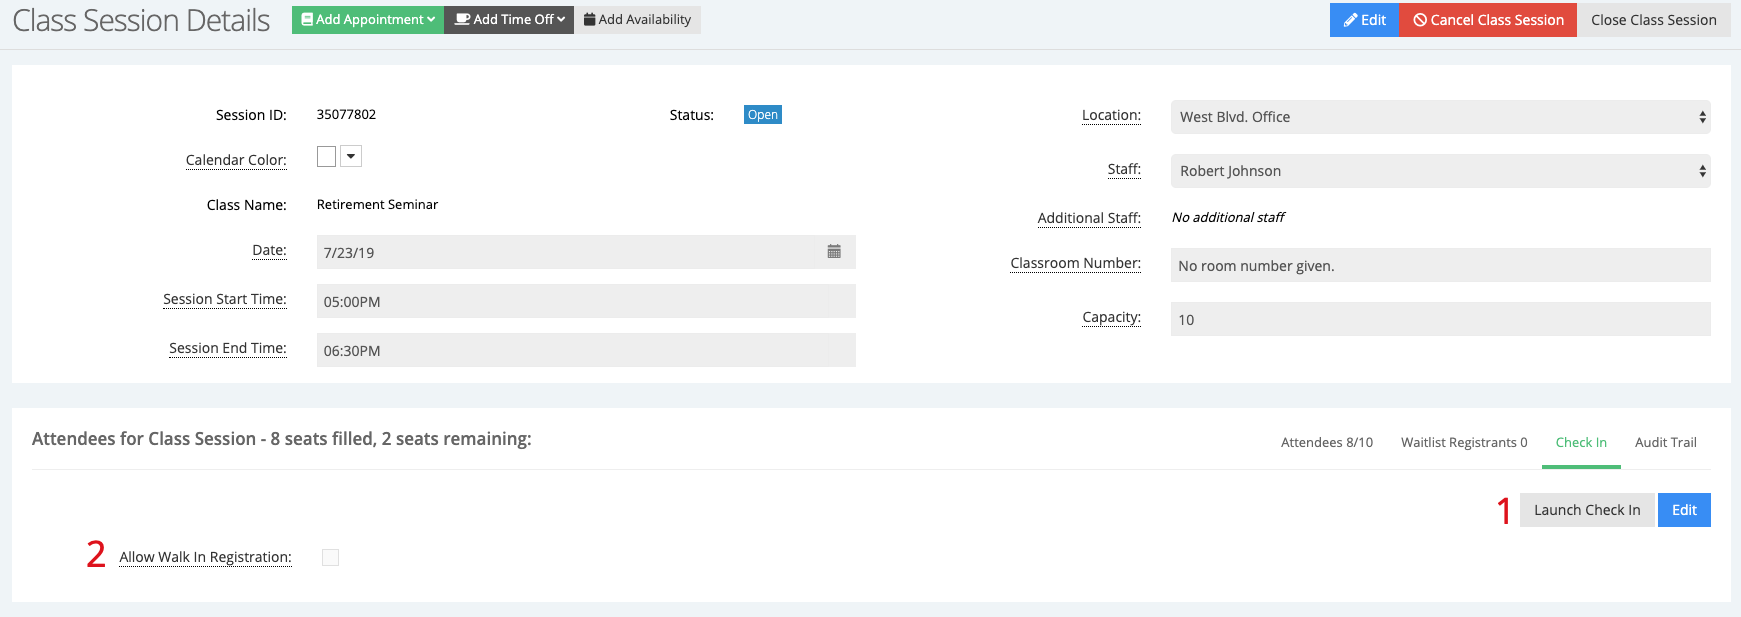
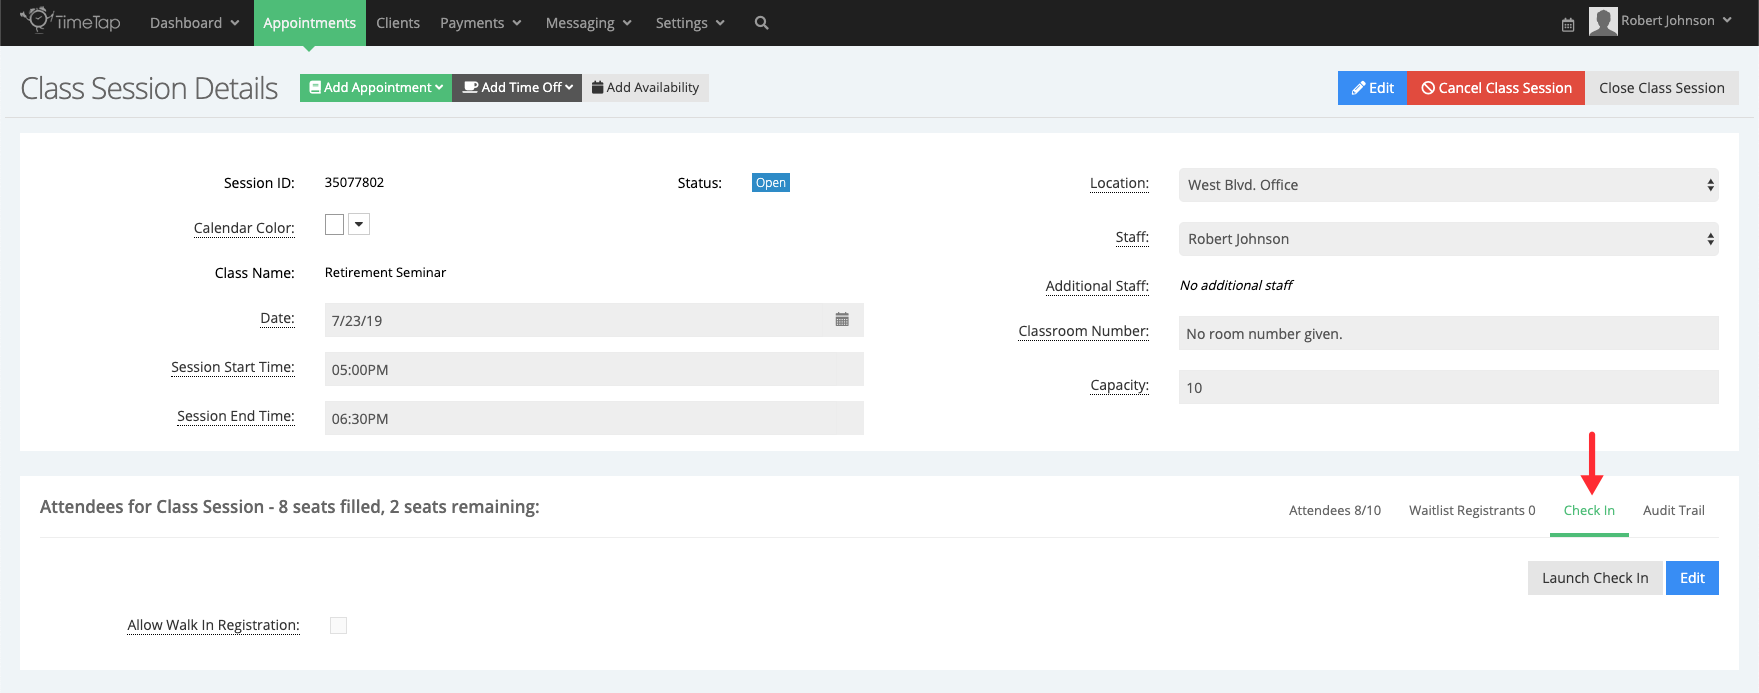
In the Class Session Details page, click the 'Check In' Tab located in the lower righthand section of the page:

Inside the Check In tab you'll have the option to launch the Check In screen for this particular class session (1), as well as allowing walk in registration in the check in screen (2). Allow Walk In Registration is covered in a different section within this page:
We'll click the Launch Check In button to launch the Check In screen in a different tab in your browser:

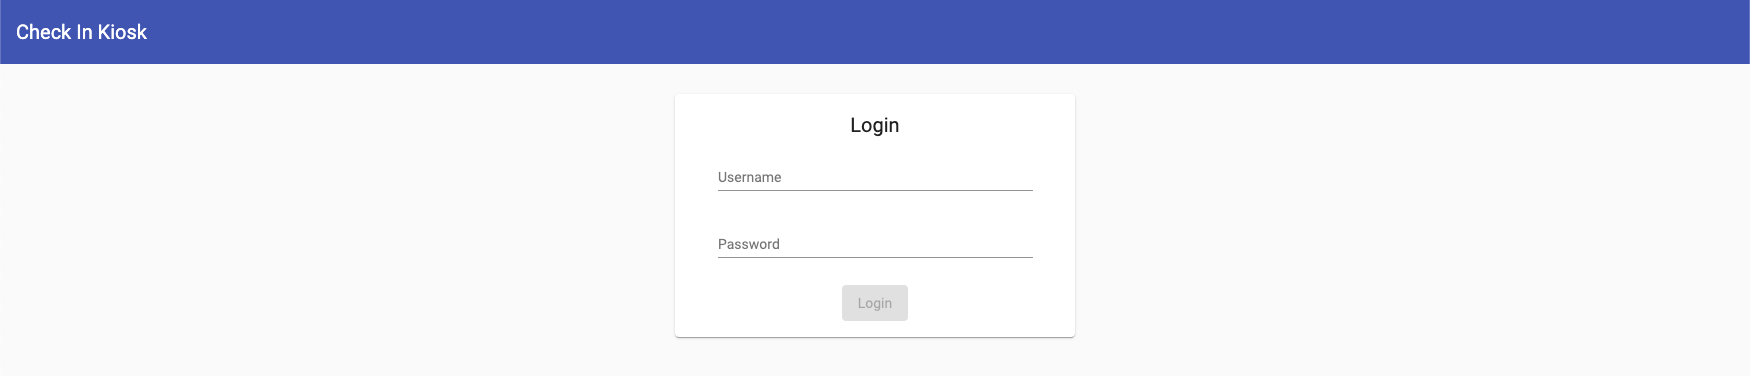
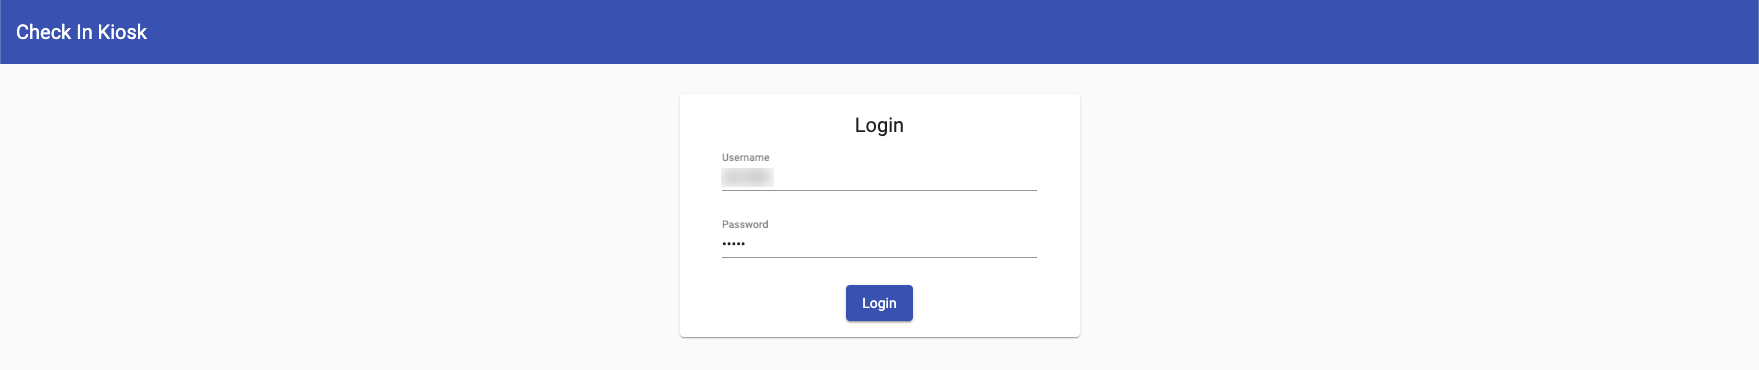
When the Check In screen launches, you'll be asked to enter your credentials:
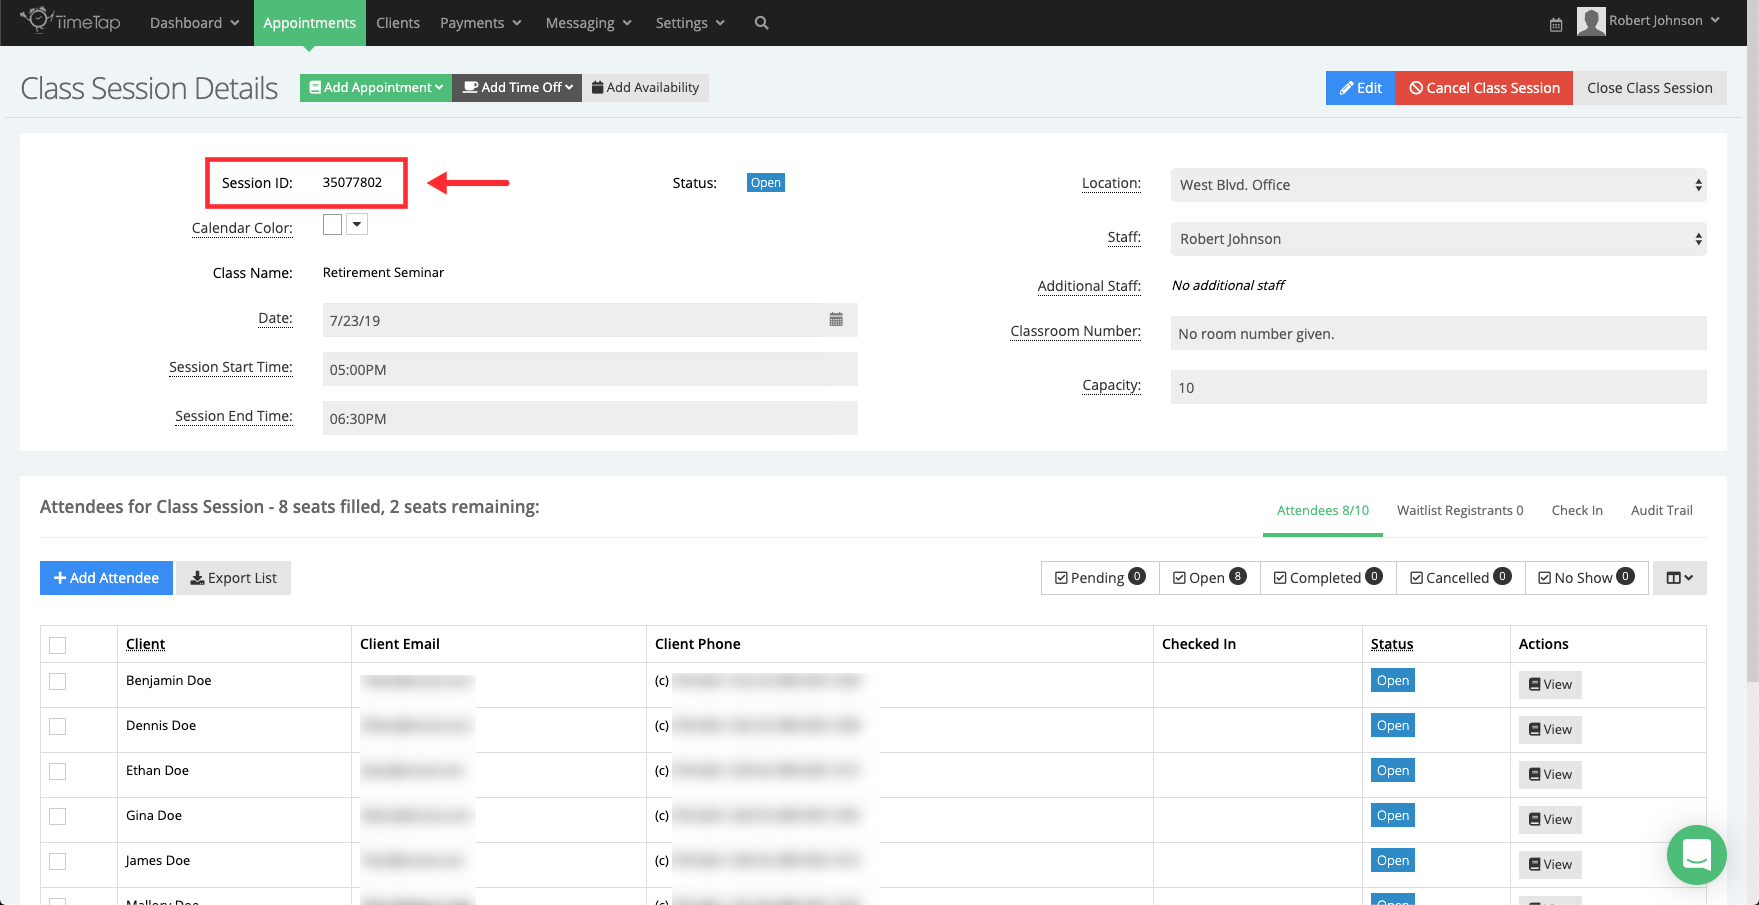
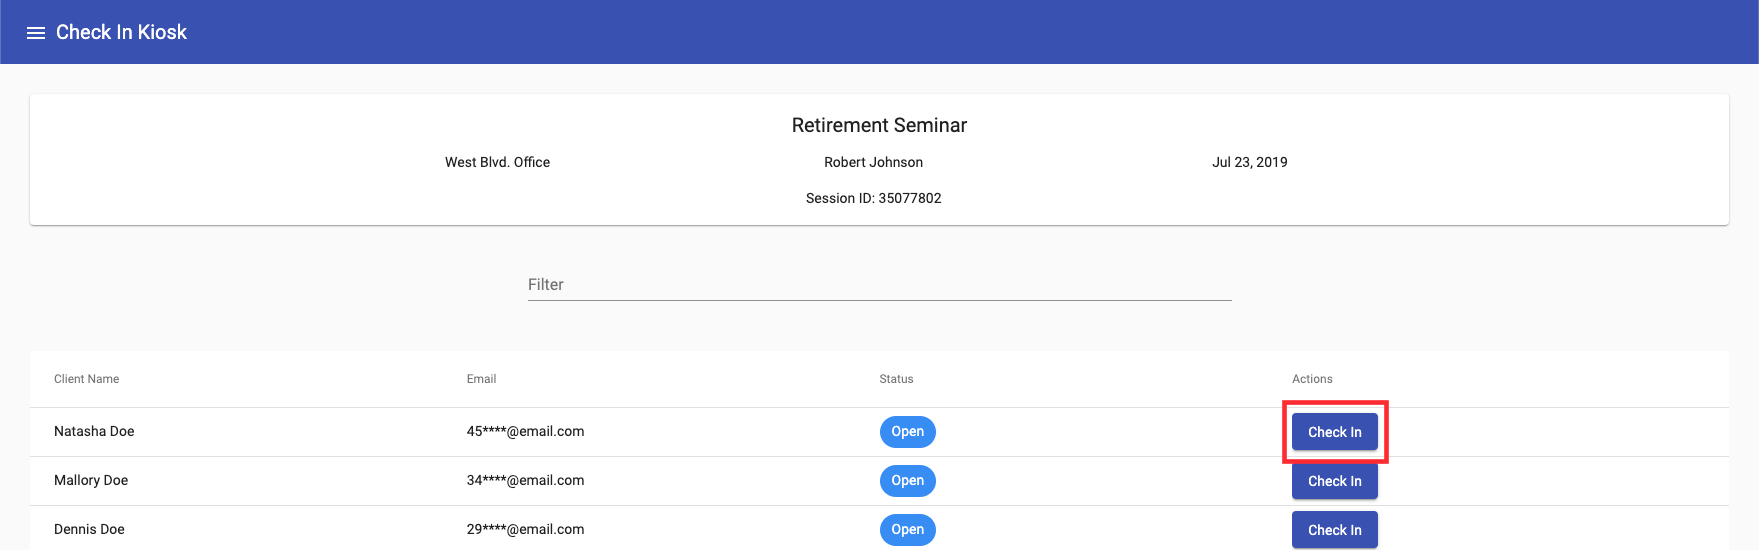
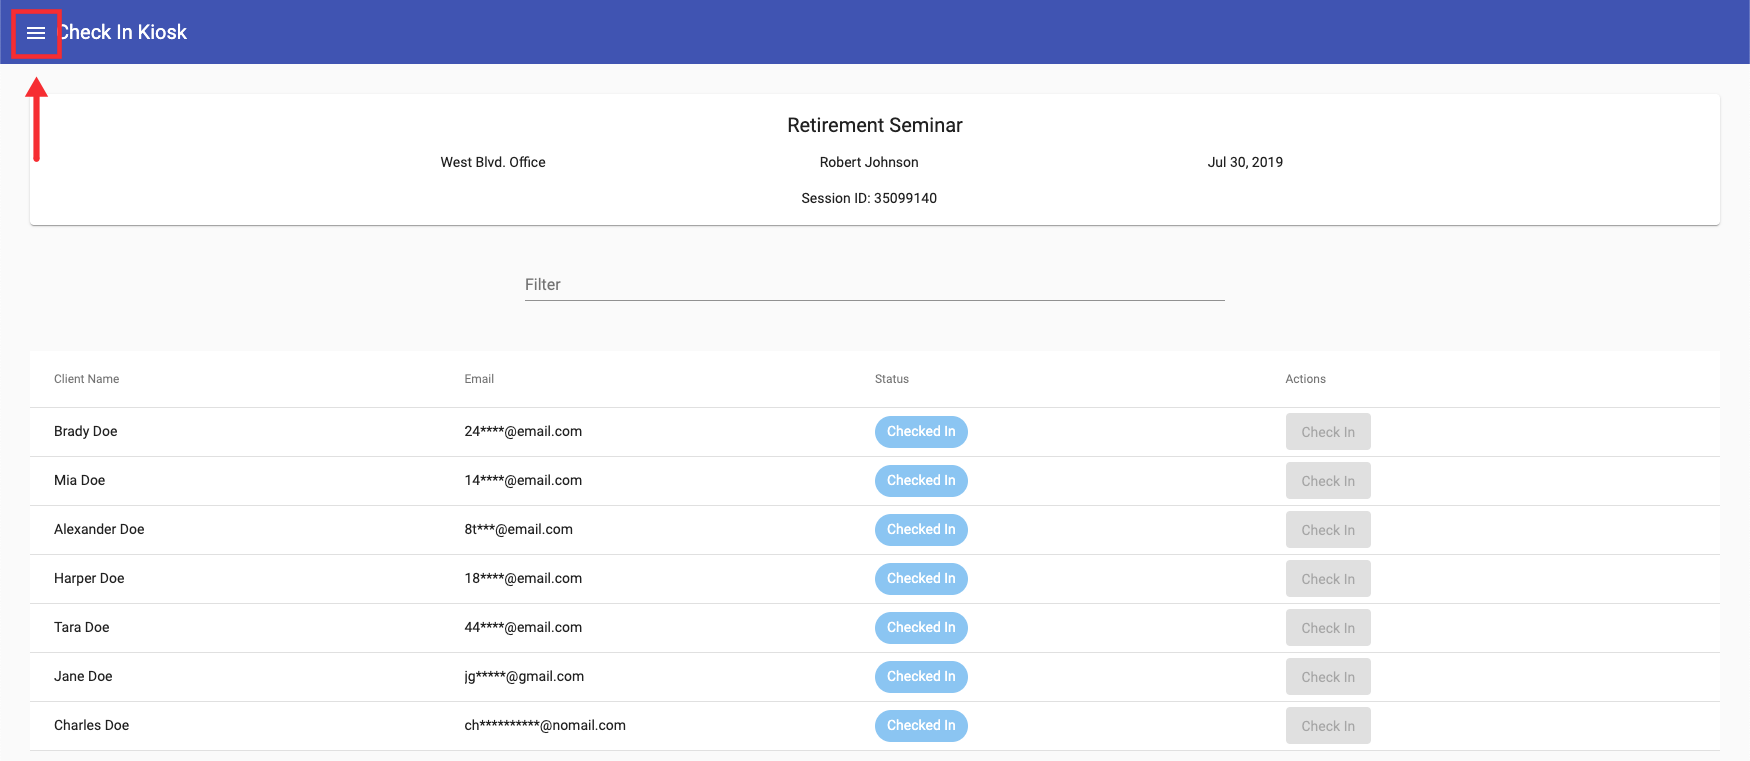
After you enter your credentials the Check In screen will load the list the attendees of the class session you selected. You can compare the Class Session ID in the backoffice to the one shown in the check in screen to ensure the correct class session loaded:
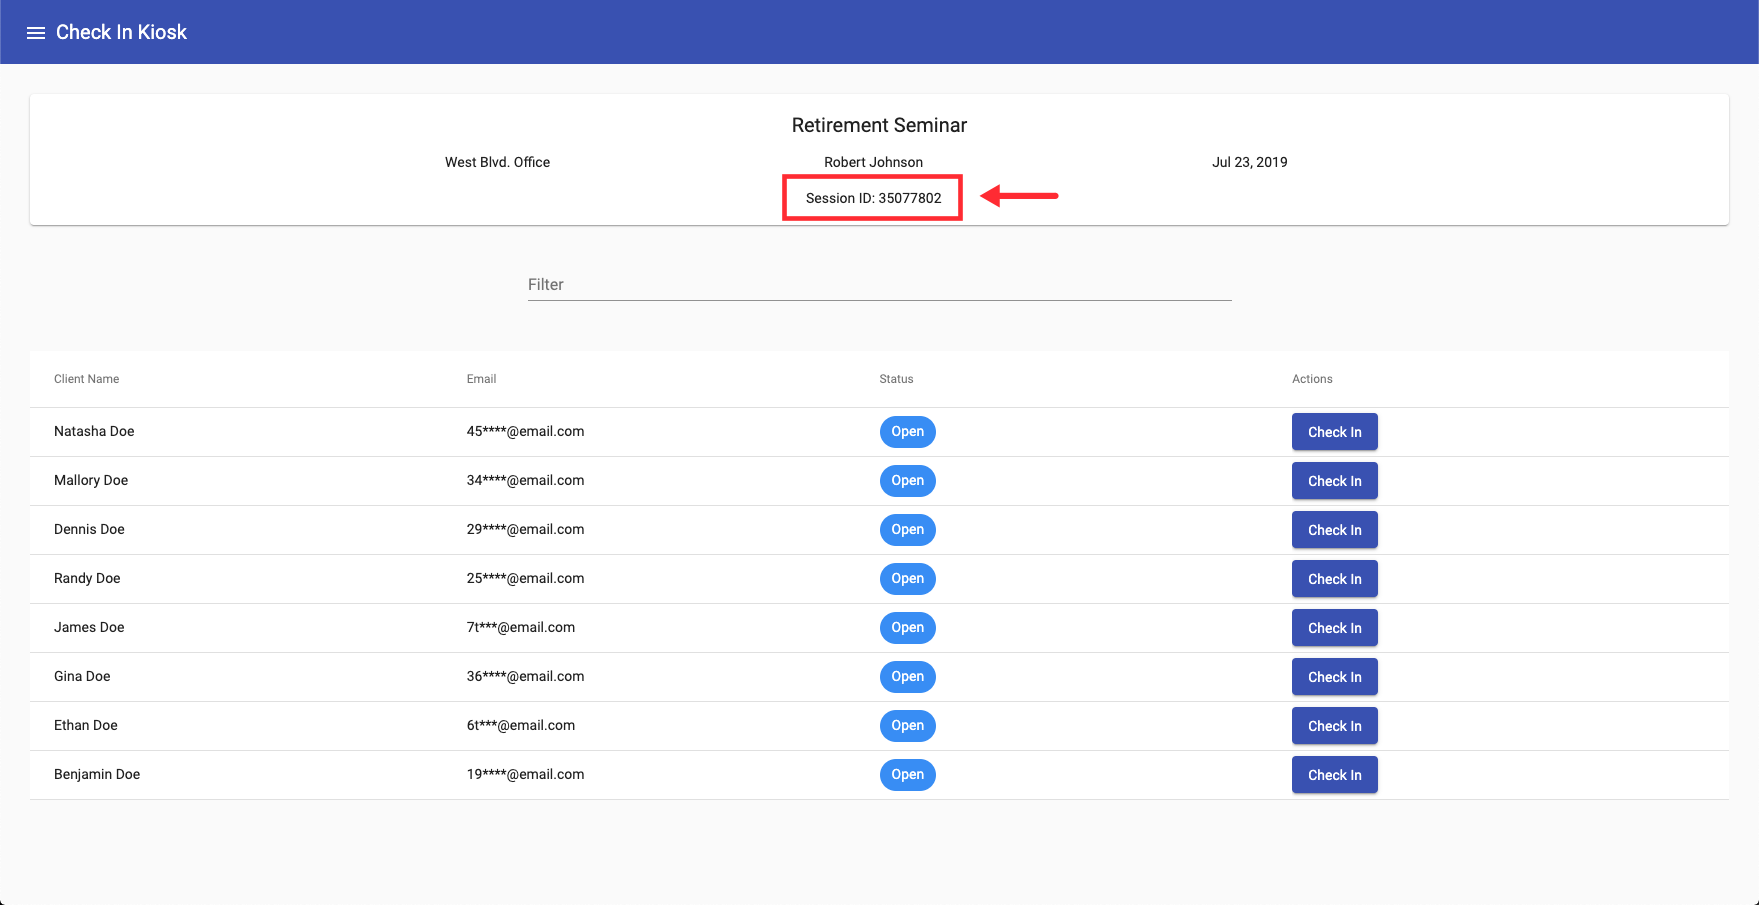
In the upper section of the Check In screen you'll find:
- The class name
- The location where the class session is taking place
- The staff leading the class session
- The class session ID
- The date when the class session is taking place

The lower section of the Check In screen contains a list of attendees of the class session we selected as well as a Filter field where clients can enter their name or email to locate their appointment: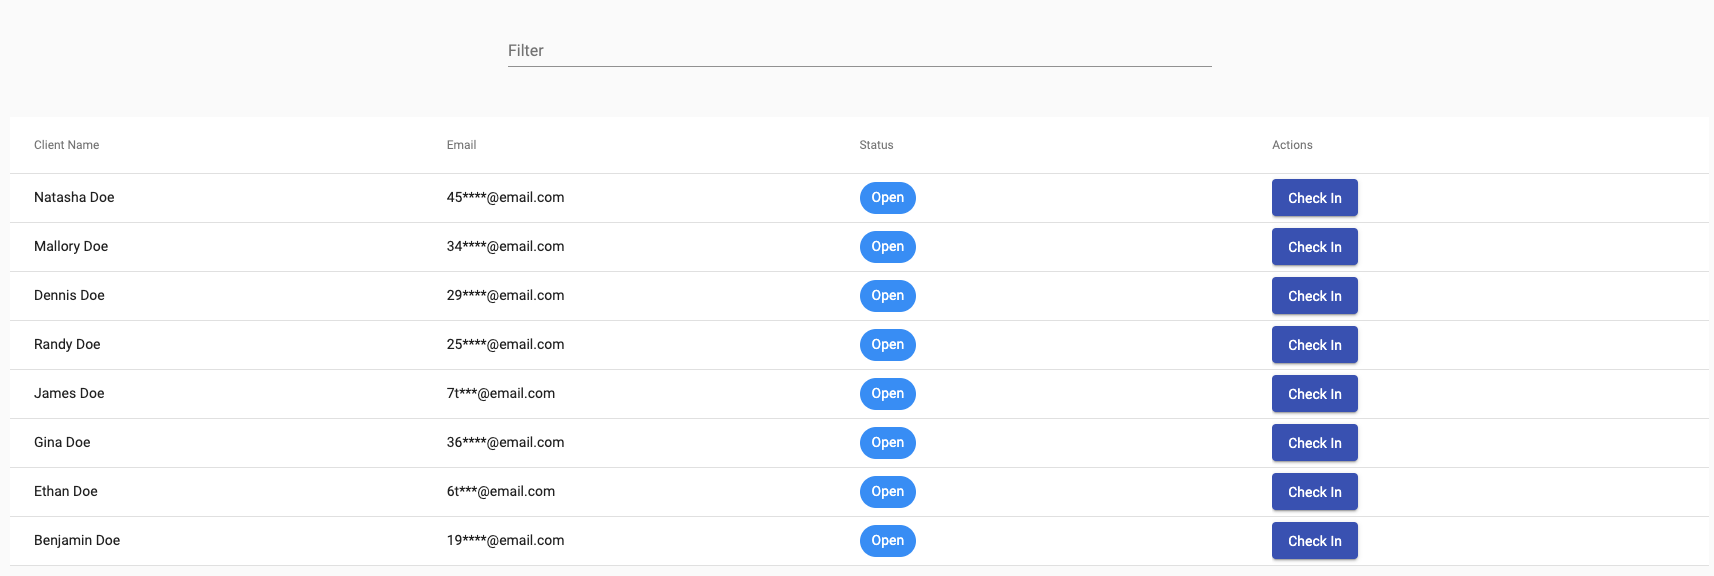
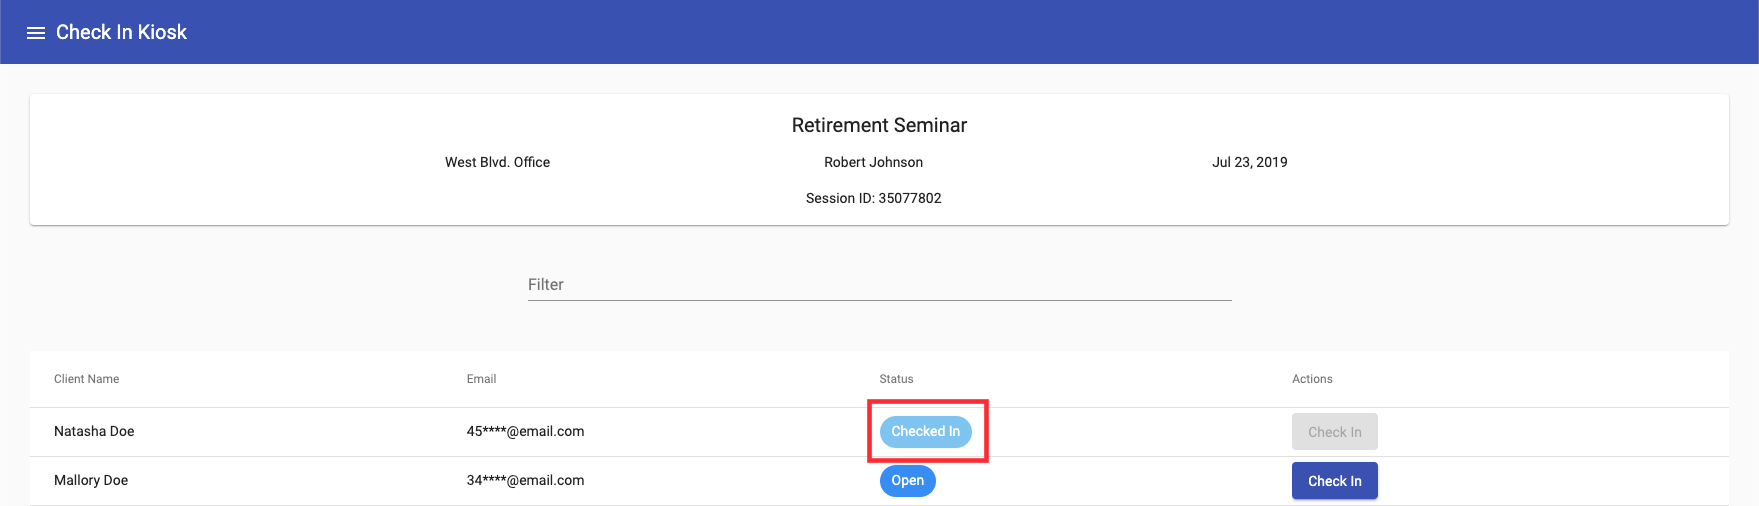
From the list of attendees, clients can click the Check In button next to your name to check themselves in:
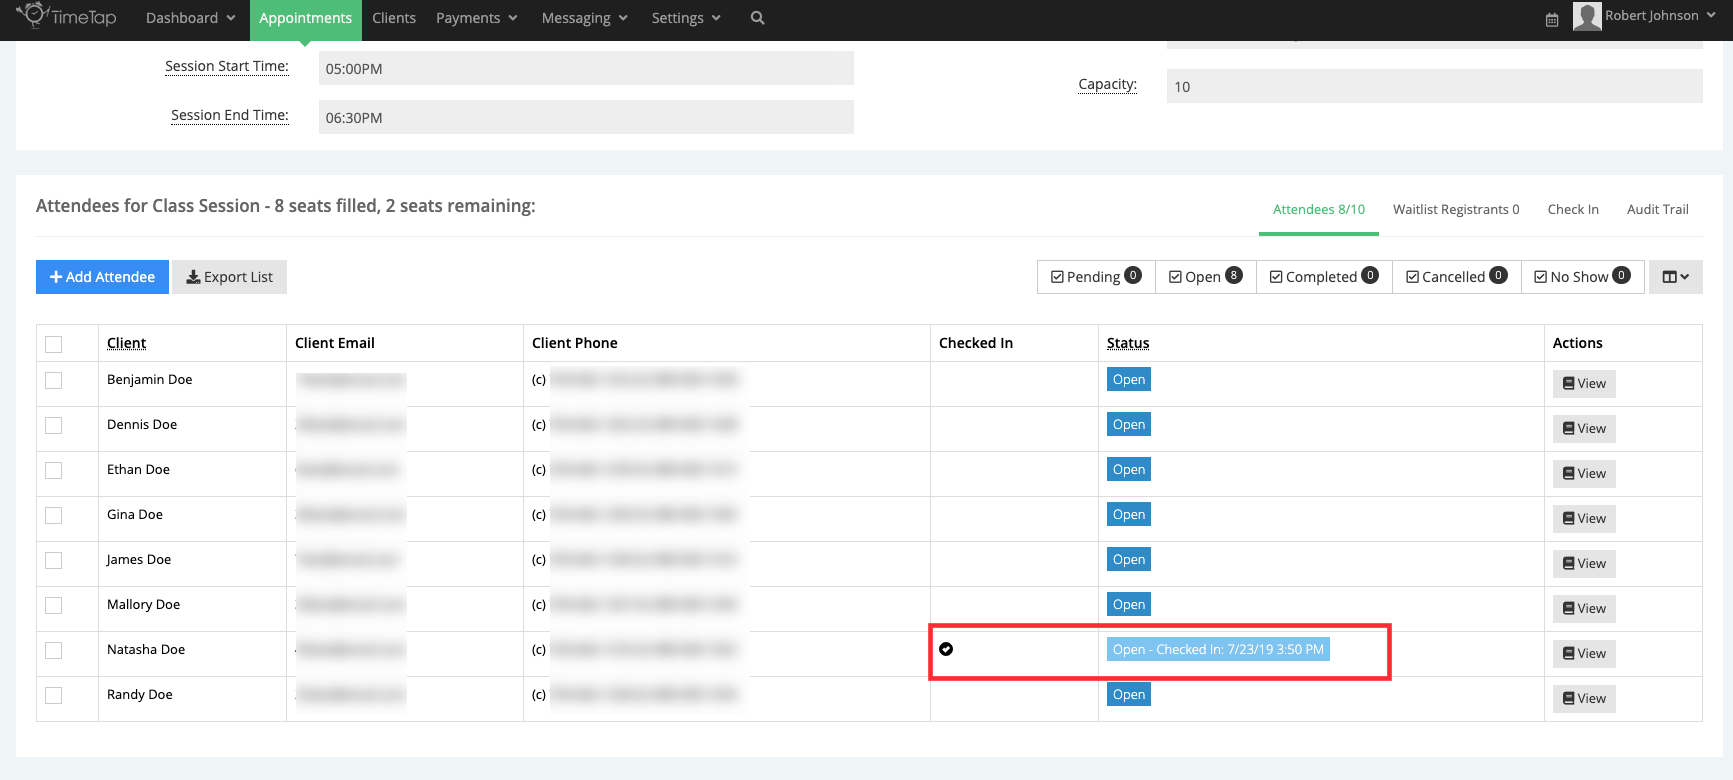
After the Check In button is clicked the status of the appointment will be changed from Open to Checked In, this is also reflected in the Class Session Details page page:
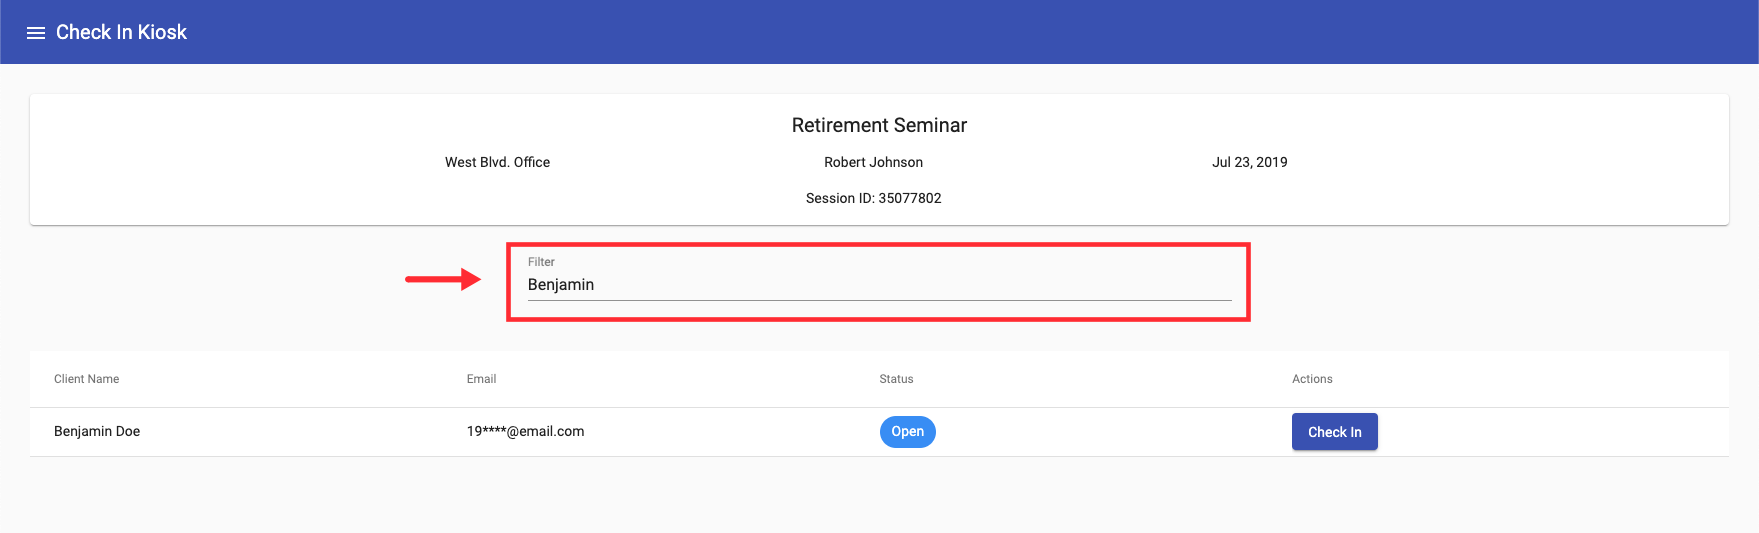
If you have a long list of attendees, you can ask your clients to enter their name or email address in the Filter field to find their name in the list of attendees:
Allowing clients to register on the check in screen is helpful if your class session is not full and you want to give clients the last minute chance to attend the class. Just keep in mind that a class session must have remaining spaces available in order to allow clients to register in the Check In screen. Begin by going to view the Class Session Details page and click the Check In tab in the lower section of the screen:
To allow walk in registrations, click the 'Edit' button in the Check In tab, check the box next to "Allow Walk In Registration" and click Save:

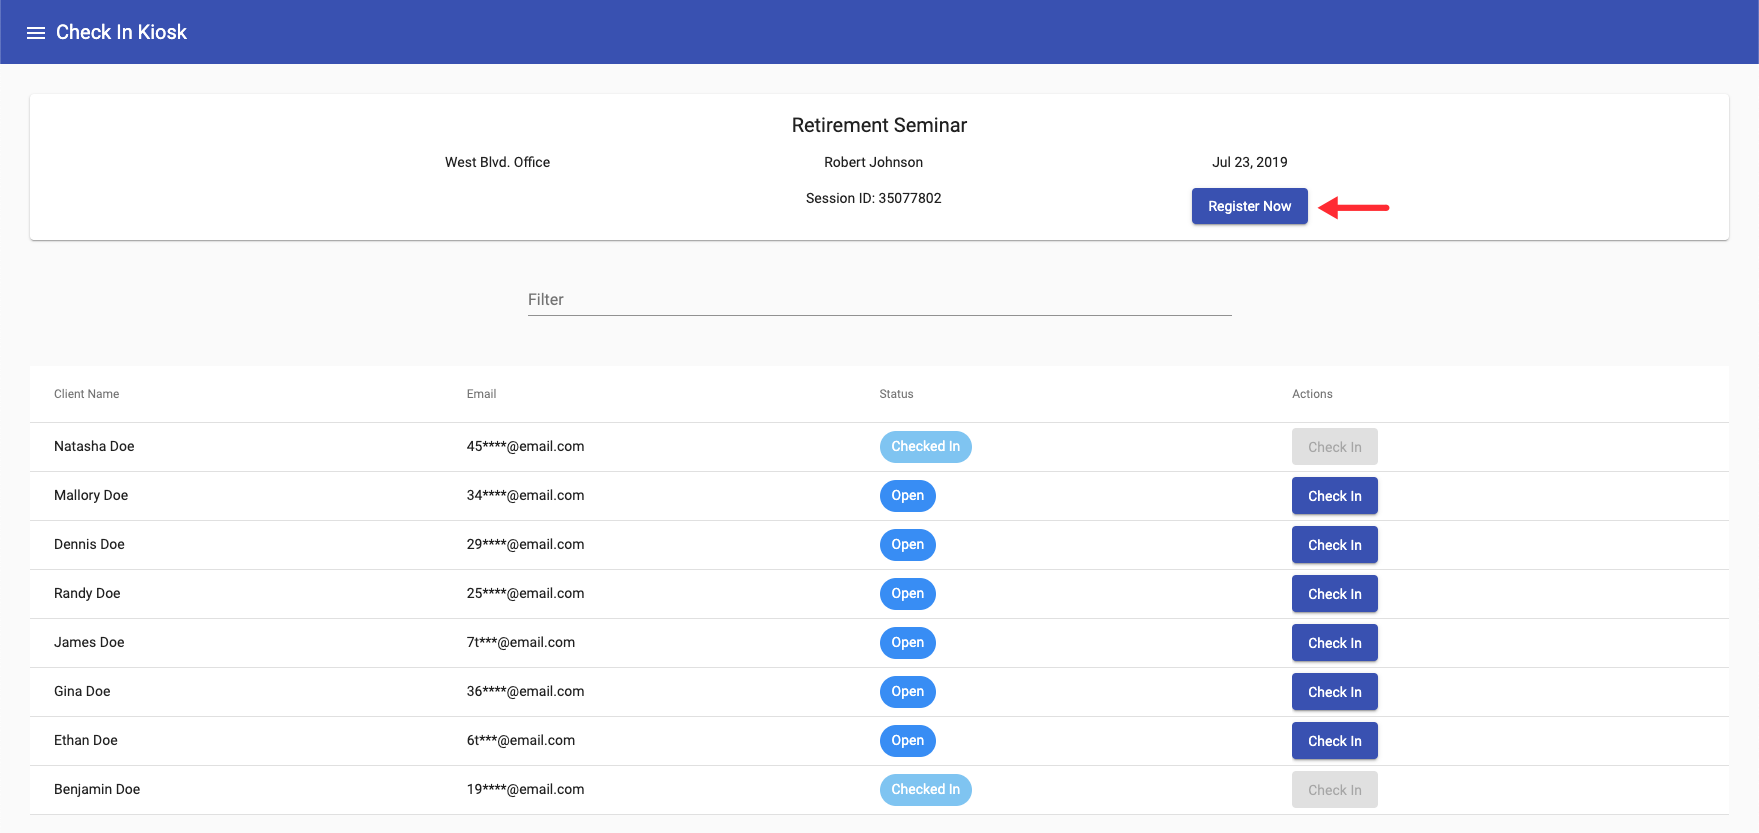
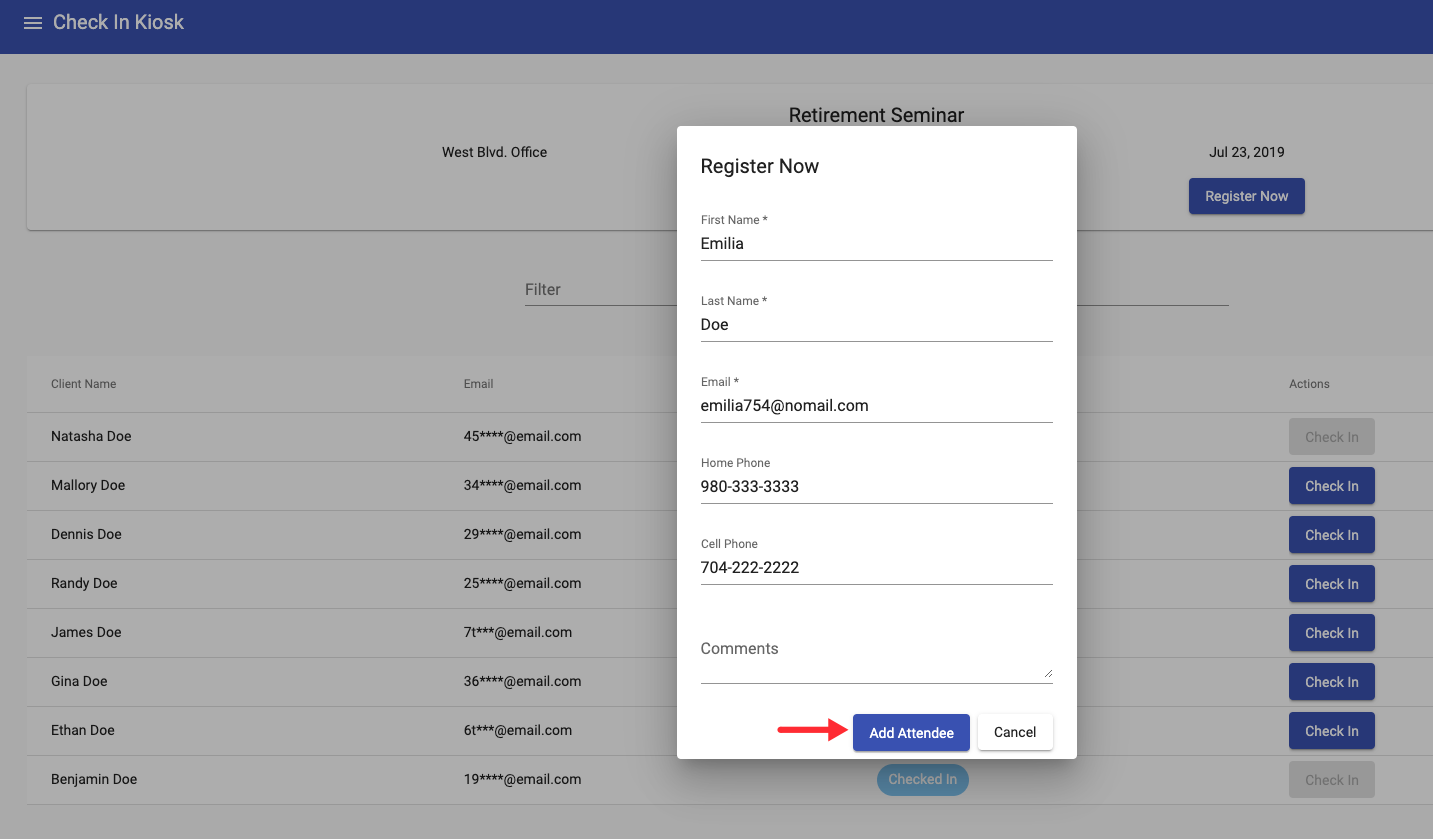
After the changes are saved, click the 'Launch Check In' button to launch the Check In screen and notice the 'Register Now' button in the class session details section. Clients can click this button to begin the registration process:
When the 'Register Now' button is clicked a new window will appear where clients will be asked to enter their information and any custom fields that may have been assigned to the class. After all the required fields are completed clients will have to click 'Add Attendee' to register for the class session you chose:
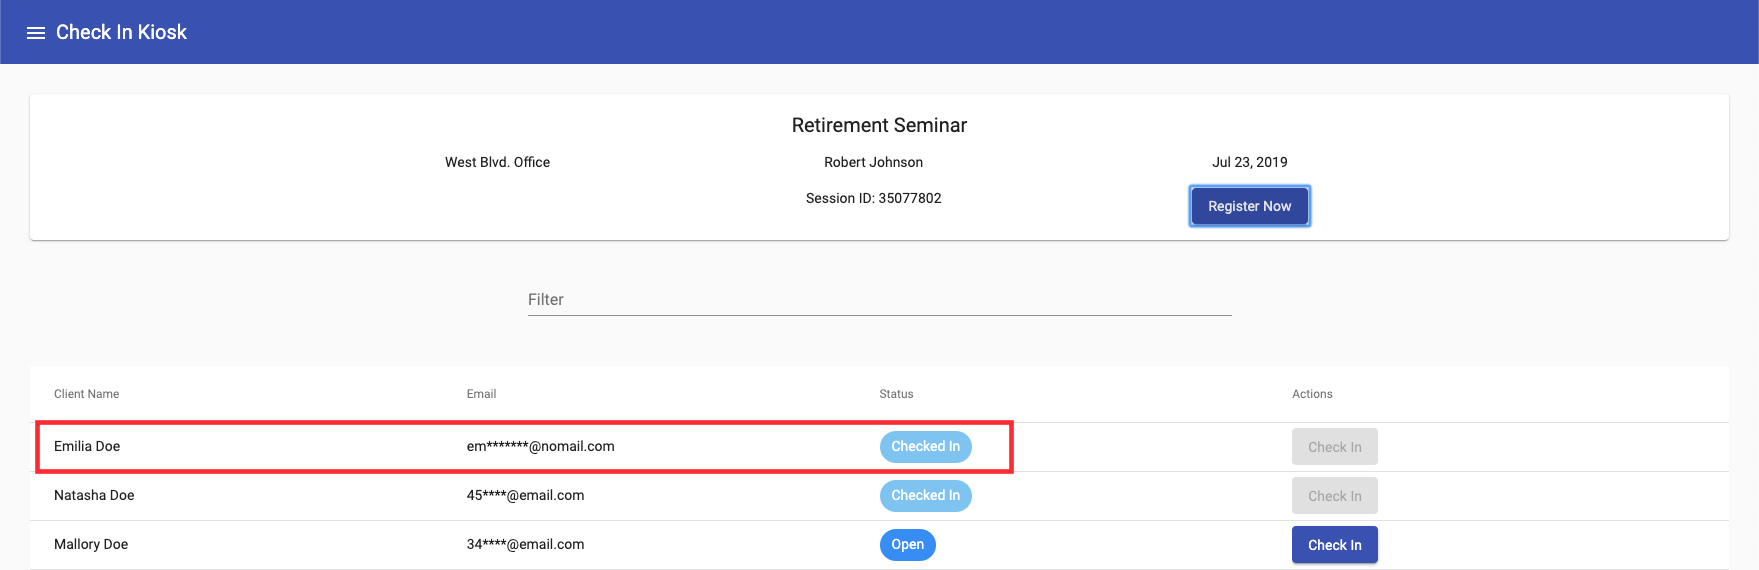
Next, the client will be added to the list of attendees and and he/she will be automatically checked in:
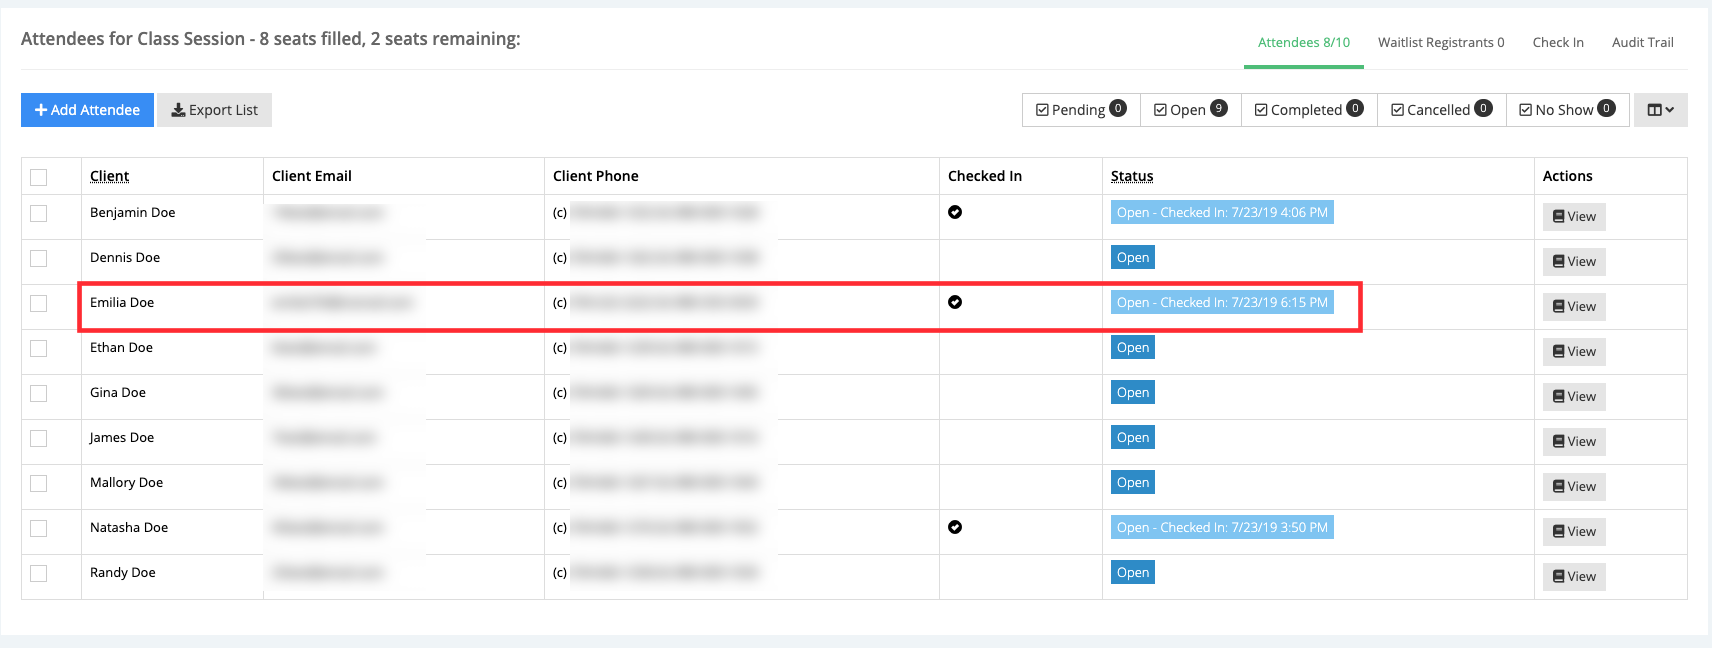
The client's name can also be seen in the list of attendees when viewing the Class Session Details in the backoffice:
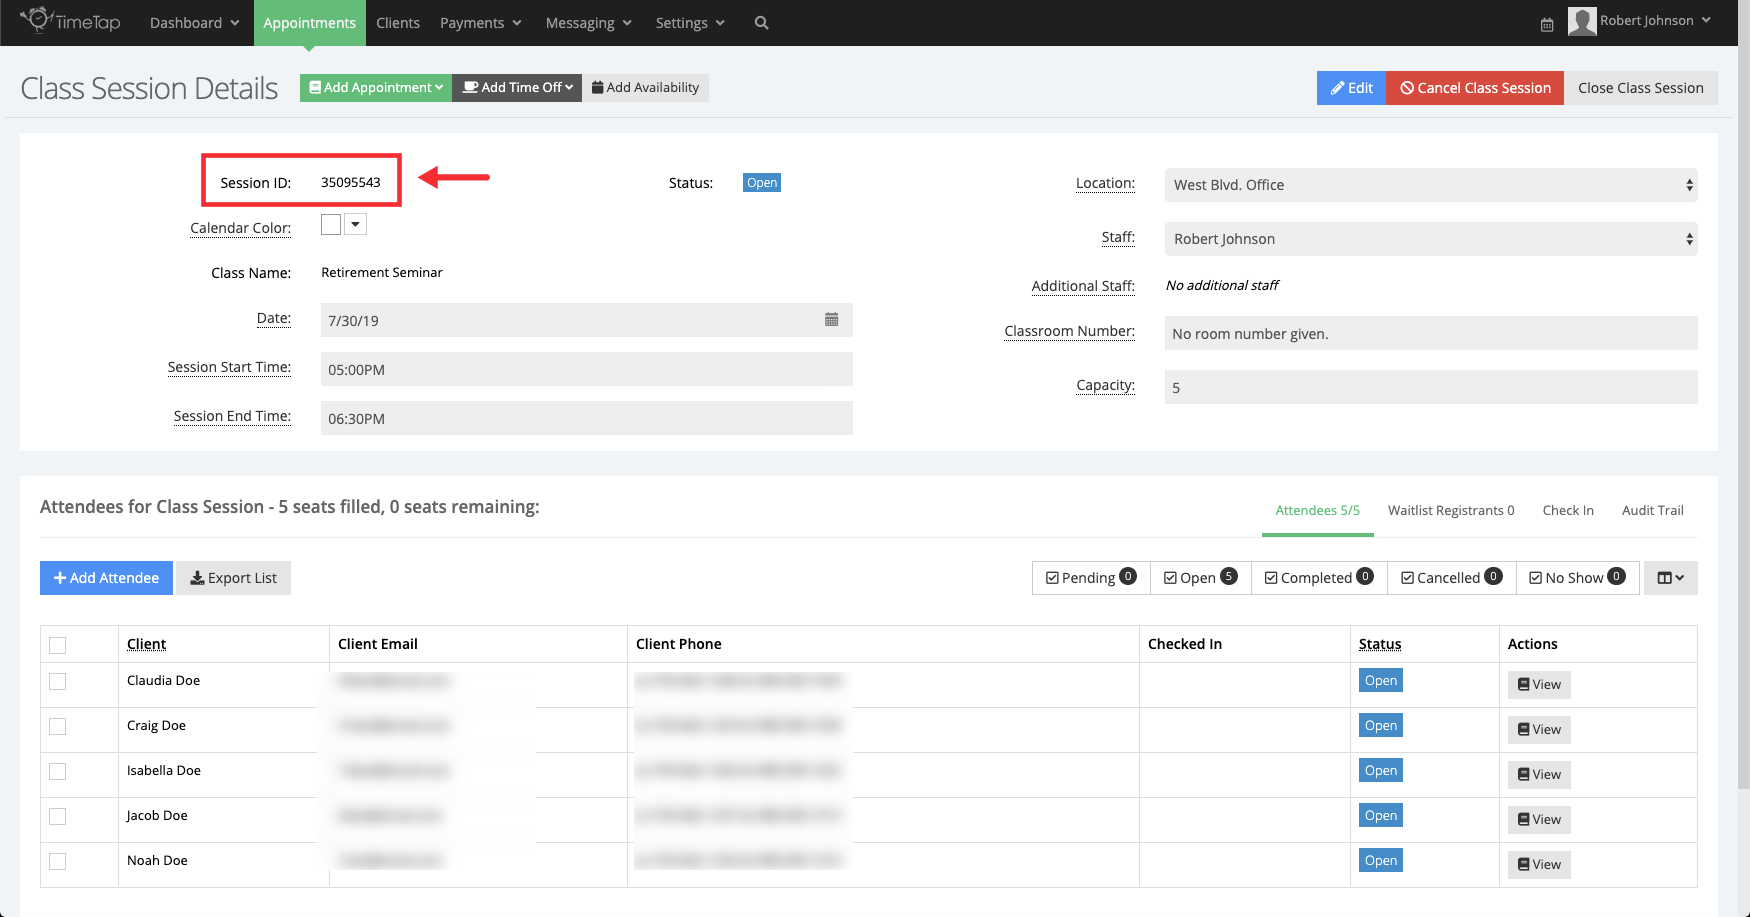
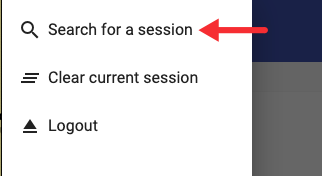
After your clients have checked in, you can search for a new class session in the check in kiosk and give other clients the opportunity to check in and register for a different session. Class sessions can be located using the Session ID number, you can locate this number in the left corner of the Class Session Details page:
While in the Check In Kiosk screen, click the Menu ( ) icon:
Click the 'Search for a session' option:
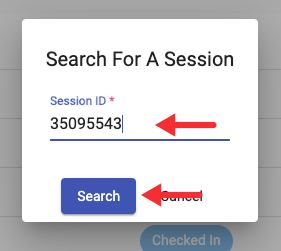
Enter the session ID in the corresponding field and click Search:
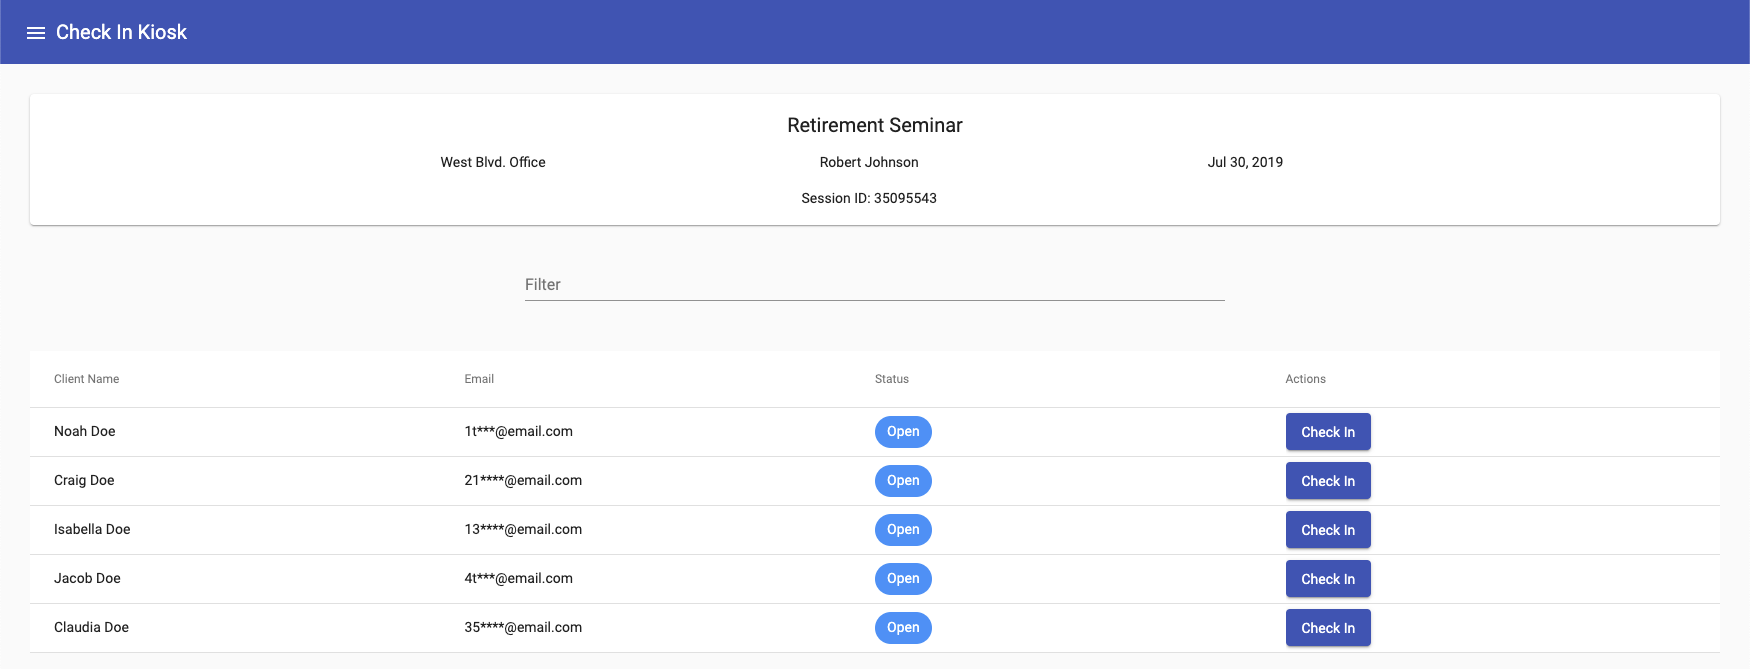
The Check In Kiosk screen will reload and the list of attendees of the session you searched for be displayed and clients will now be able to check in and register:
If after all your clients have registered you want to clear the Check In Kiosk screen, click the Menu () icon:
Click the 'Clear current session' option:

The Check In Kiosk screen will clear and you'll be given the option to search for a new class session:

If after clients are checked in you want to log out of the Check In Kiosk, click the Menu () icon:
Click the Logout option:
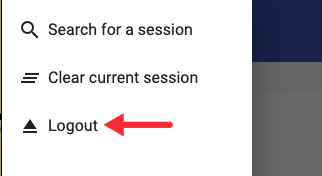
You'll be logout off the Check In Kiosk screen. You can log in to the Check In Kiosk using your TimeTap credentials to search for a class session: