Adding a Variable Description to Forms
The purpose of the form field Variable Description is to give you the opportunity to enter data that should be set on the form at the time you are sending it out to your client(s). Through this field you are able to program multiple default values that you can select from as you're sending, or when you're sending out the form you can choose the value on the fly.
This field comes into use when you have a couple default messages to your clients and depending on their appointment or their situation you can base what content fills this field at the time of sending.
As we go through the set up of this feature we will use the following as an example: Lets say you have a service called Clinical Assessment and based on this appointment you will send your client a form laying out their Treatment Plan (which will be on of two things) - Treatment Plan 1 or Treatment Plan 2.
To get a quick refresh on how to add forms click here!
In this section we will cover the following:
Adding Variable Description Field
We have set up a form called Treatment Plan. On this form we want to add our description fields, variable description fields and our client form fields (consent check box, signature and date entry).
To add our fields we will click the Fields Tab followed by "Add your first field now"
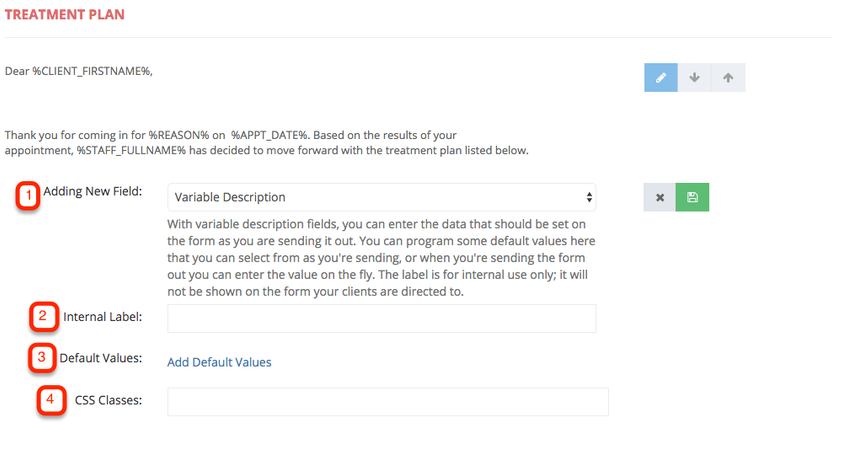
You will be giving the option to choose the new field you are adding. In this instance we have already added our description field and we will click the + sign to add a new field and we will select Variable Description as our new field:
- Adding New Field - We have selected the variable description field which allows us to offer different default value to attached to the form at the time of sending the form
- Internal Label: This is for internal use only and will not show anywhere from the clients perspective
- Default Values: When you click add default values there are the different "messages" you will choose to add to your form at the time you sent it to your client
- CSS Classes: If you would like to apply custom CSS styling to the filed enter this CSS class here
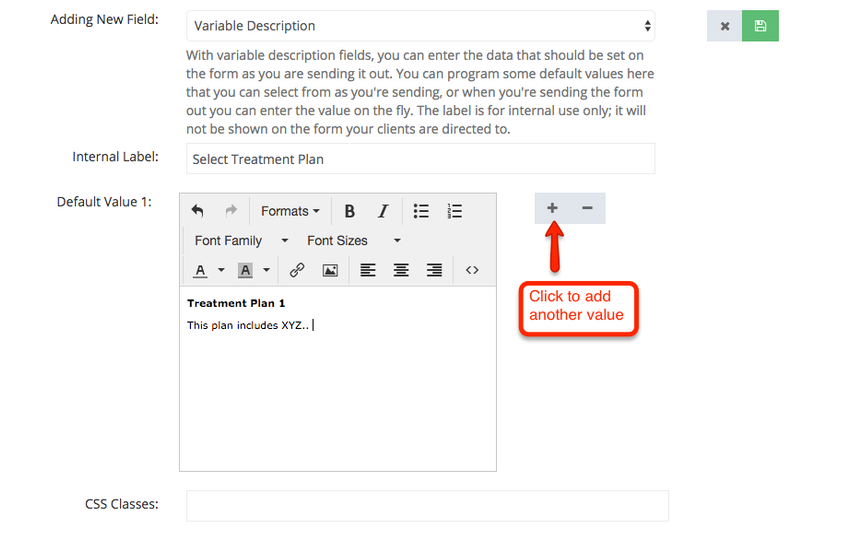
We will add our Internal Label as "Select Treatment Plan" and click Add Default Values to add our first default value:
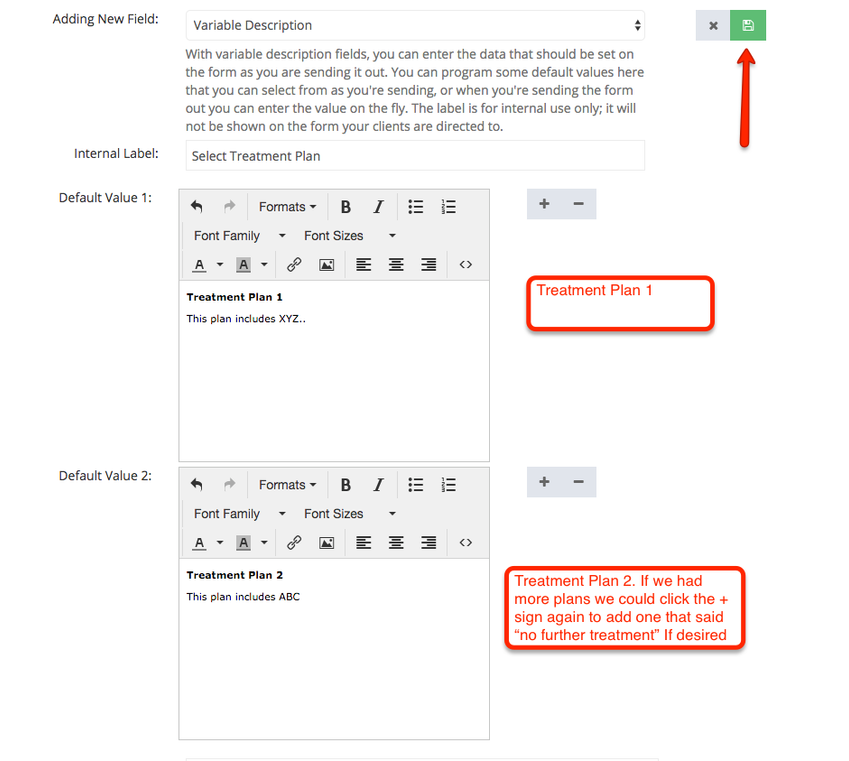
Once we have finished typing our Default Value 1 we will click the + sign to add another value. This second default value will outline our Treatment Plan 2. and we will click the save button to save this field.
Value Options Under a Variable Description Field
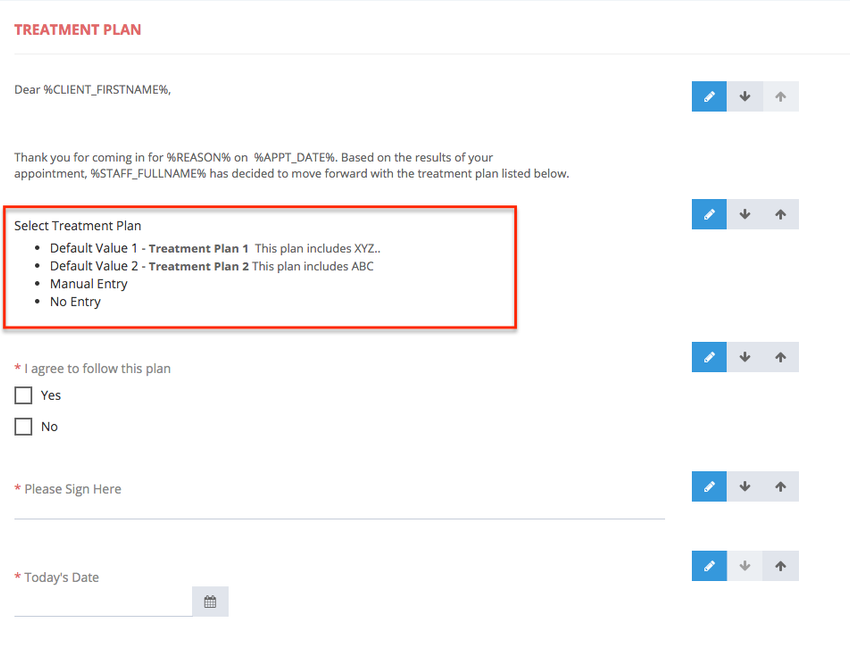
Now that we have saved our variable description field with the two treatment plans you will see an overview of options you can select at the time of sending the form.
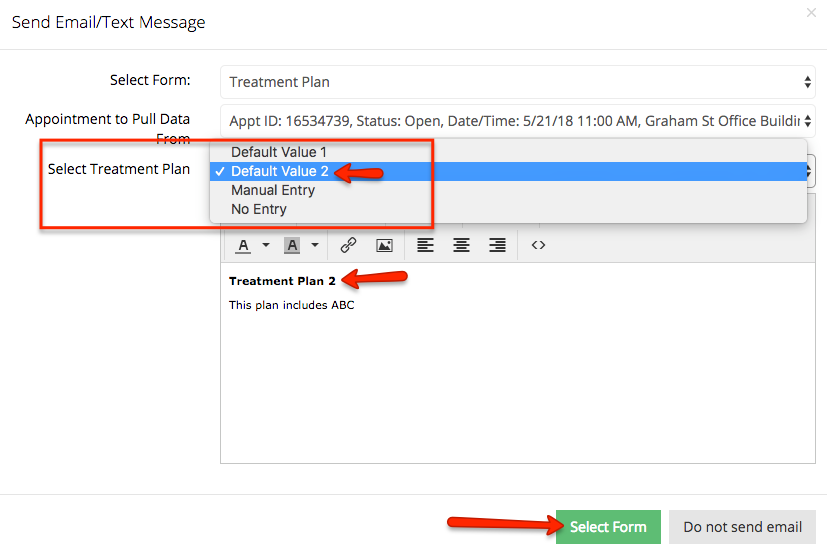
Under the Select Treatment Plan (Highlighted area above) you will see:
- Default Value 1 - Treatment Plan 1 (we created)
- Default Value 2 - Treatment Plan 2 (we created)
- Manual Entry - This option is for you to choose at the time of sending if your 2 default values do not portray the message you wish to share in this section of the form
- No Entry - You can choose to select No Entry at the time of sending the form if you wish to omit/hide this section of the form from your client. Perhaps the Treatment Plan portion of the form does not apply to that particular client.
Sending a Form with a Variable Description Field
Now that we have created a form it is time to put it in action and sent to our clients.
For a refresher on how to send forms to clients please click here. For this example we are going to start within a clients Appointment Detail page and send the form from there.
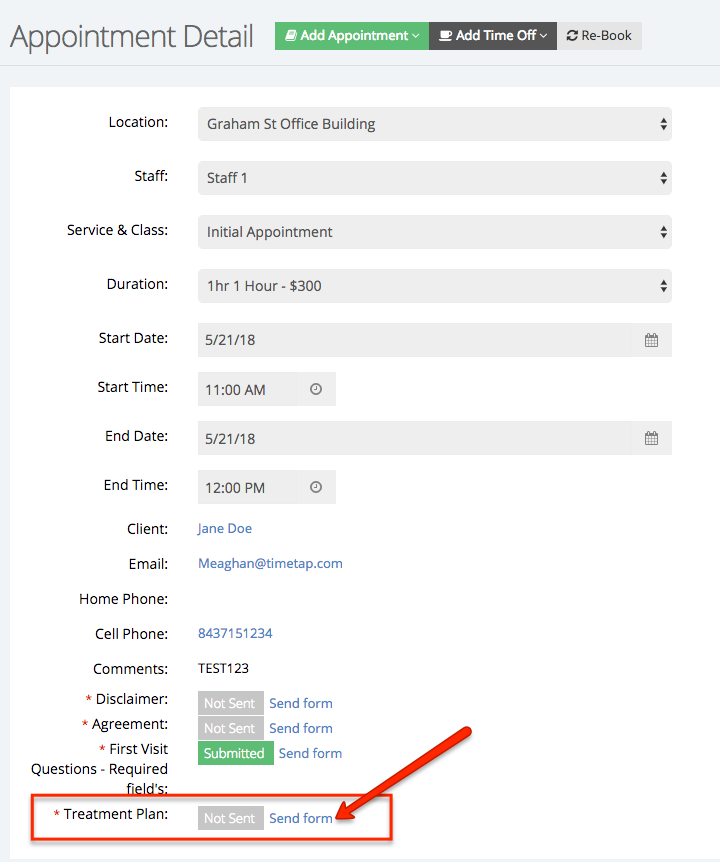
On the appointment screen I will go to calendar and look at May 21st. I will double click on that appointment to open the Appointment Detail page. Once i am on the page I will look beneath the client information and find the form labeled "Treatment Plan." I will then click Send form:
When I click on Send form a pop-up window will appear. I will then verify that I am selecting to send the form labeled "Treatment Plan" for the appointment on May 21st at 11am. It will also ask you to Select the Treatment Plan (the variable description field). We will chose Default Value 2, which in our example will put our Treatment Plan 2 message. After we select our treatment plan we will click the green Select Form button.
On the next window your email template will be automatically generated with with the correct form link to send to your client and you will click Send Email:
What the Client Receives
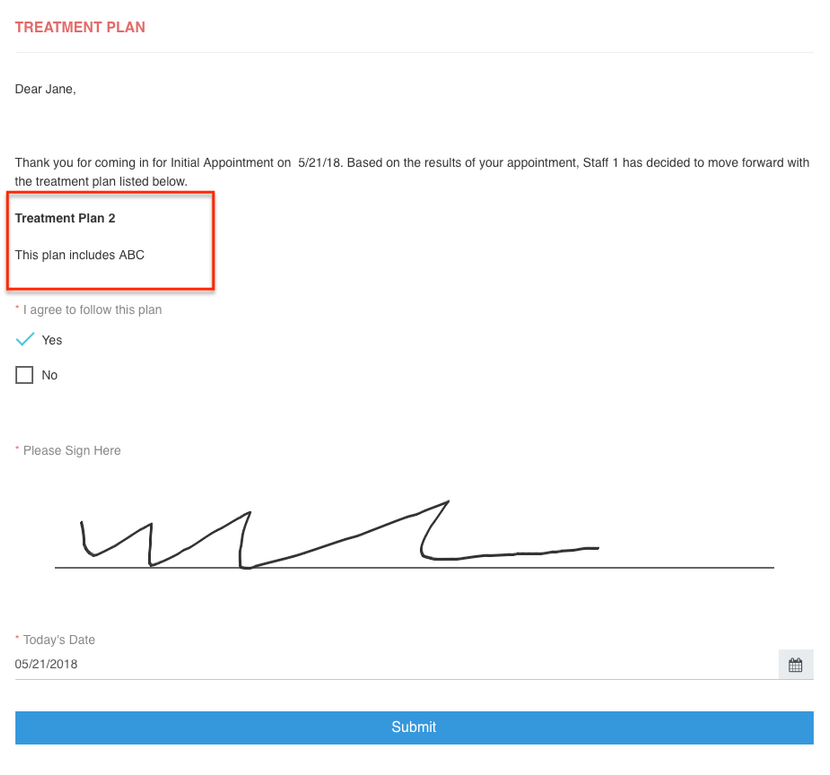
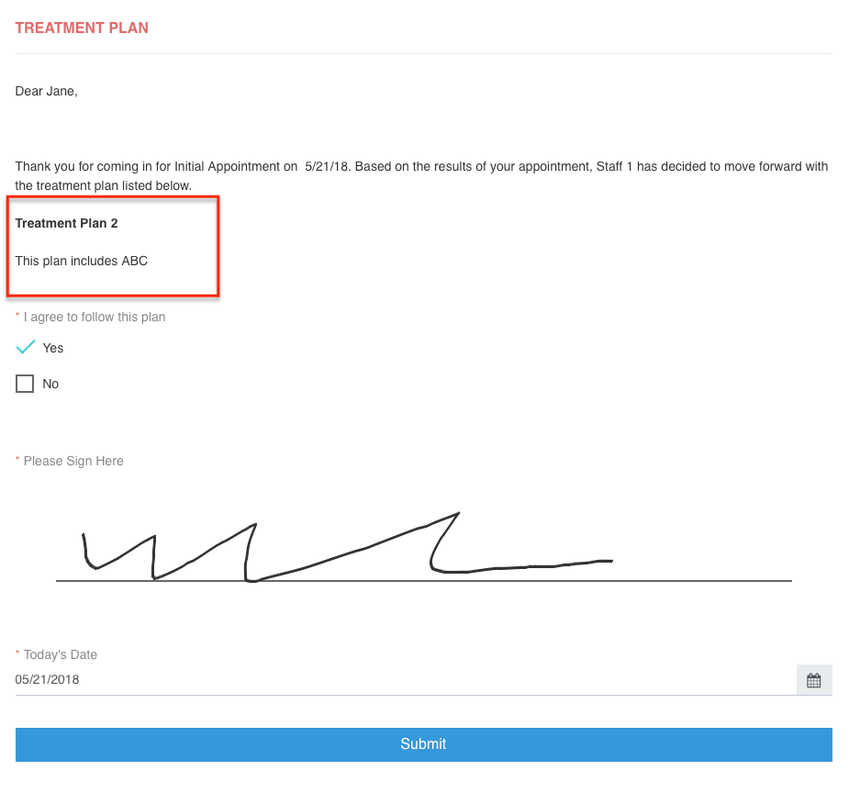
Once the staff member sends the form email the client will receive an email with the form link to review and fill out. When the client clicks the link they will see the treatment plan that was selected at the time of sending, in this case Treatment Plan 2 will show where we have designated the variable description to be.


