Changing the appointment status for class attendees
- Lucy Barber (Deactivated)
When your class session begins or after it's over, it's easy to quickly go through your attendees list and change the status for your clients' appointments who were enrolled in that class session. From your attendees list, you can mark clients as either having completed the class session or as a no show if they didn't make it.
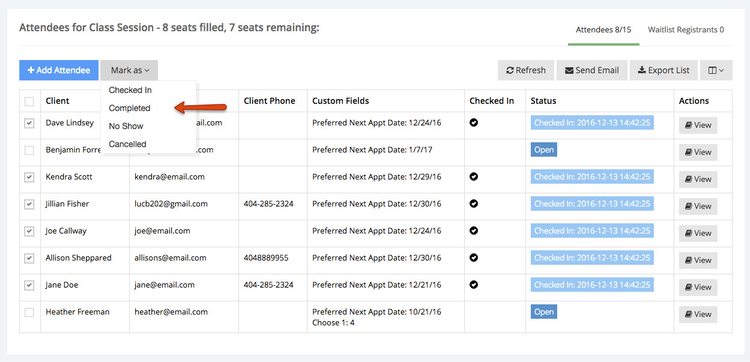
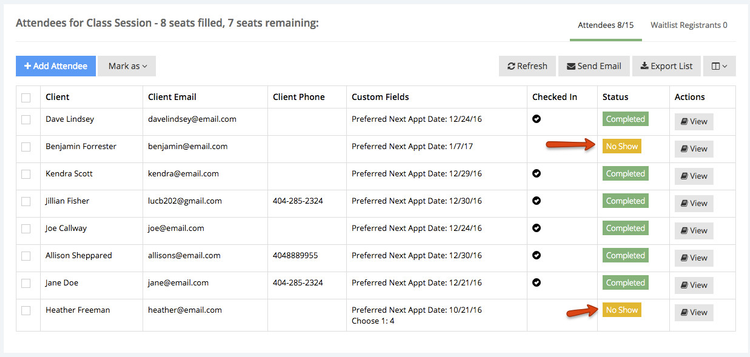
The Attendees list that is on the class session details screen is the easiest way to do this for a class because it compiles all attendees for a session into one view:
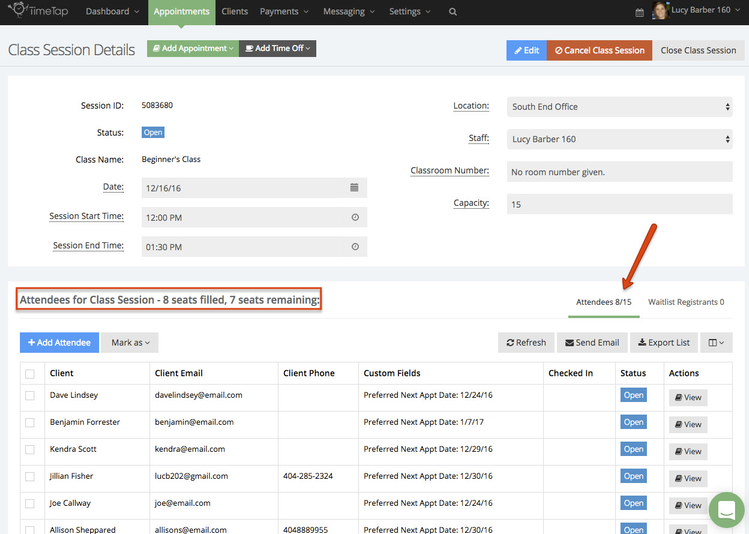
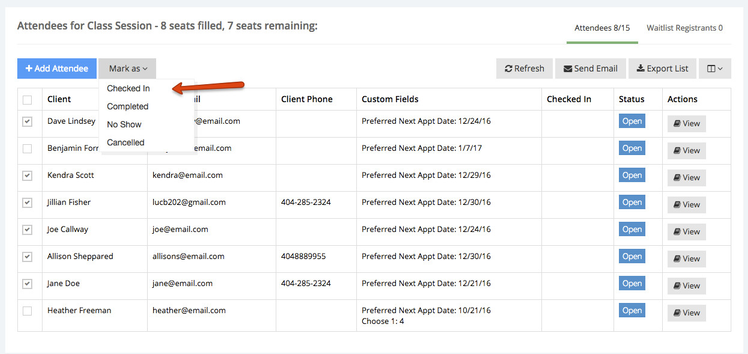
Let's say that the class session in the screenshot above just started and 6 of my 8 registered clients on the attendees list have shown up. I can check off those six clients, click the "Mark as" dropdown and select "Checked In":
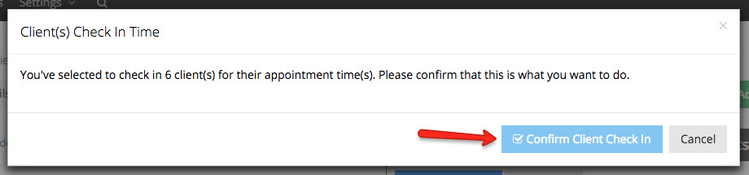
You'll first be asked to confirm that you really want to mark the selected clients as checked-in:
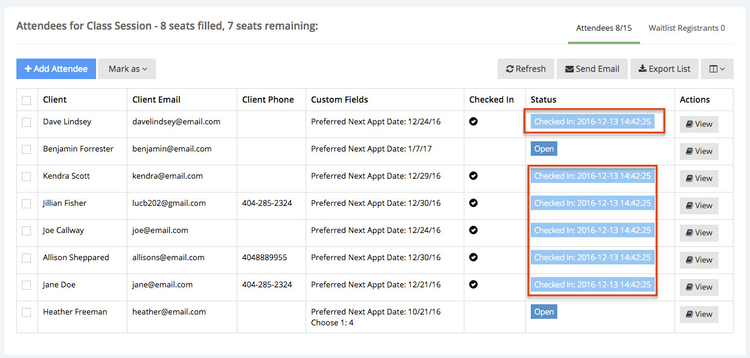
Once you confirm that you do want to mark the clients as checked in, your class session details page will update so that the attendees list reflects the status change:
After the class session has ended, I can come back and mark all of my clients who came to the class session as completed. In this example, I will mark the six clients who I had marked as "Checked In" as "Completed":
I'll get a small confirmation window to make sure that I really want to mark all these appointments as completed. On here I can check off whether I want to send the clients an appointment completed email as well as enter in an appointment completion note which will be inserted into the email:
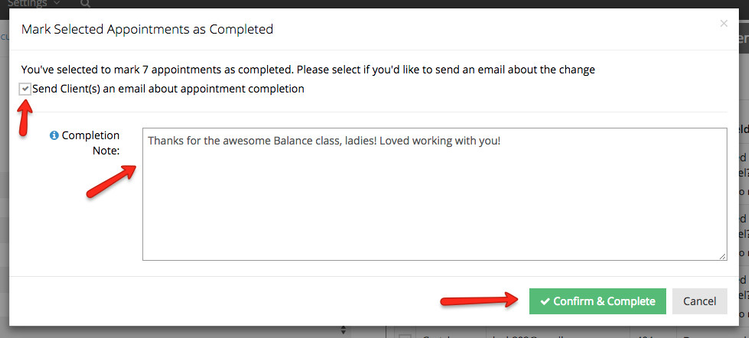
Please note: because you are marking multiple clients as completed at once, you won't have the option to edit the email before sending it out to your clients. If you want to edit the individual appointment completed email that gets sent to your clients upon marking an appointment completed, I recommend going and marking the appointment as completed from the appointment detail page.
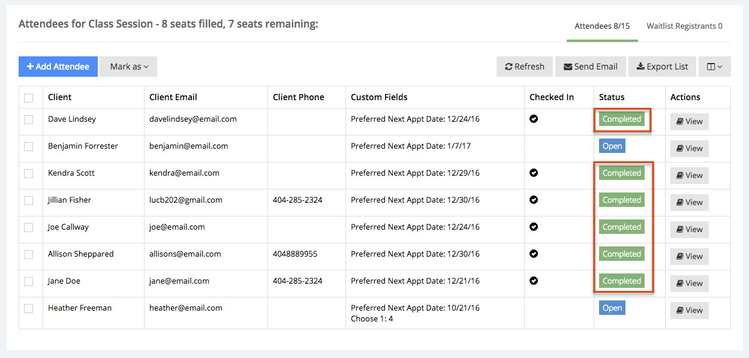
Once you confirm that you want to mark the appointments as completed, you'll be returned to the Class Session Details page where your attendees list will be updated with the new status that was applied to each registered attendees appointment:
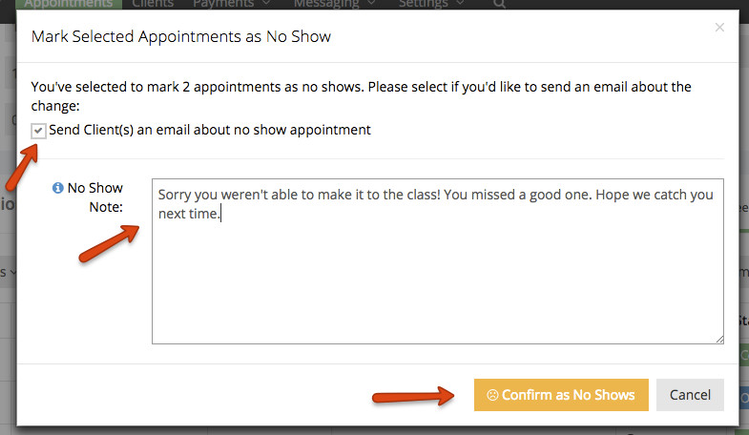
The other two appointments on my attendees list is for (Heather Freeman and Benjamin Forrester) were no shows for the class session. To mark them as a no show, I will just check off the checkbox next to her name, click the "Mark as" dropdown and select the "No Show" option:

This will give me a confirmation window to confirm I want to mark the selected appointments as a no shows. I can also select whether I want to send the client an email about the no show and enter in a no show note:
Once I confirm the clients as a no show, the attendees list will again update on the class session details screen to show that the clients were no shows:
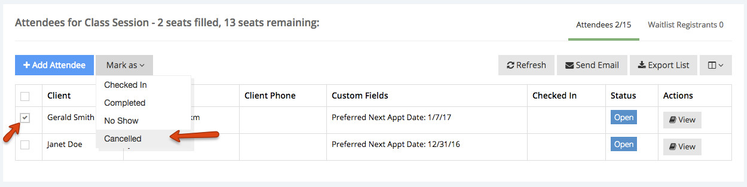
I can also mark clients on my attendees list as "Cancelled". To do this, I would just select the checkbox to the left of their name, click the Mark as dropdown button, and select the option for "Cancelled":
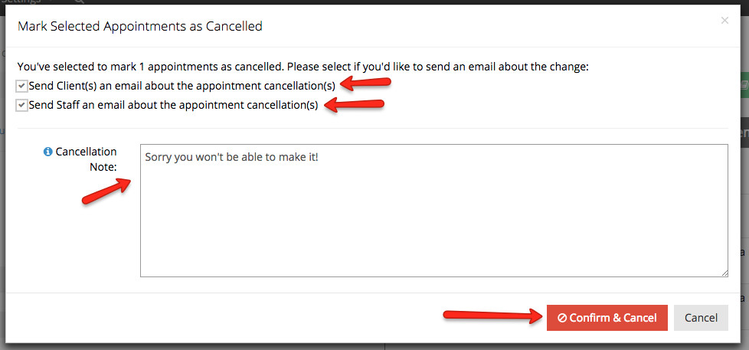
This would give me a small confirmation window to confirm I really wanted to mark this attendee as cancelled. It will also give me the option to send out the appointment cancellation email to my clients and/or my staff as well as an area to enter in a cancellation note:
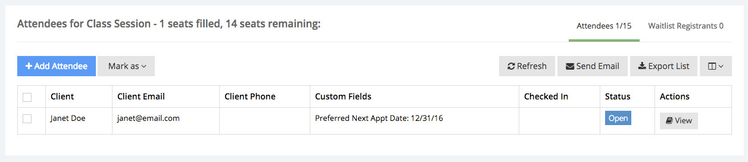
Once I confirm and cancel the registered client's appointment, I'll see the attendees list update. You'll notice that the cancelled appointment is no longer listed on the attendees list. This is because with the appointment being cancelled, the client is no longer considered an attendee of the class session, freeing up their seat for someone else to take:
If you have other questions on how to categorize appointment for class session attendees or just questions about appointment statuses in general, please feel free to reach out to our support team and we'd be happy to answer any questions you have.