Add and Edit Custom Booking Sites
- Elvis Merino (Unlicensed)
- Joel Kearney
In the following example we'll assume that Mark Jones is a tutor who offers tutoring appointments for two different subjects, chemistry and English. Mark offers his appointment at a tutoring center and via Skype. Mark wants to invite a specific group students to book appointments with him for Chemistry tutoring only at the tutoring center. He could distribute the service's private URL but his students would see the tutoring center and Skype as the options in the location panel in the booking flow. Mark could also share the tutoring center's private URL but all other staff available at this location will appears as options in the scheduling flow. We'll create a dedicated booking site where students can book chemistry tutoring session with mark only at the tutoring Center.
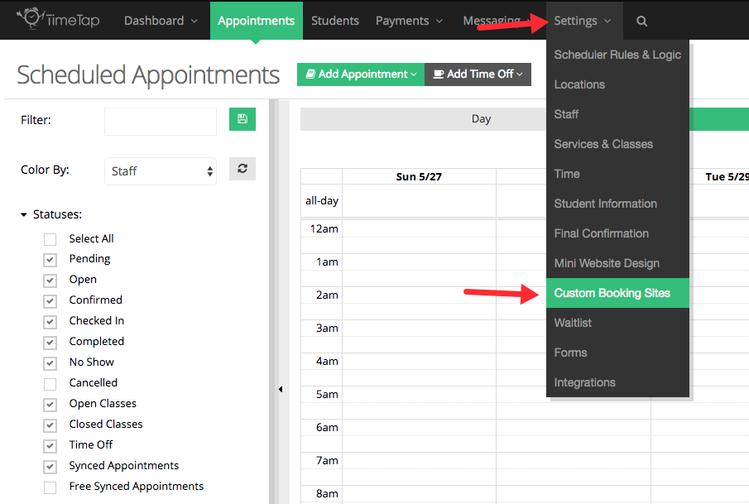
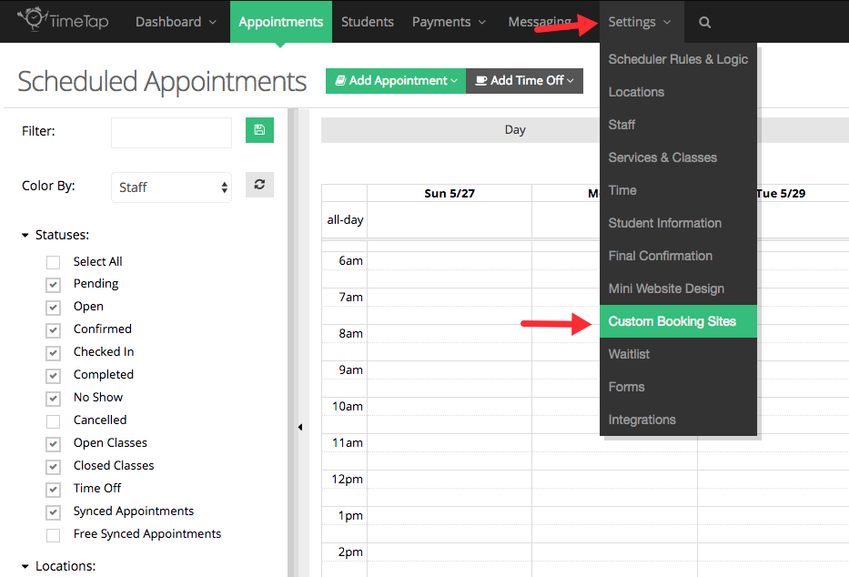
We'll begin by going to Settings > Custom Booking Sites:
Once in the Custom Booking Sites page we'll click the Add New Booking Site button:

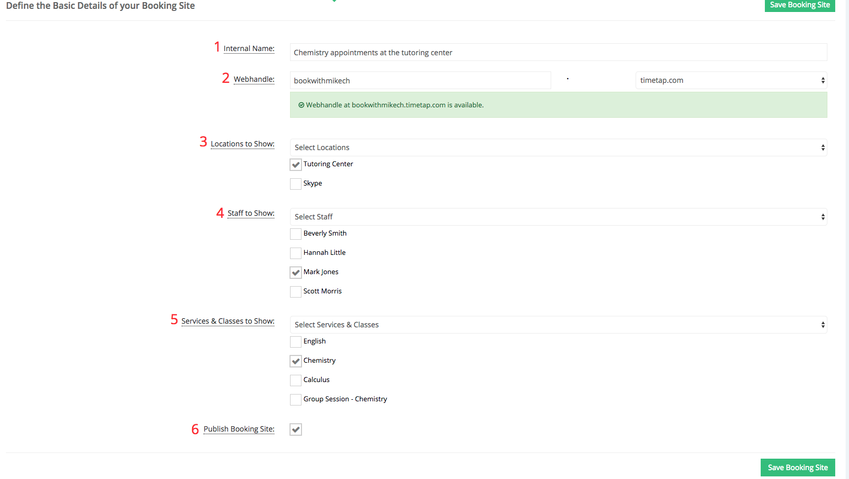
After the Add New Booking Site button is clicked we'll be taken to the Add New Booking Site screen - this screen is composed of the following fields:
- Internal Name: The internal name is how you will reference and identify the booking site while logged into the back office. This name is not displayed to your clients.
- Webhandle: This is the dedicated link where the booking site will be available. If you're on a Business level plan, you will be able to customize it.
- Locations to Show: This where you select if you'd like to show all locations for booking or just select locations on your booking site.
- Staff to Show: This is where you select if you'd like to show all staff for booking or just select staff on your booking site.
- Service & Classes to Show: This is where you select if you'd like to show all services & classes for booking or just select services & classes on your booking site.
- Publish Booking Site: Check this checkbox if you want to allow clients to book at this link. If you're staging it and don't want to open it up for booking quite yet, uncheck this checkbox.
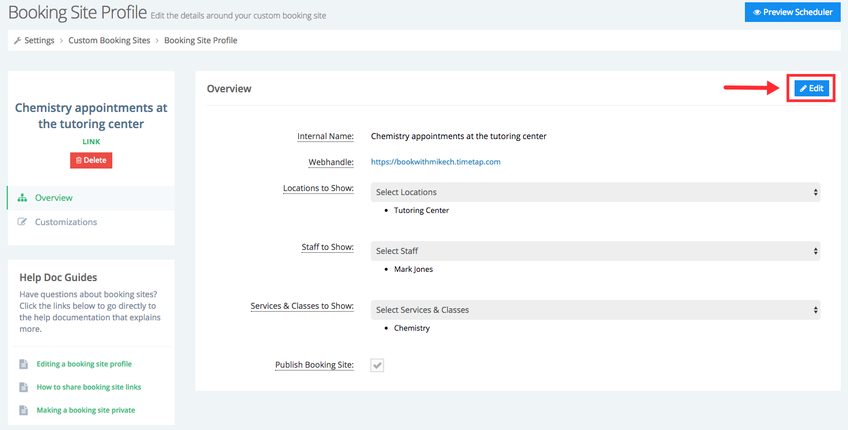
in the example below I labeled assigned the internal name "Chemistry appointments at the tutoring center", assigned a vanity URL BUSINESS LEVEL FEATURE, selected only the tutoring location, selected Mark as the only staff in the booking site, chose to only show "Chemistry" as the only service available, and also chose to publish the booking site:
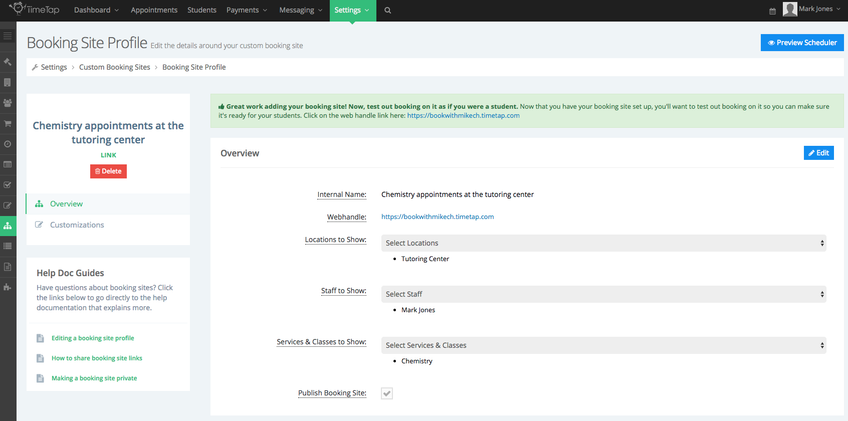
After all the criteria is selected we'll click the Save Booking Site button to be taken to the Booking Site Profile page:
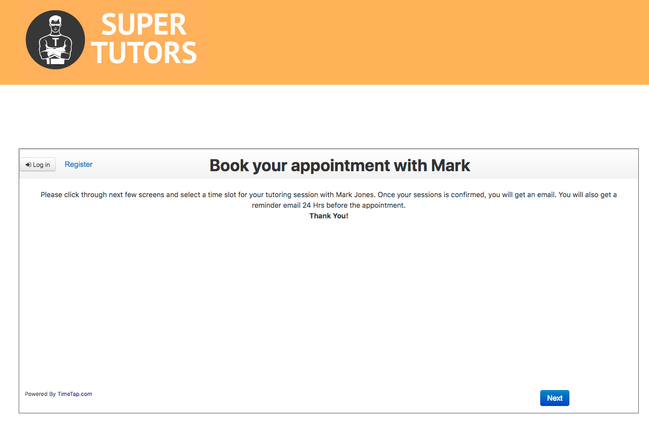
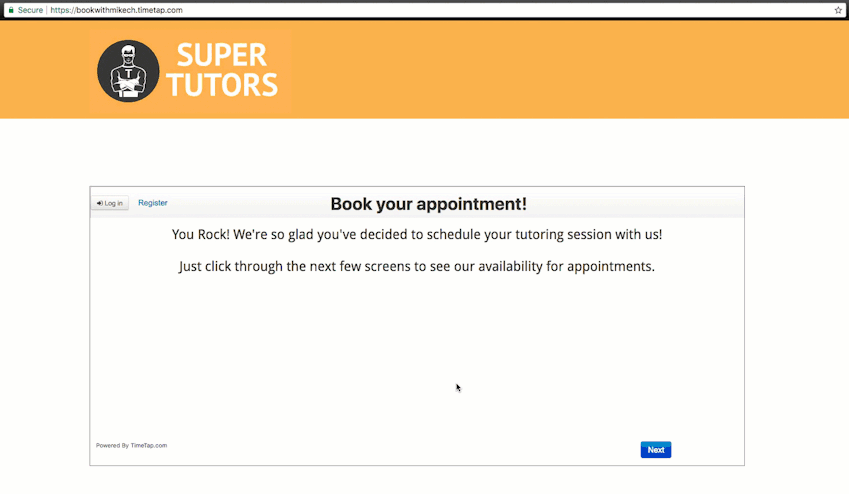
At this point if a student visits the URL for this booking site they will see the availability Mike has at the tutoring center and the only service option will be "Chemistry":
The layout of the custom booking site will maintain the changes applied to the account's mini-website in the Mini Website Design section.
In the next section we'll cover how to edit the booking site and make customizations.
After creating your custom booking site you can go back and make changes to it, you can select different locations, staff, service & classes, update the internal name, change the webhandle, and un-publish the site. To view your booking site go to Settings → Custom Booking Sites:
Once in the Custom Booking Sites page you'll see your booking sites listed, under the Actions column click the View button next to the booking site you want to edit:

While in the Booking Site Profile click the Edit button and in the Overview section to make changes to the internal name, webhandle, locations to show, staff to show, services & classes to show, or to publish or not publish the booking site:
To apply your changes click the Save button:

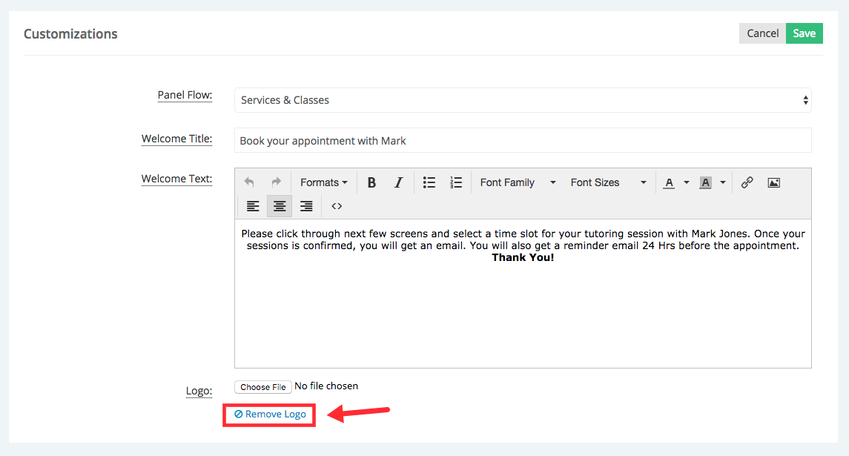
To make customizations to your booking site click the Customizations tab below the name of name of your site:
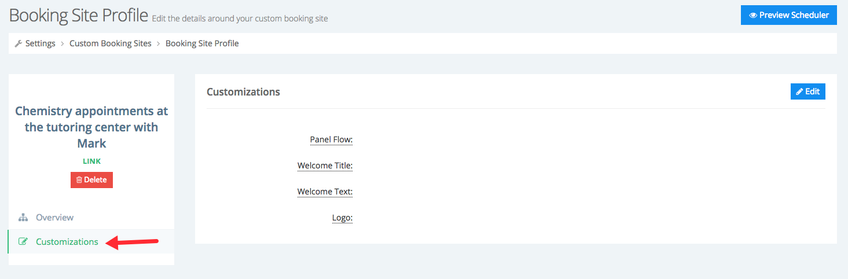
In the customizations tab you'll be able to customize:
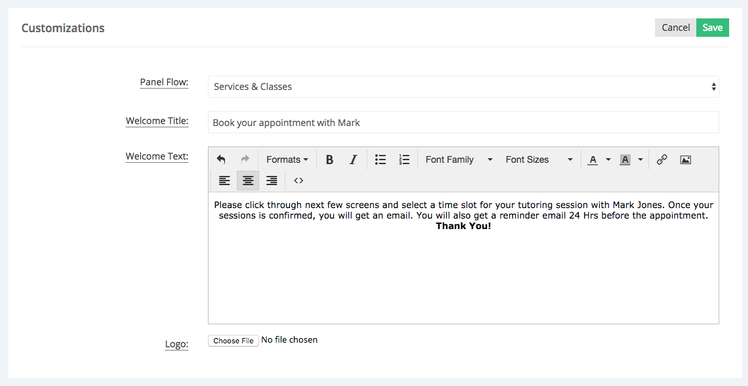
- Panel Flow: This sets the order of the screens on the scheduler at this booking site. By default a newly created booking site will have the same panel flow assigned in the Scheduler Rules & Logic section.
- Welcome Title: This sets the title that appears in the header bar on the first page of the scheduler. By default a newly created booking site will have the same Welcome Title assigned in the Mini-Website Design section.
- Welcome Text: This set the text that appears beneath the header bar on the first page of your scheduler. By default a newly created booking site will have the same Welcome Text assigned in the Mini-Website Design section.
- Logo: This appears as the main logo on this booking site. By default a newly created booking site will have the same logo assigned in the Mini-Website Design section.
Note: If you've chosen to display the panel to the left of your scheduler or the bottom section they will be displayed on all your booking sites.
In the example below I changed panel flow to only show the Service & Classes panel, replaced the default welcome title and text, but didn't replace the company's logo. Make sure to click Save to apply your changes to the booking site:
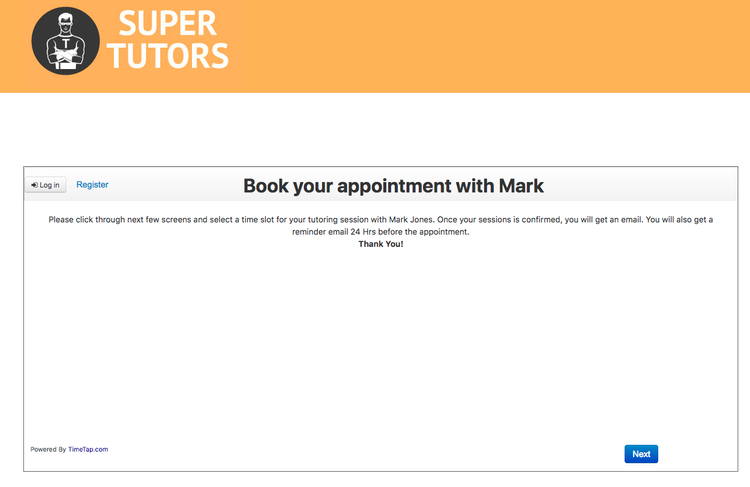
If I now go to the booking site I can see that the changes I saved are now applied:
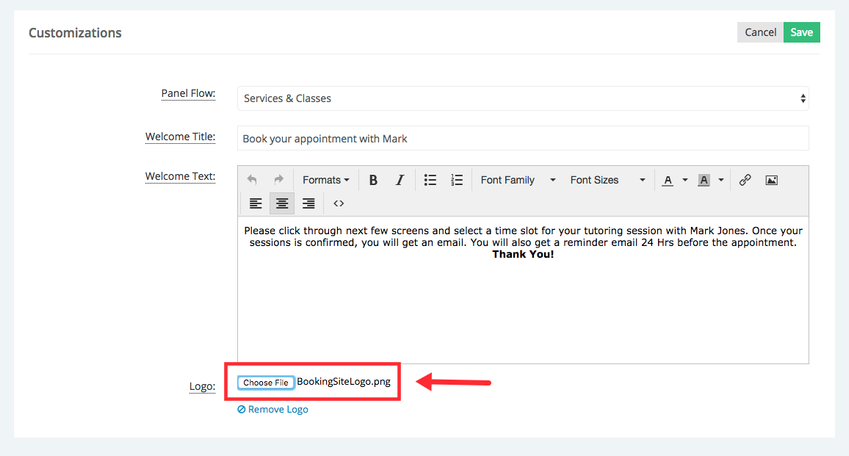
If I change my mind and now want to replace my company's logo in this booking site with a different image, I'll go back to the Customization tab, click Edit, and select the image, then click Save:
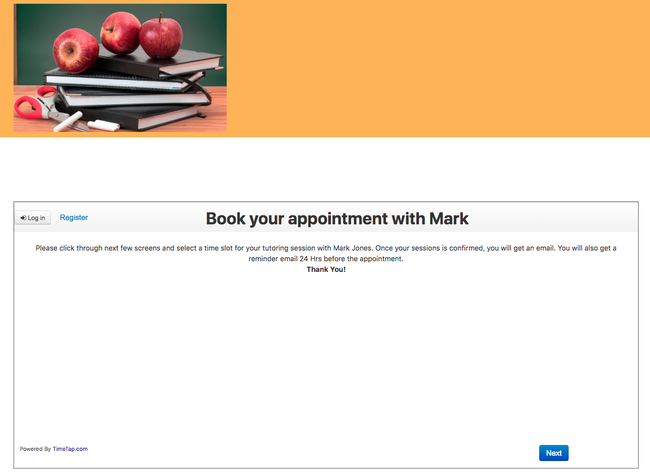
If go to the booking site I'll be able to see the image that now replaces the company logo:
To remove the image I upload it and replace with my company's logo I'll go back to the Customizations tab, click Edit, and select the Remove Logo option below the image I uploaded:
After saving my changes I go back to the booking site and will see that my company's logo is now back in the site's header: