Share Custom Booking Site Links
- Elvis Merino (Unlicensed)
Now that you've learned how to add and edit custom booking sites we'll cover how to share the links to those booking sites with your clients.
In this page we'll cover:
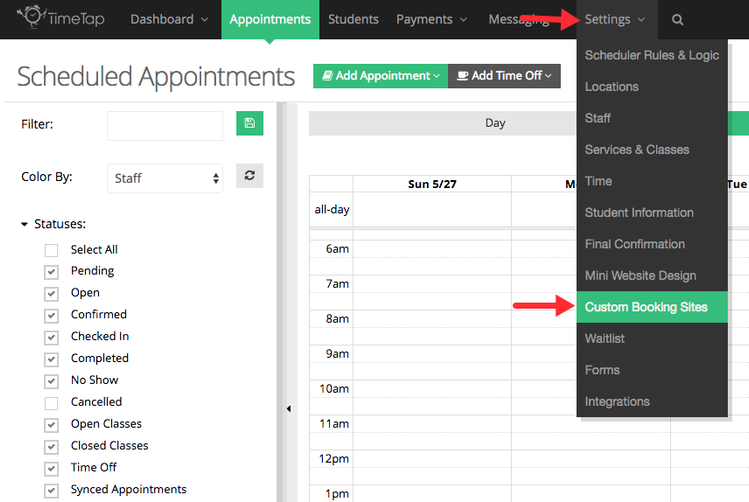
You can find the booking site URLs go to Settings → Custom Booking Sites:
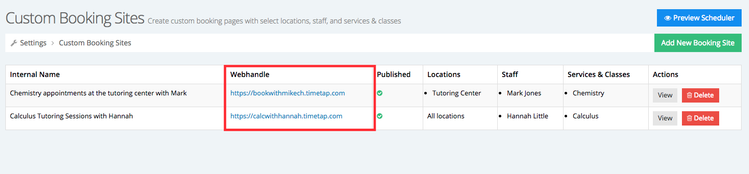
In the Custom Booking Sites page you'll find the URLs to your booking sites in the Webhandle column:
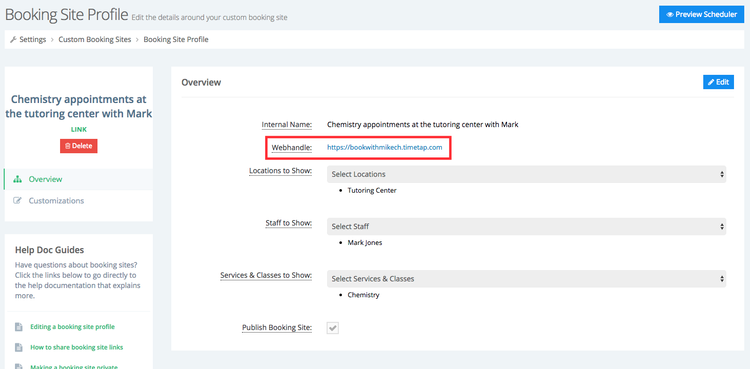
You can also the booking site URL in the the booking site profile, while viewing your booking sites click View next to the booking site you want to see:

In the Booking Site Profile you'll find the booking site URL in the Webhandle field:
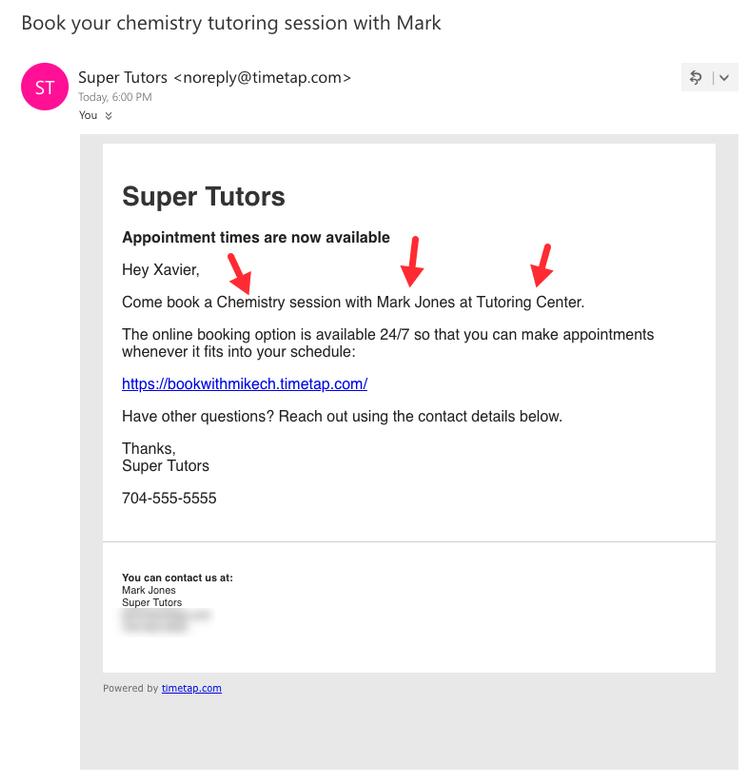
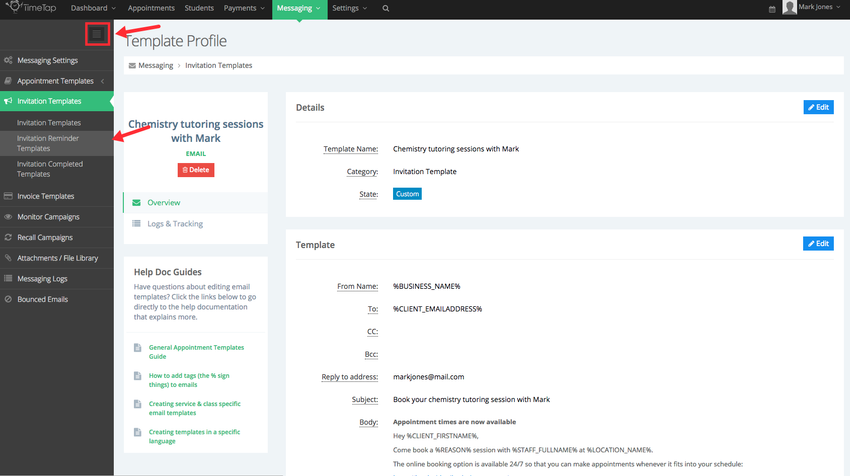
When it the time comes to invite your clients to book an appointment in your booking site we recommend creating an invitation template specifically for this purpose. In a different page of our documentation I created a custom booking site for a tutor named Mark Jones. Mark offers appointments at two locations, a tutoring center and over Skype, the booking site we created for Mark is intended to invite a specific group of students to book appointments with him at the tutoring center for chemistry tutoring sessions. Now we will cover how to send the link to the booking site in an invitation template.
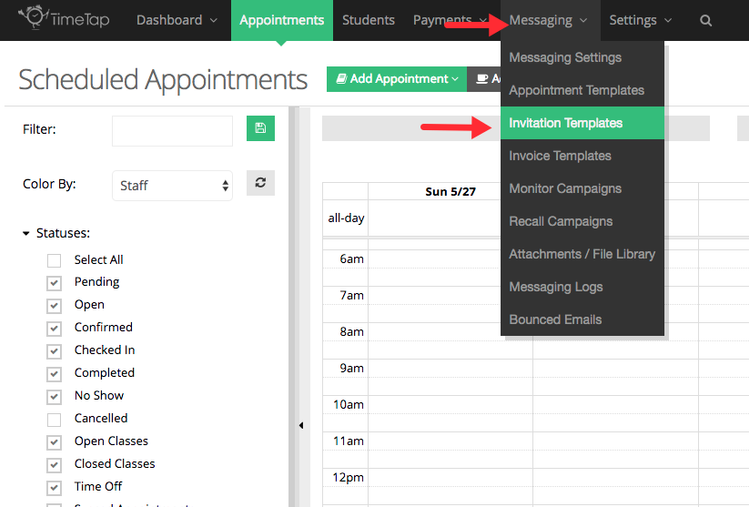
We'll create the invitation template by going to Messaging → Invitation Templates:
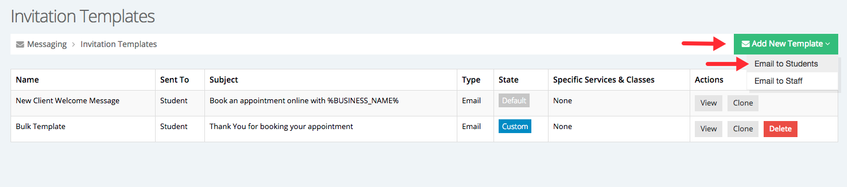
In the Invitation Templates screen click the Add New Template button and select Email to Clients/Students/Candidates/Customer/Patients:
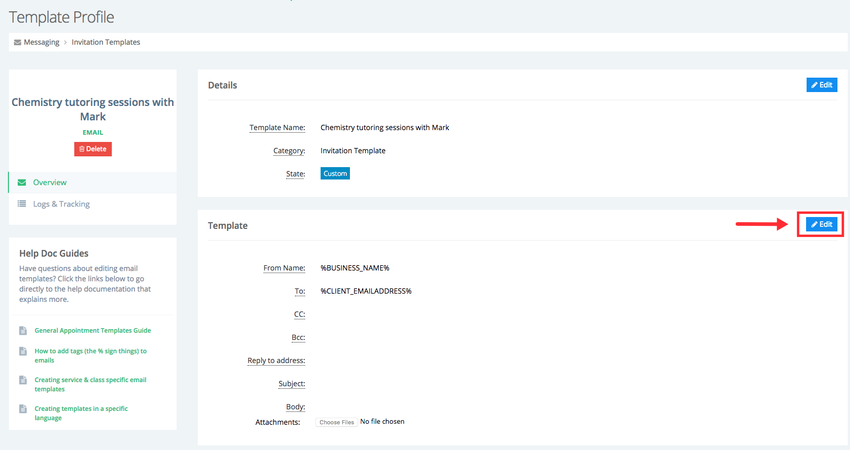
After naming my invitation template I'll click the Edit button in the Template section:
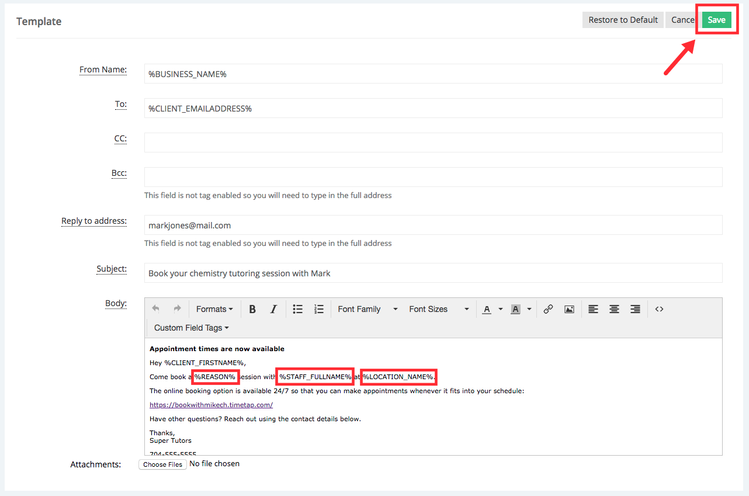
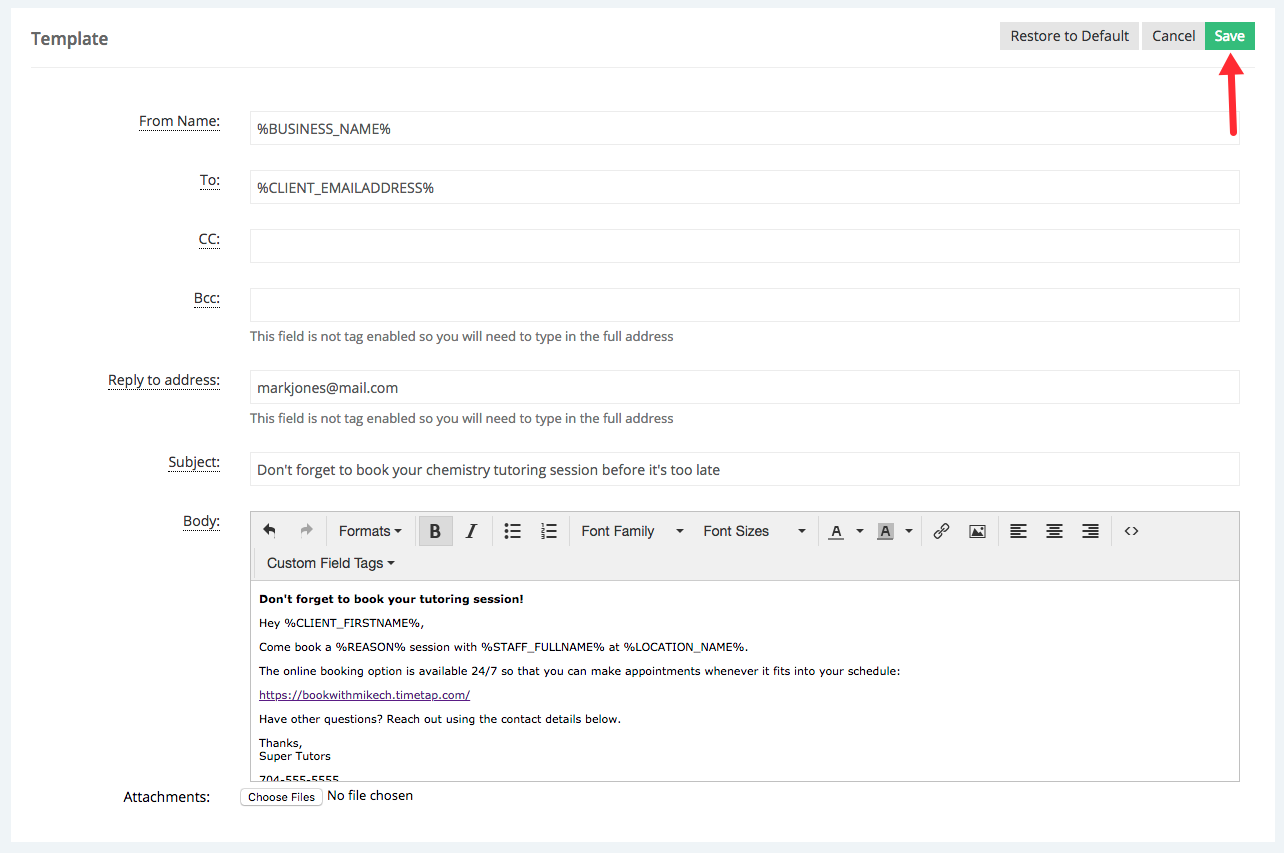
In the body of my email I included the tags %REASON%, %STAFF_FULLNAME%, and %LOCATION_NAME% along with the link to the booking site where I want students to book their chemistry tutoring session, when emailing clients from the list of clients or within their profile there will be an option to populate the tags with the specific selections. After my template is completed I'll click Save:
Note: The following step is optional
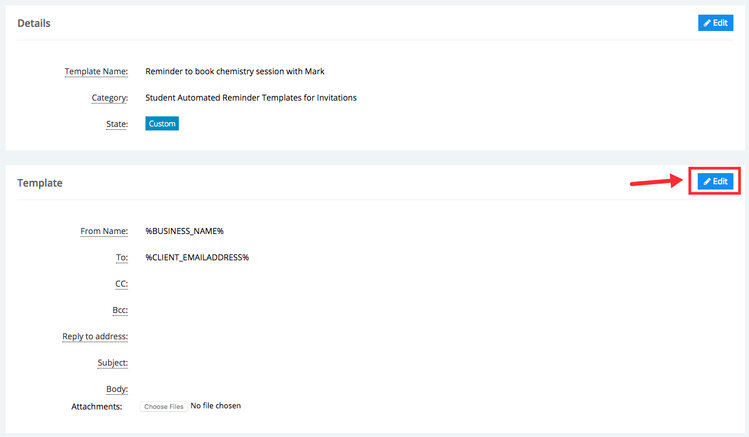
After my invitation template has been created I'll created a reminder template, this template will be sent to the client after a determined amount of time if the action requested in the invitation template is not fulfilled. While still in the invitation Template Profile screen click the menu icon on the side navigation menu and select Invitation Reminder Templates:
In the Invitation Reminder Templates screen click the Add New Template dropdown and select Email to Clients/Students/Candidates/Customer/Patients:

After naming the reminder template click the Edit button in the template section to compose your email template:
After the reminder email is composed click the Save button:
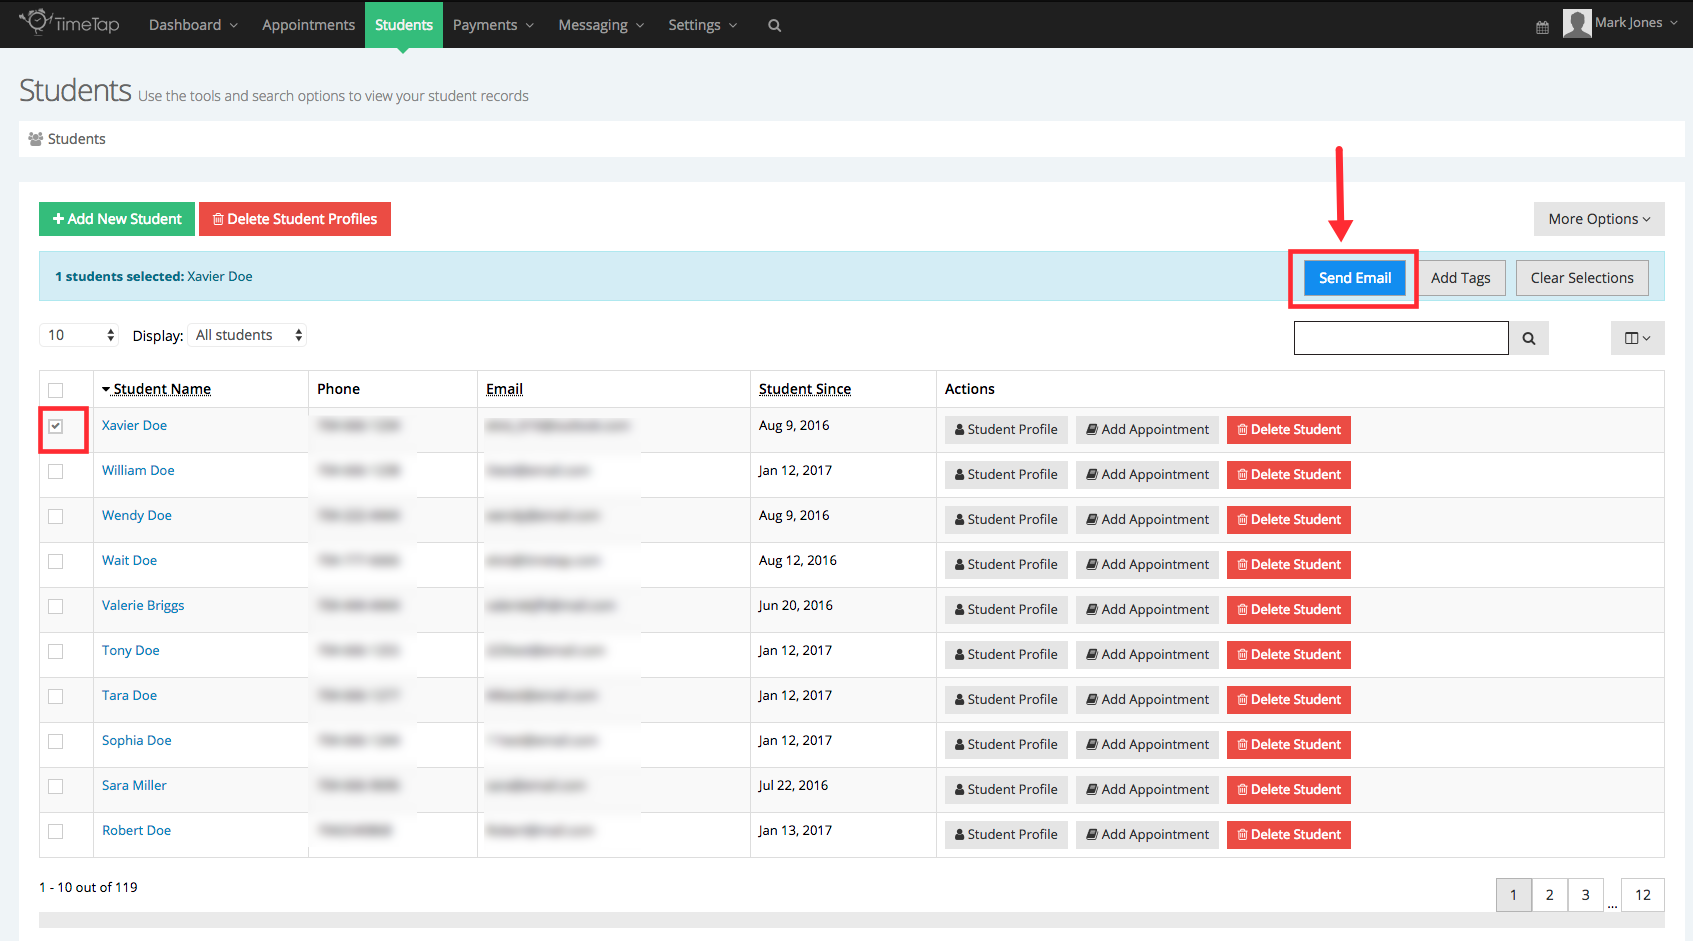
The final step on distributing the link for a booking site is to actually email it to your clients. Go to you list of clients select the clients who you want to email the invitation email to and click the Send Email button:
A new window will appear, the first step is to select the invitation template we want to send, in this case I'll select the template "Chemistry tutoring session with Mark":
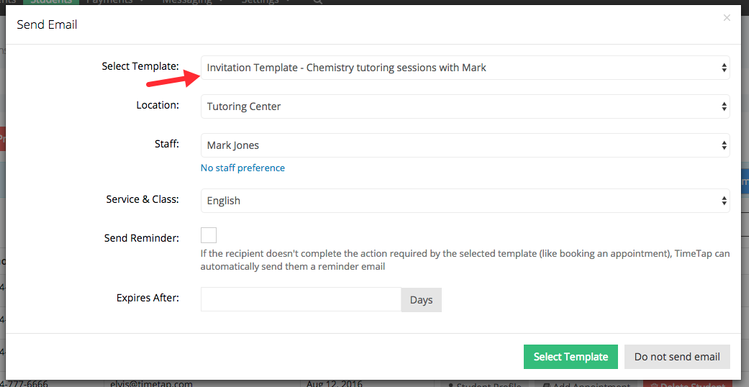
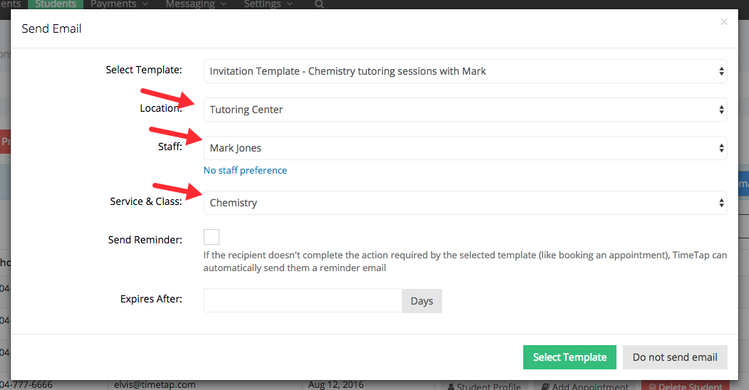
In a previous step I mentioned that in my invitation template I included the tags %REASON%, %STAFF_FULLNAME%, and %LOCATION_NAME%, this window will allow me to fill in the tags with the selections I make for the location ( %LOCATION_NAME%), staff (%STAFF_FULLNAME%), and service or class (%REASON%). In this example I selected the location "Tutoring Center", I select Mark Jones as the staff, and Chemistry as the service:
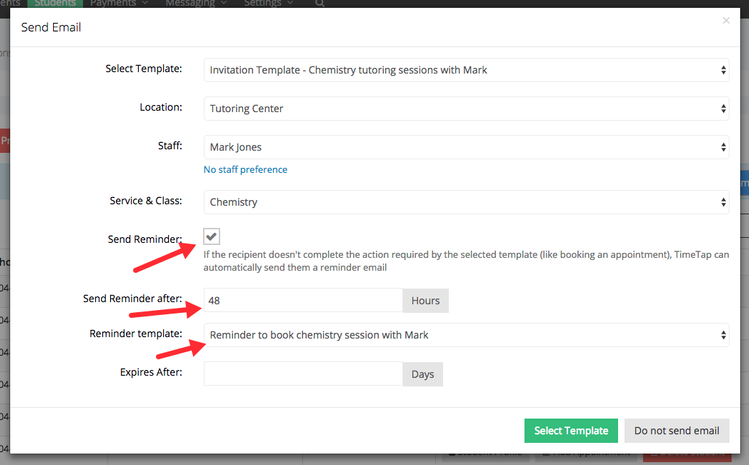
I will also select the option to send a reminder email to the client 2 days (48 hours) after the initial email if they have not booked an appointment:
A preview of the email I'm about to send will appear in a new window, click Send Email to send the email to the client:
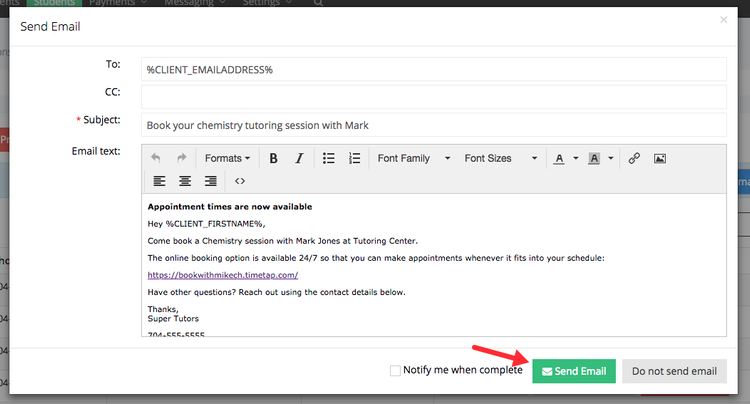
When the client receives the invitation email notice that the tags %REASON%, %STAFF_FULLNAME%, and %LOCATION_NAME% were filled in with the selections I made when I was sending the email: