Exporting List Views
You can export any list view into Excel format. The options for this differs slightly based on what kind of TimeTap plan you're on.
If you are on our starter version of TimeTap, you will be able to export your appointment lists as is. If you are a TimeTap Professional or TimeTap Business account holder, you can select which staff you want to export appointments for and then export the appointments with additional fields other than the ones that display on the list view by default. In this documentation, we'll walk through how to export an appointment list from the perspective of a TimeTap Professional and TimeTap Business user.
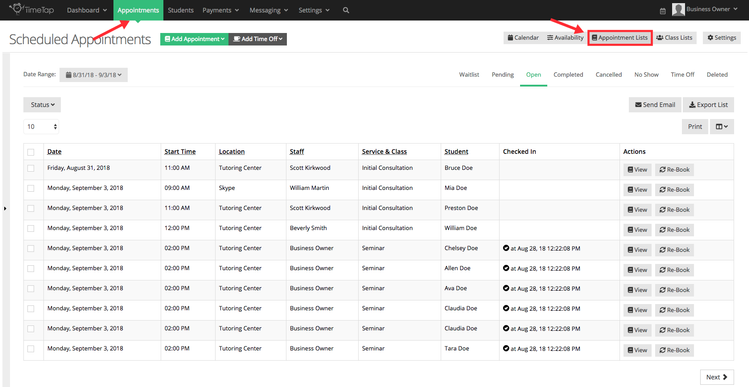
To export a list of appointments, first go to Appointments → Lists and click on the List view that you want to export, if you need to refresh your memory on how to navigate through the appointment lists, click here:
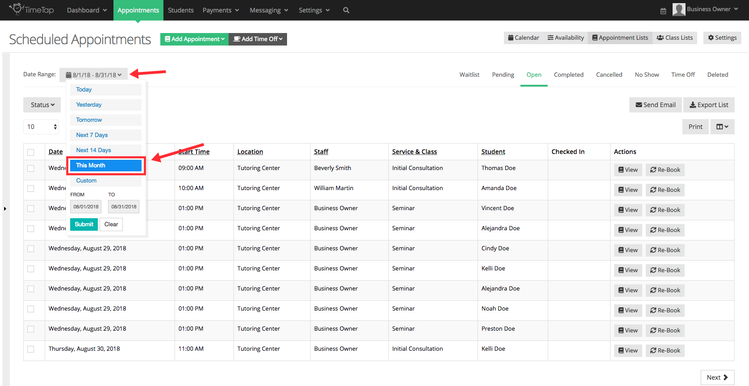
Next, define the date range that you want your exported list to cover:
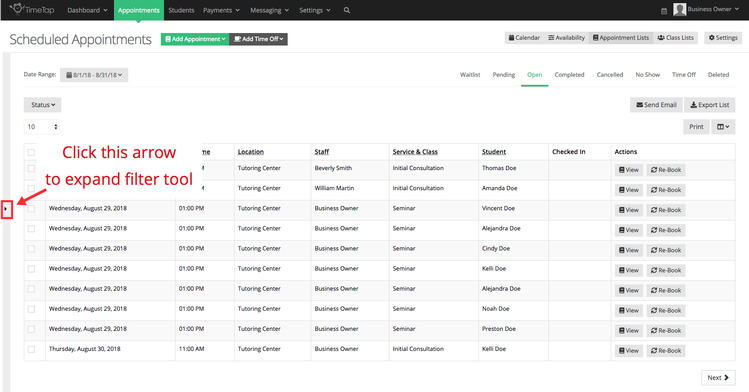
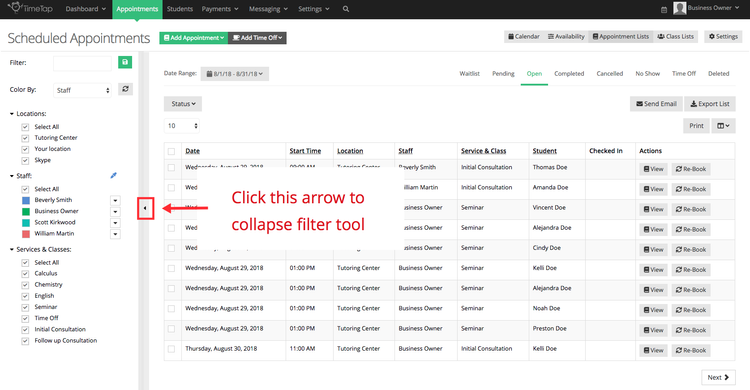
Then, you'll want to select which staff you'll want to see the appointments for. To select which staff you want to export, click the small arrow on the left side of your screen to expand the staff/service/location filters, keep in mind that we have created documentation on how to use this tool and also create filter, click Using Your Calendar to read more about it:
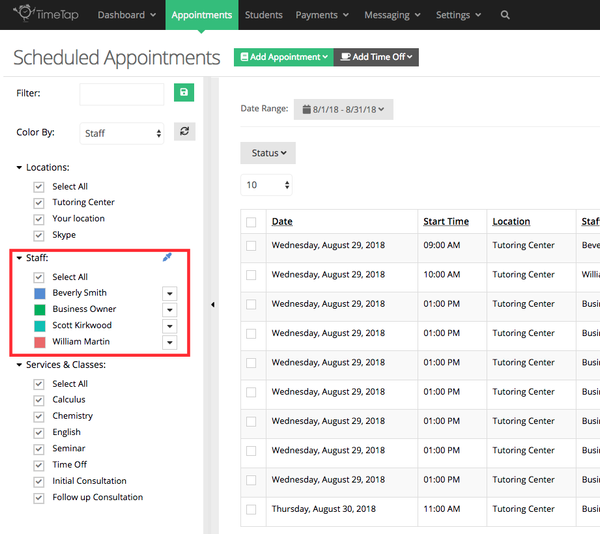
With the filter expanded, check the box "Select All" below staff to see all of your staff's appointments or select only the ones who's appointment you wan to see:
Please note: If you are on the TimeTap Starter version of our software, you will not see the option to select multiple staff as TimeTap Starter only allows for 1 staff on your account. You will only see this option to include additional staff if you are on TimeTap Team Professional or TimeTap Team Business and have added other staff to your account.
Once you've selected the staff to display, you'll see any of their appointments appear in the List view, you can click the small arrow on the left hand side of your screen to collapse the filter tool:
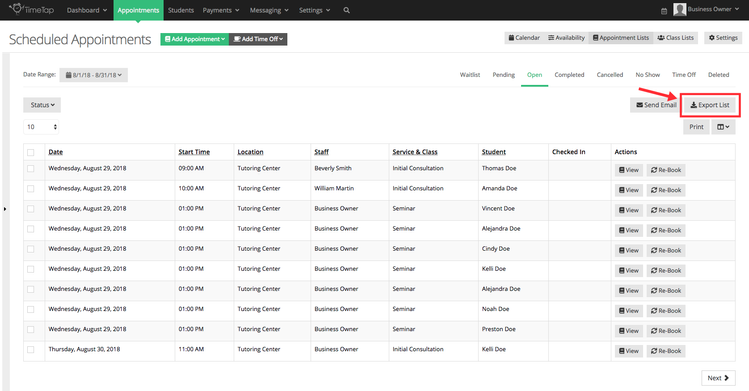
From here, all you have to do is click the "Export List" button in the top right of the list that you want to export for the given time range:
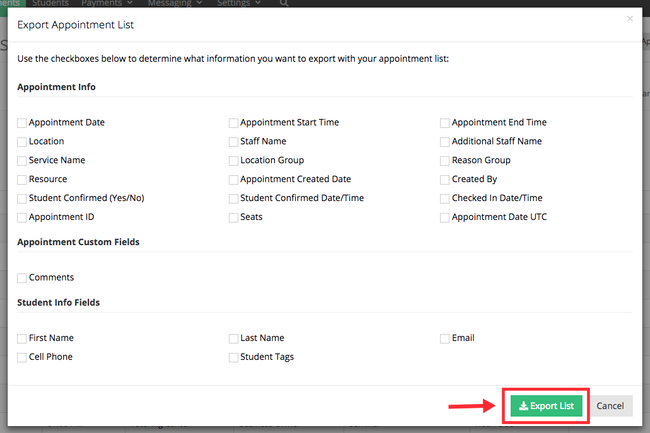
If you are on the TimeTap Professional or TimeTap Business version of our software, then from the Export List window that appears, you can select a number of additional fields to export along with the list you're viewing on screen. After you've selected the fields you want to export on your list, click the green "Export List" button to initiate the export:
Please note: If you are just using the Free version of TimeTap, you will only be able to export the list as it stands in TimeTap. The fields will include Appointment Date, Appointment Start Time, Location, Staff Name, Service Name, Client Name, and any Appointment Custom Fields.
After you export the list, you can open it up in Excel and see all the information you exported in a nice table view (click image below to enlarge):
Have any questions on exporting lists? Please feel free to contact our support team to ask them of us.
