Adding a New Service
- Lucy Barber (Deactivated)
- Elvis Merino (Unlicensed)
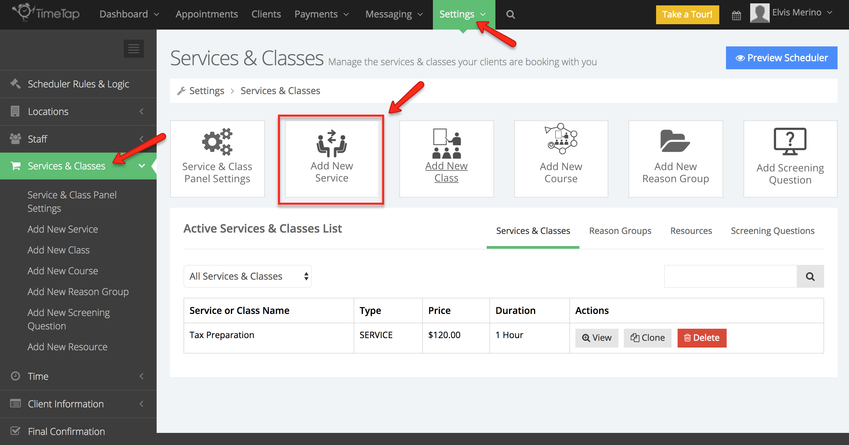
To add a service, navigate to your Services screen by going to Settings → Services and Classes and click the button to "Add New Service":
This will take you into the Add New Service screen, this screen is divided has different fields:
- Service Name: This is the service name that your clients will see as they are booking an appointment.
- Service Internal Name: This is the name is what your staff will see when logged into the back office, if this is left blank what you entered in the service name field will be used.
- Service Description: This appears under your service's name in the scheduling flow and can be used to provide more details around what clients are booking.
- Screening Question BUSINESS PLAN FEATURE: This is where you assign a screening question to this service from the list of questions you've added. Screening questions allow you to make sure that clients meet certain criteria before they are allowed to see the times that you are available for appointments. Only one screening question can be applied per service.
- Allow Waitlist BUSINESS PLAN FEATURE: Check this box if you would like to apply the waitlist to this service. This will make it so that if a client is trying to book this service on a date where you are all booked up, it will prompt them to join a waitlist in case any times become available.
- Private Service: Check this box if you would like to show this service only at the service's private URL and in the back office when staff are setting up appointments for clients.
- Appointment Duration: This is how long the appointment lasts for the client. You can extend the total time that gets reserved on the staff's schedule by adding a buffer before or after the appointment.
- Multiple Durations: If you offer a service for multiple time slots, you can check this box and then enter the different options clients might book. This is covered in more detail in the service profile documentation
- Buffer Before: Applying a buffer before your service will add some padding before the start time. This covered in more detail in the service profile documentation.
- Buffer After: Applying a buffer after your service will add some padding after the end time. This covered in more detail in the service profile documentation.
- Service Price: This is how much booking one appointment for this service costs. If you have a payment portal set up and require payment, then the client will be asked to submit the amount you enter in this field upon booking (unless you have a deposit amount entered below).
- Deposit: If you don't require the full price of the service upon booking, but only want to collect a deposit amount, enter that in this field. You must have a price entered in order to put in a deposit
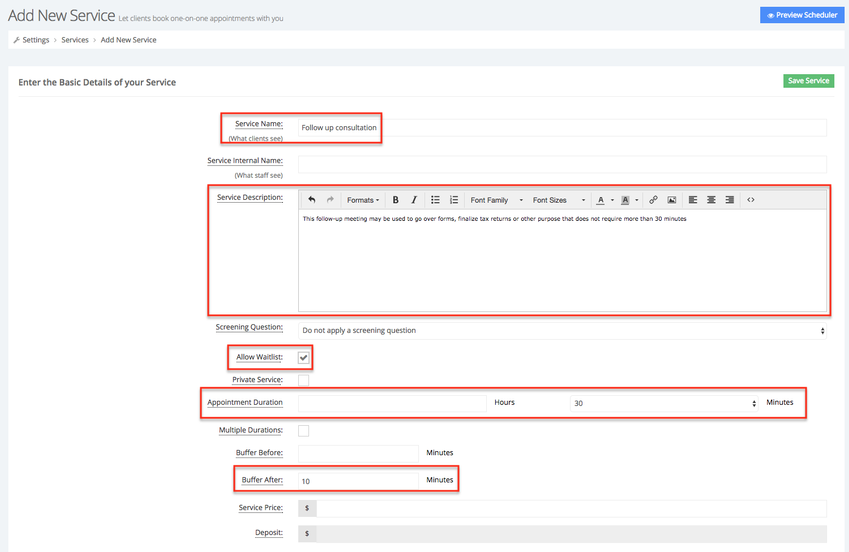
In the example below I added a new service and name it "Follow up consultation", added a brief description for the service, allowed client to register for the waitlist for this service, set the duration for appointment for this service to 30 minutes, and added a buffer of 10 minutes after each appointment for this service:
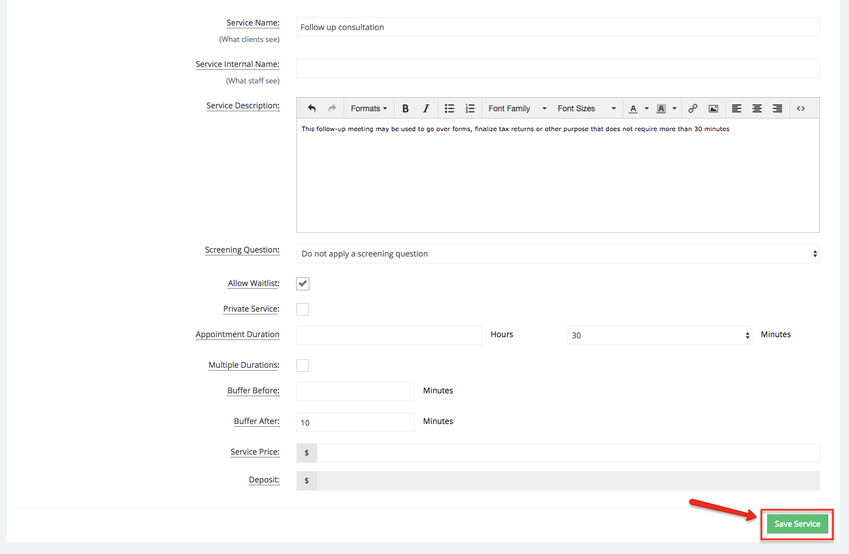
After reviewing the information entered, scroll down to the bottom of the page and click "Save Service" to be directed into the Service's Profile:
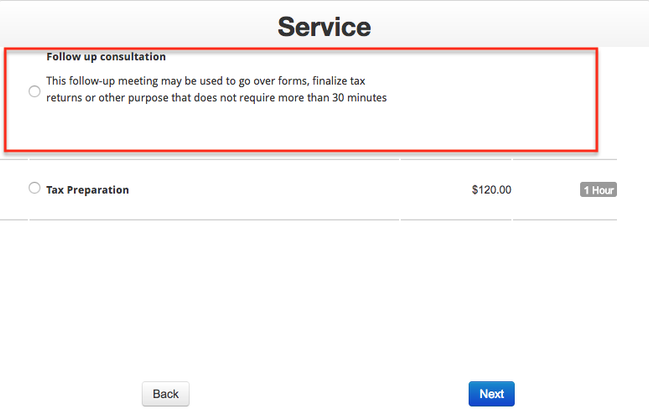
Now when your clients click through your scheduler, they will see this new service as another appointment offering:
After adding a service, you may want to reorder how it is displayed in your services list or update some of the information in its service profile (like name, duration, description or price).