Screening Questions
- Lucy Barber (Deactivated)
- Elvis Merino (Unlicensed)
- Eddie Harris (Unlicensed)
Screening questions are useful in situations where a specific requirement must be met to receive service. For instance, you might offer a service that requires the client to be at least 18 years of age- perhaps the service you provide requires that the client has filled out certain paperwork with your office before they can book an appointment to be seen. In any case, you can use screening questions to stop those who don't meet the criteria from booking. Here we will show you how to create, apply, edit and preview screening questions:
More information on Screening questions:
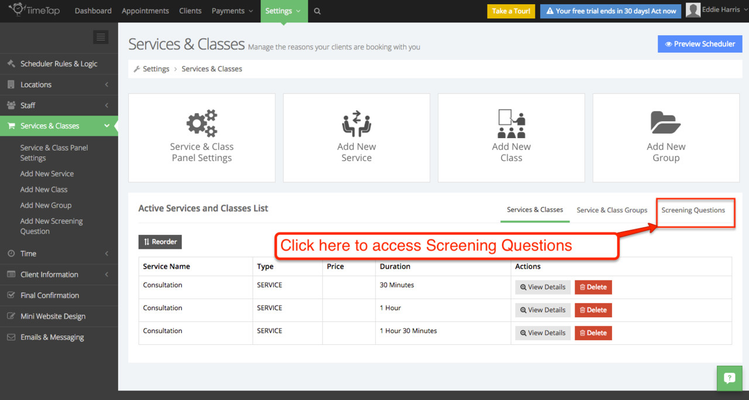
The Screening Questions section will be found under Settings → Services & Classes on your TimeTap Back Office screen.

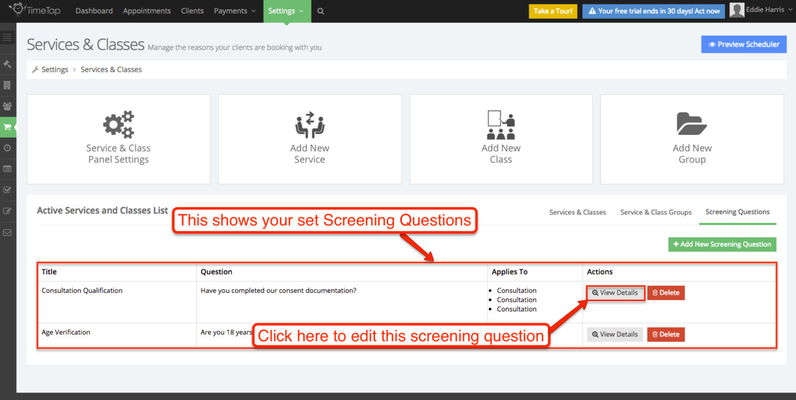
Once on the Services & Classes page, locate and click the Screening Questions tab on the right side of the screen.
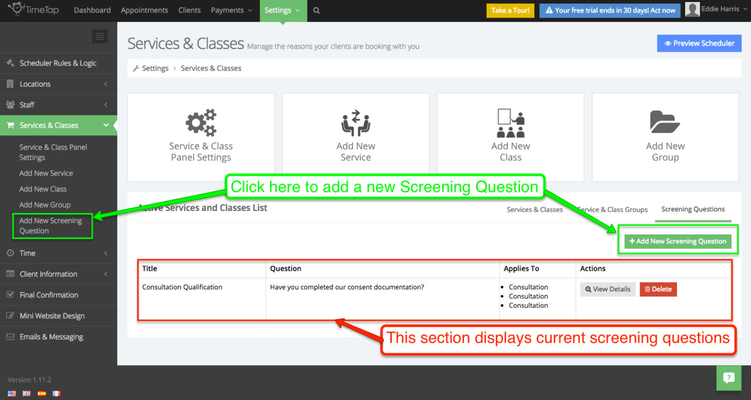
The Screening Questions page lists the screening questions you currently have configured for your scheduler. To add a new screening questions, click the +Add New Screening Question button. If the left side menu is visible, you may also click the Add New Screening Question option listed there.
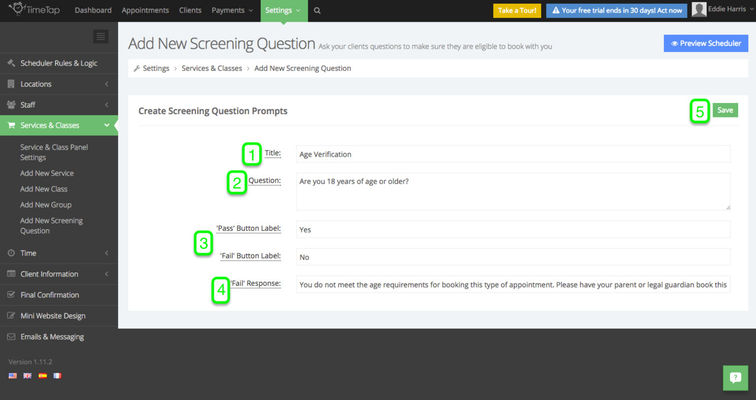
After selecting either option, the next page will give you the following prompts to complete:
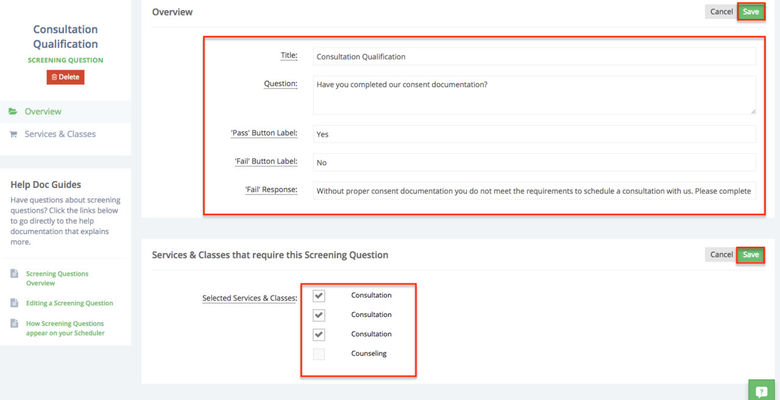
- Title: This is what will show up in the scheduler above the question in the pop-up screen
- Question: This is where you insert the question the exact way you would like for it to appear in the scheduler
- Pass & Fail Labels: The next two prompts are asking for what you would like your clients to select in the scheduler.
- "Pass" will allow clients to continue booking the appointment.
- "Fail" will stop clients from continuing to book the appointment.
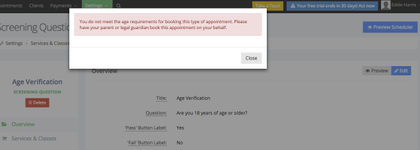
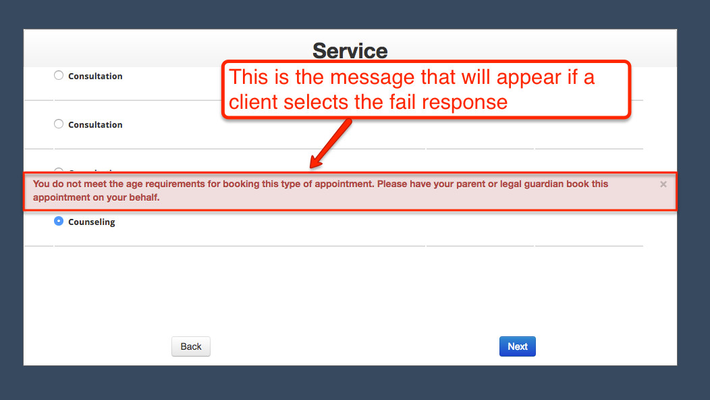
- Fail Response: This is the message that will appear if the client select the "Fail" option to your screening question. It may be helpful to add instructions on what clients should do if they don't meet the requirements to book that service with you. i.e. Please call 1-800-888-9988 if you have questions about your disqualification.
- Save: Don't forget to click Save after you finish completing this form.
After saving your screening question settings, the screening question profile page will give you the opportunity to review your settings and offer next steps.
- Overview: Make sure to look over the information in this section to ensure that everything submitted is accurate.
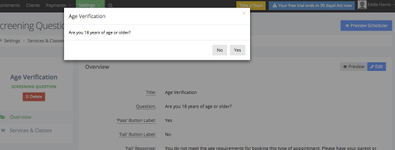
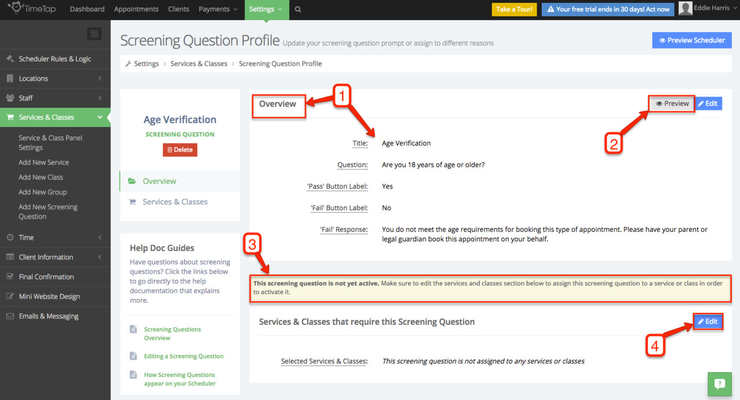 2. Preview: This gives you an opportunity to see the screening question and fail response in a pop-up screen.
3. Disclaimer: This disclaimer box is letting you know that the screening question isn't active until you assign it to a particular service
4. Edit: Click the Edit button to assign the screening question to a particular service.
After selecting the Edit button, click the service(s) you would like to assign this screening question to and then Save. You can only assign one screening question to a service; however, many services can have the same screening question.
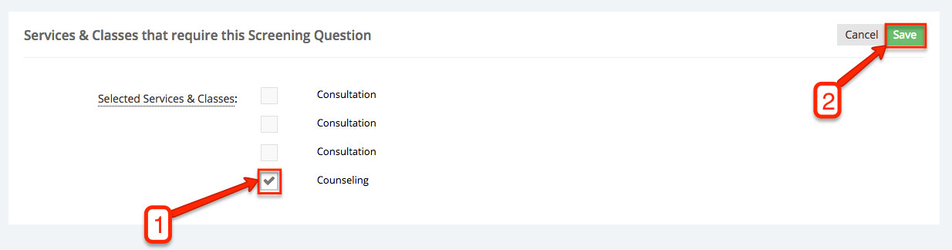
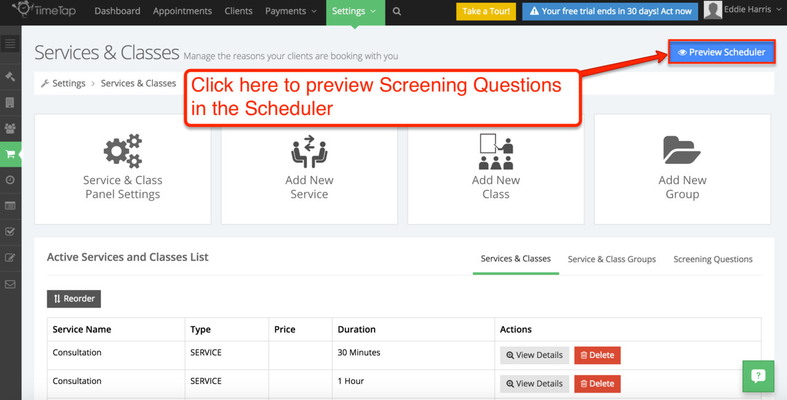
Selecting Save will hide the edit screen and allow you to preview your work on the client side using the Preview Scheduler button at the top of the page.
Editing your screening questions be found on the same screen used to Add a New Screening Question. The box at the bottom of your screen will list your existing screening questions. To edit a specific screening question, click the View Details button.
Once you click the View Details button, the screening question profile screen will appear. You will have the options to edit the content of the screening question and/or edit the services that require this screening question. If you would like to edit one or both of these select the Edit button(s) in each section.

After selecting Edit, the screen will give you the opportunity to change any of the settings for the screening questions. Once you've made the changes that you need, remember to click Save in the section(s) where you made changes. The screen should return to normal and allow you to preview the changes in the scheduler using the Preview Scheduler button at the top of the page.
It's always good practice to preview any new changes and additions in the Scheduler before your clients do. At the top of most of your pages in TimeTap Back Office, we have a Preview Scheduler button. Click this button to experience the scheduler as your clients will.
To view your screening questions in the scheduler, click through the prompts until you reach the services page. Select the service of your choice and select Next. Your screening question will appear on the screen as shown below.
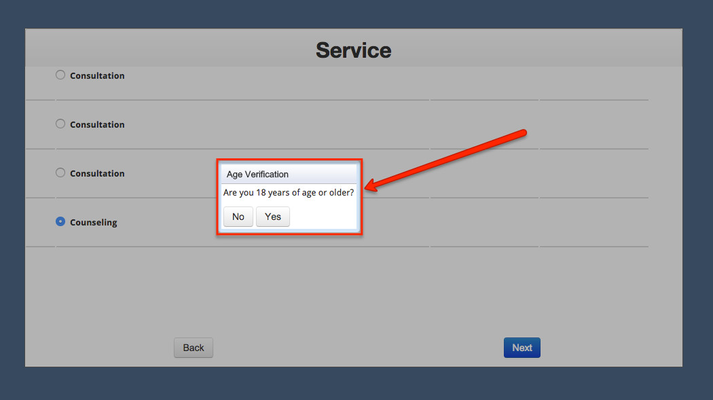
If your client selects a fail response, the fail response disclaimer will appear on their screen as shown below.
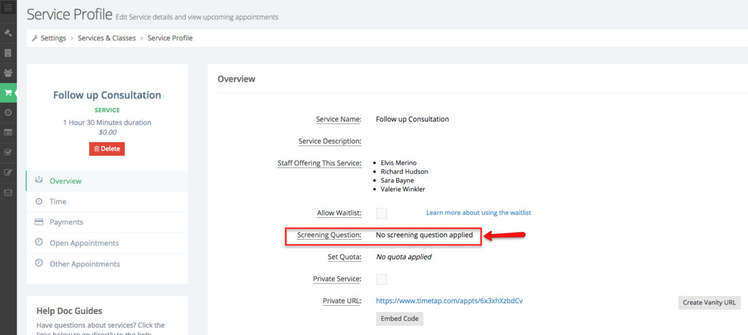
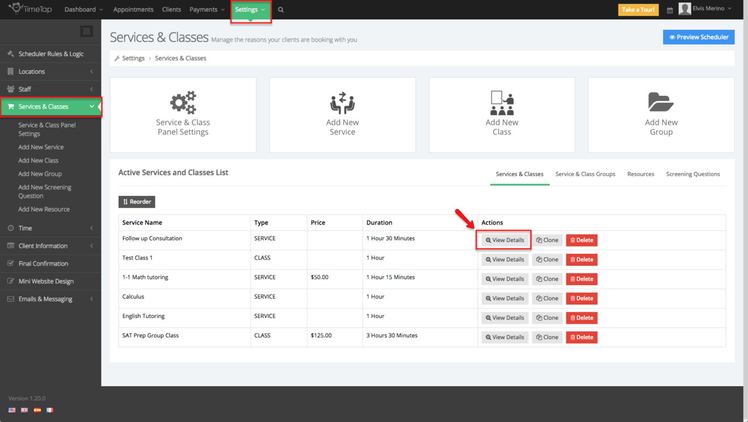
If you would like to remove the screening you assigned to a service or a class, go to Settings > Services and Classes. Click View Details next to the service you would like to modify, in this case is Follow up Consultation:
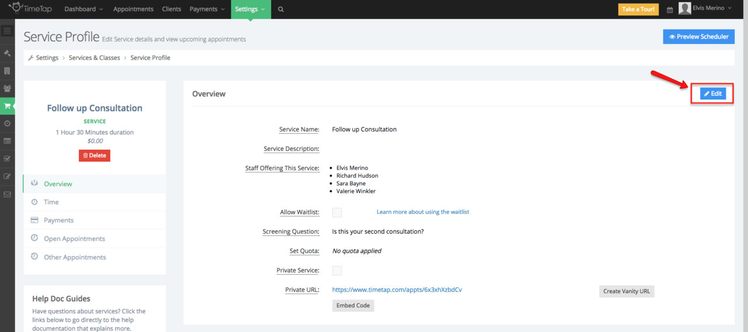
Once in the service's profile click the Edit button located on the right side of the screen:
After clicking the Edit button you will be able to make changes to the service overview, in this case we will use the dropdown menu next to the Screening Questions section to remove the screening question assigned to this service. Click the dropdown menu and select the option "Do not apply a screening question" and click Save:
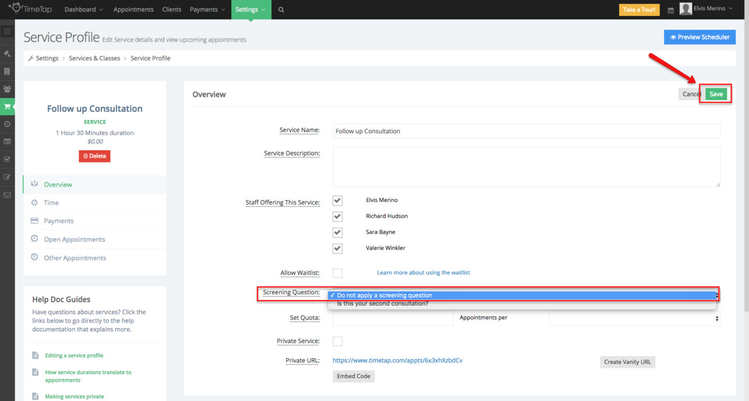
After clicking Save you'll notice that the screening questions is removed from this service: