Cancelling Appointments
- Lucy Barber (Deactivated)
- Meaghan O'Reilly (Unlicensed)
Appointments can be marked as Cancelled from any status except Checked In. Once an appointment is listed as "Cancelled" it can then be Re-Opened, Completed, marked as No Show, or permanently deleted.
If you mark appointments as Cancelled, you have the option to send out an email to the Client and/or the Staff about the cancellation. If a client cancels his/her appointment by either logging into the scheduler or clicking on the cancellation link in the email, they will receive a confirmation that their appointment was cancelled and you will receive an email that they cancelled their appointment.
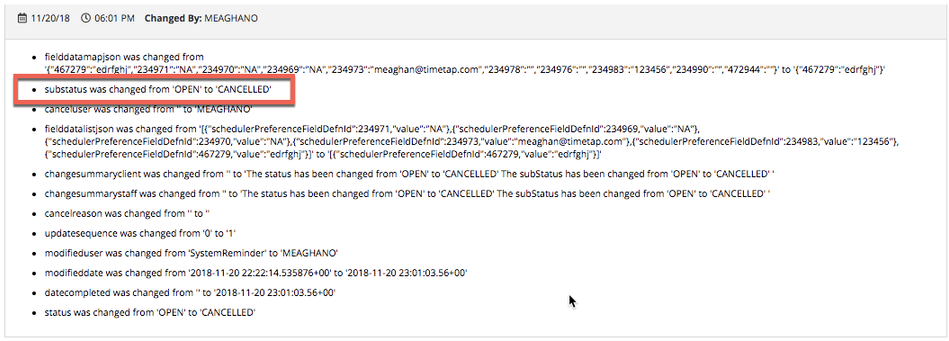
A time stamp of the status change will be listed on the Audit Trail for the appointment when either you (the staff) or the client cancel it.
In this documentation, we will go through how to:
- Cancel appointments in Open status
- Change Completed status to Cancelled
- Change No Show status to Cancelled
- How Clients can cancel their appointments
- Canceling a repeating appointment series
- Finding & Viewing Cancelled Appointments
We will also discuss what can be done once appointments are listed as Cancelled and how you can make these changes in both List views or the Appointment Detail view.
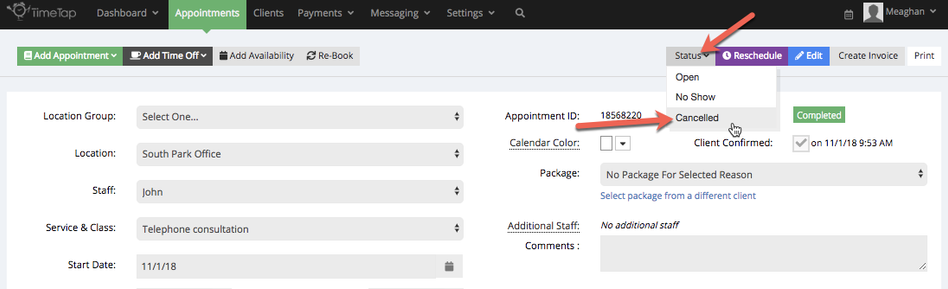
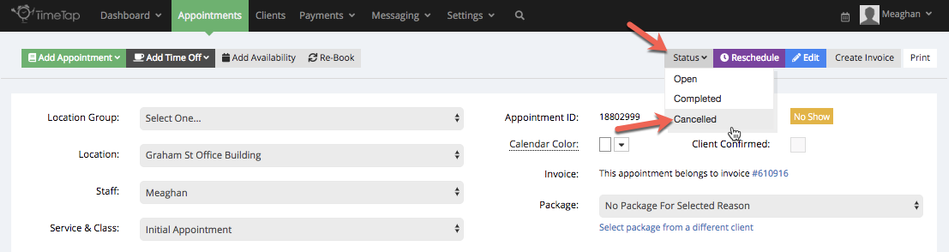
You can mark appointments Open appointments as Cancelled from either the Appointment Detail or Open List views. To mark the Open Appointment as cancelled from the Appointment Detail view, click the Status dropdown and select "Cancelled":

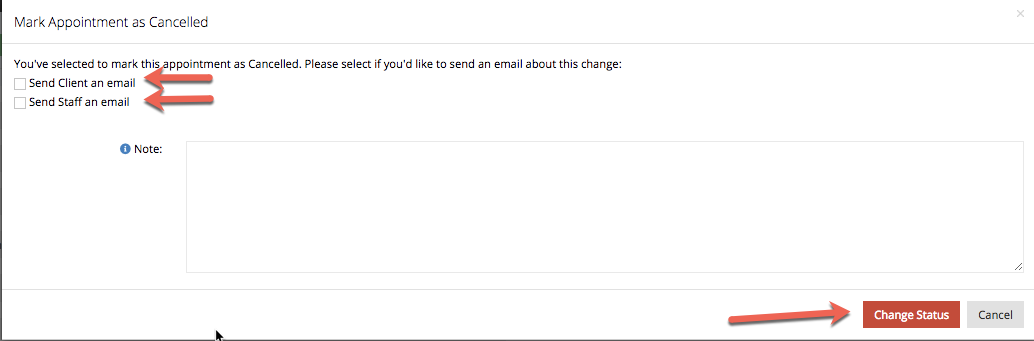
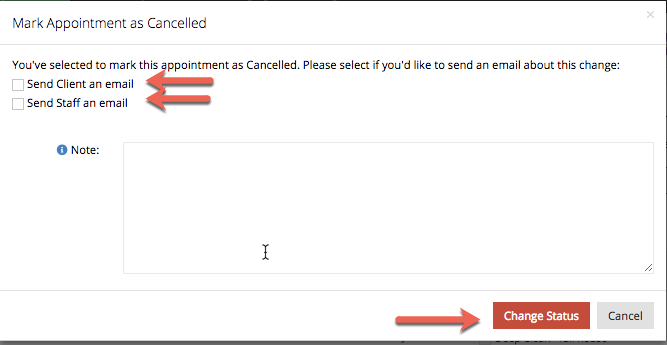
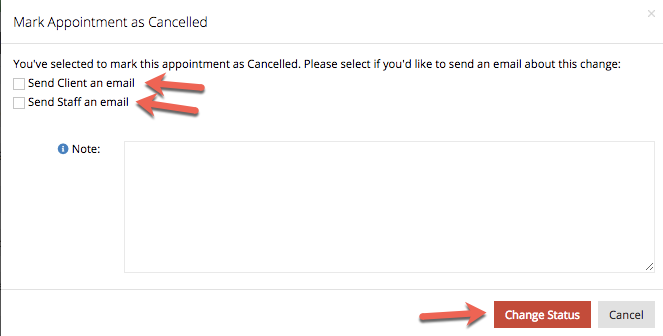
At this point, you will be prompted with the option to send an appointment cancelled email to the client and to the staff. You can select who you want to notify about the Cancelled appointment and then add a Cancellation Note that will be inserted into the body of the email:
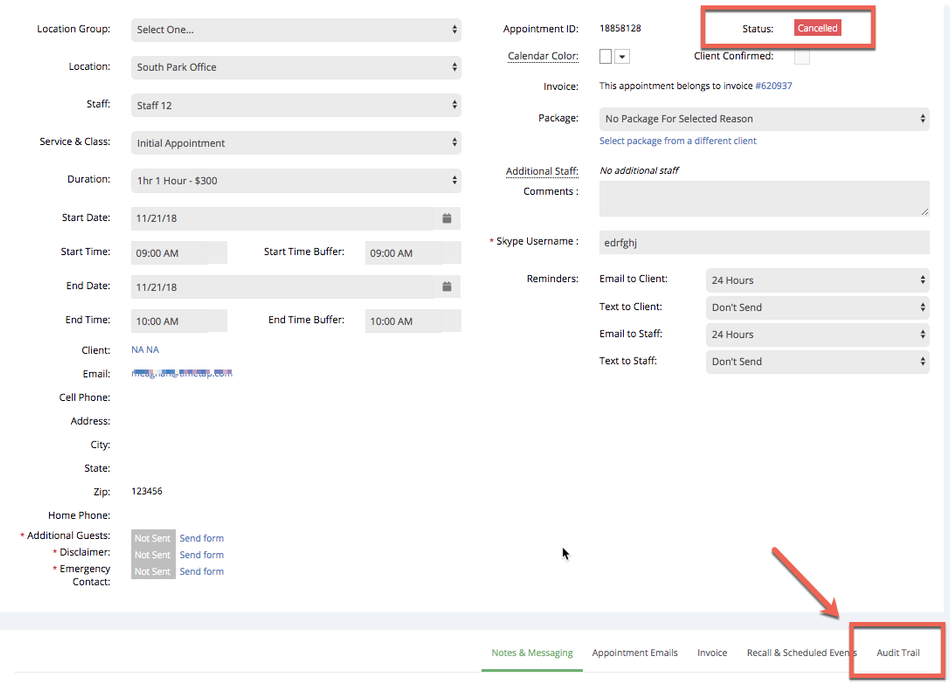
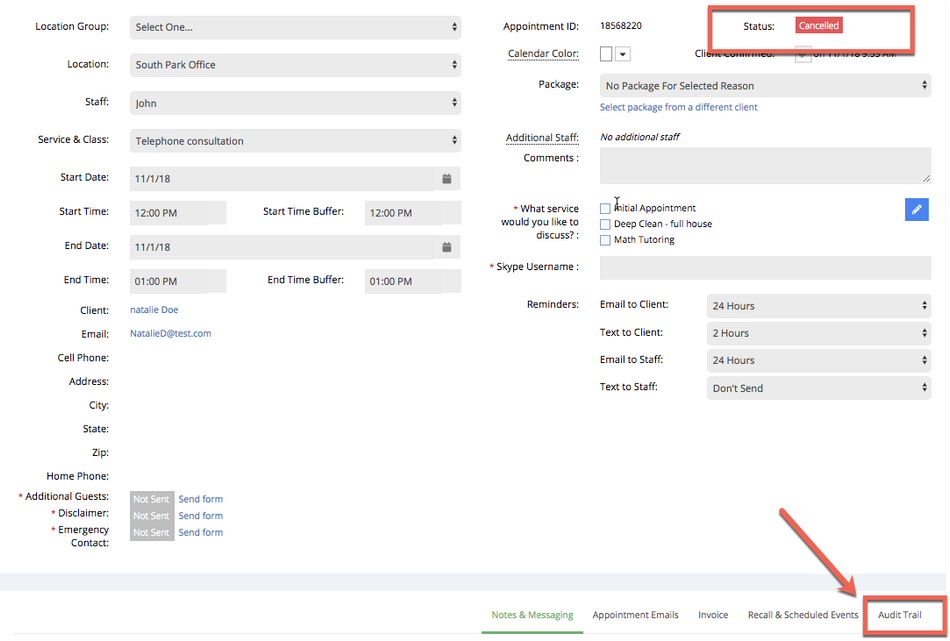
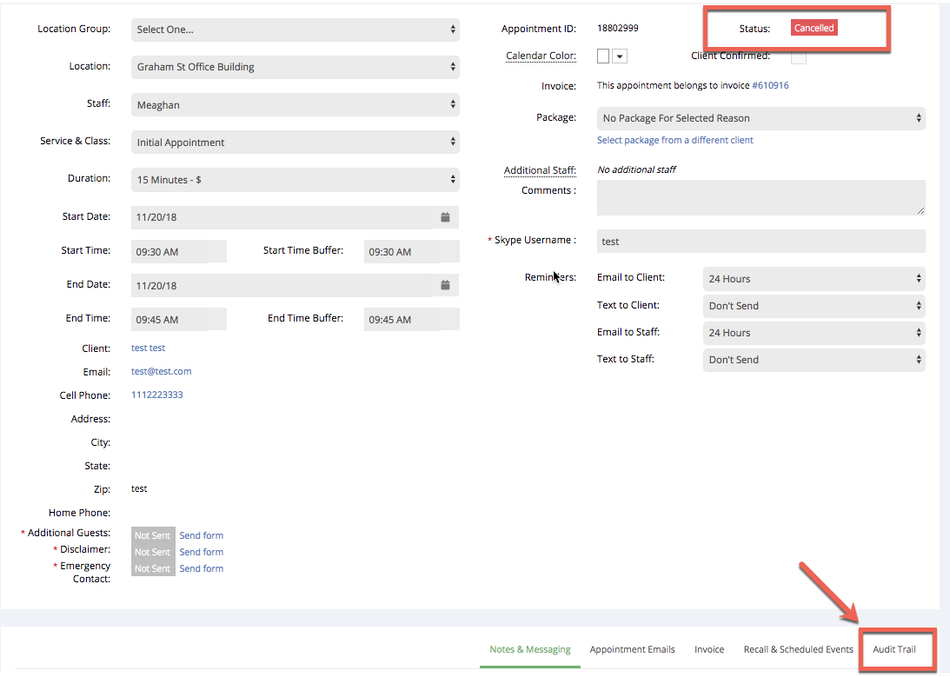
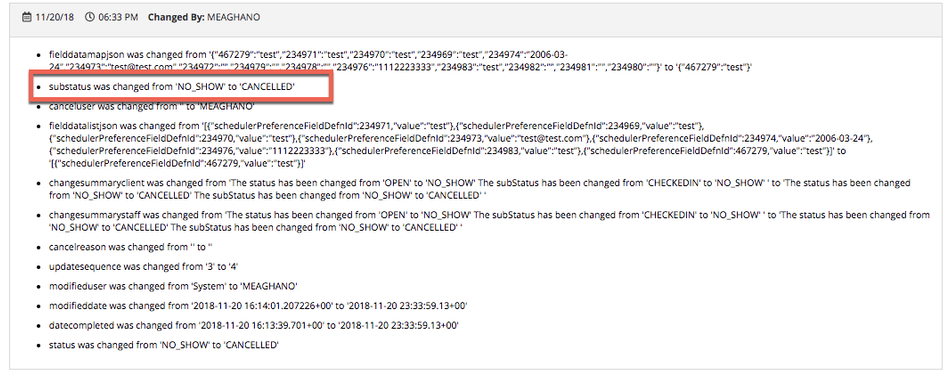
After you press Change Status, the appointment detail record will update and show the appointment status as "Cancelled". You will also see a time stamp of the status change on the Audit Trail:
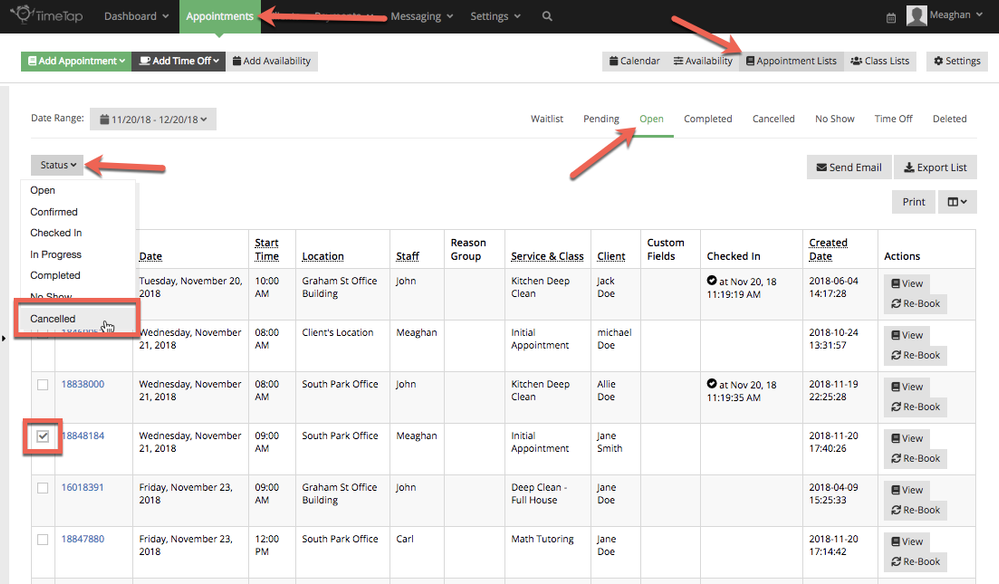
Open appointments can also be marked as Cancelled from the Open appointments list. To do this, navigate to Appointments → Appointment Lists → Open and select the appointments from the list that you want to mark as Cancelled. Then click the Status dropdown menu and select Cancelled
After confirming that you do indeed want to cancel the selected Open appointments, the appointments you marked as Cancelled will display in the Cancelled Appointments list:
There will be times when you accidentally mark an appointment as Completed when you meant to mark it as Cancelled. If this happens to you, don't worry about it. It's simply to re-categorize an appointment marked as "Completed" as "Cancelled".
You can do this either from the Appointment Detail screen for a Completed appointment or from the Completed Appointments list view. To move a Completed Appointment to Cancelled status from the Appointment Detail page, go to the appointment record and from the Status drop down select Cancelled:
At this point, you will be prompted with the option to send an appointment cancelled email to the client and to the staff. You can select who you want to notify about the Cancelled appointment and then add a Cancellation Note that will be inserted into the body of the email:
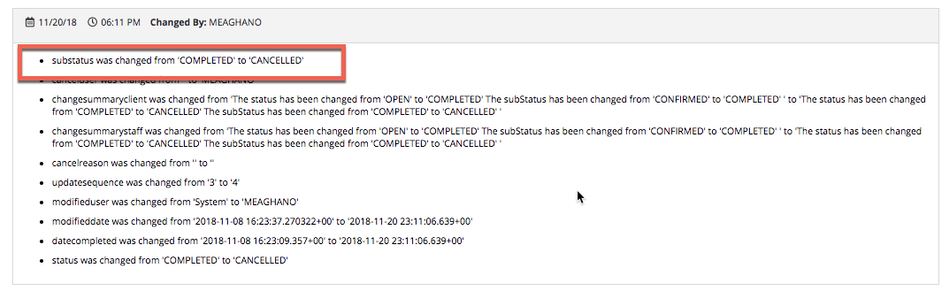
Once you press Change Status from the modal, you will see that the status updated to "Cancelled" and the time stamp for the status change is indicated in the Audit Trail:
As mentioned, you can also change Completed Appointments to Cancelled from the Completed Appointments list. To do this, navigate to Appointments → Appointment Lists → Completed and select the appointment(s) from the list that you want to mark as Cancelled. Then click the status drop down menu and select cancelled: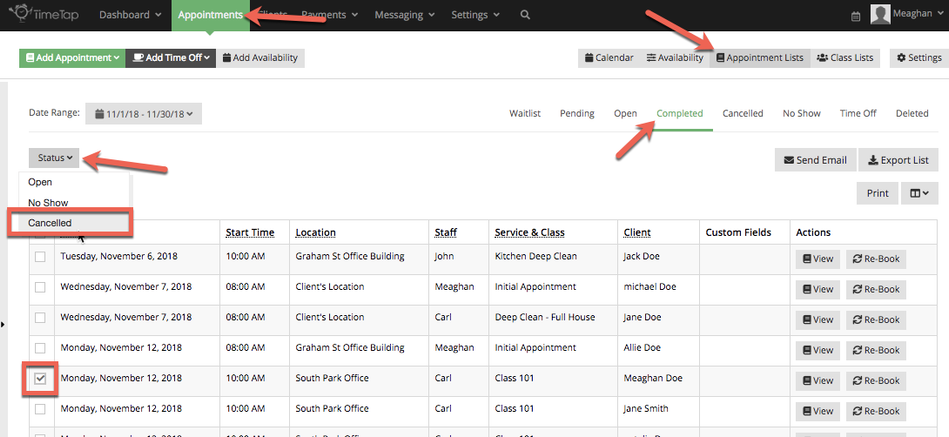
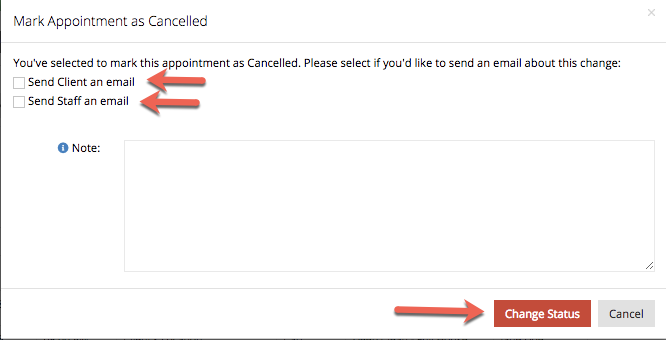
At this point, you will be prompted with the option to send an appointment cancelled email to the client and to the staff. You can select who you want to notify about the Cancelled appointment and then add a Cancellation Note that will be inserted into the body of the email:
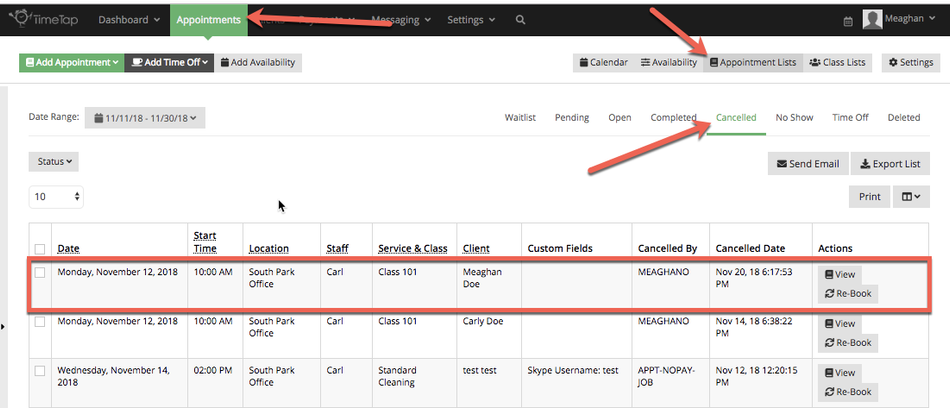
After you confirm you want to move the Completed Appointments to Cancelled Status, the screen will update to show you the Cancelled Appointments list with the appointments you just cancelled in there:
Just as you may accidentally mark an appointment as Completed that you meant to enter as Cancelled, you may do the same thing with No Show. Should this happen, you can move an appointment from being a No Show to being marked as Cancelled from either the Appointment Detail page or the No Show appointment list. From the Appointment Detail page, click the Status dropdown and select "Cancelled":
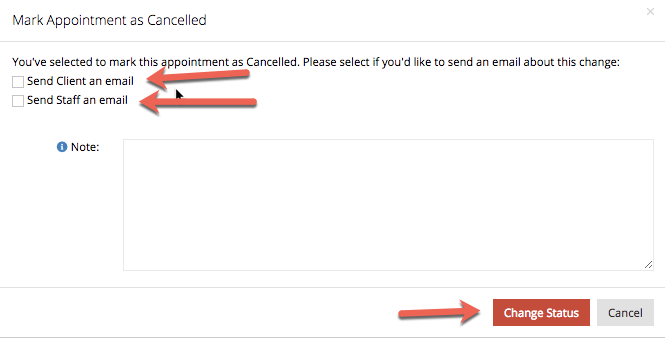
At this point, you will be prompted with the option to send an appointment cancelled email to the client and to the staff. You can select who you want to notify about the Cancelled appointment and then add a Cancellation Note that will be inserted into the body of the email:
Once you press Change Status from the modal, you will see that the status updated to "Cancelled" and the time stamp for the status change is indicated in the Audit Trail:
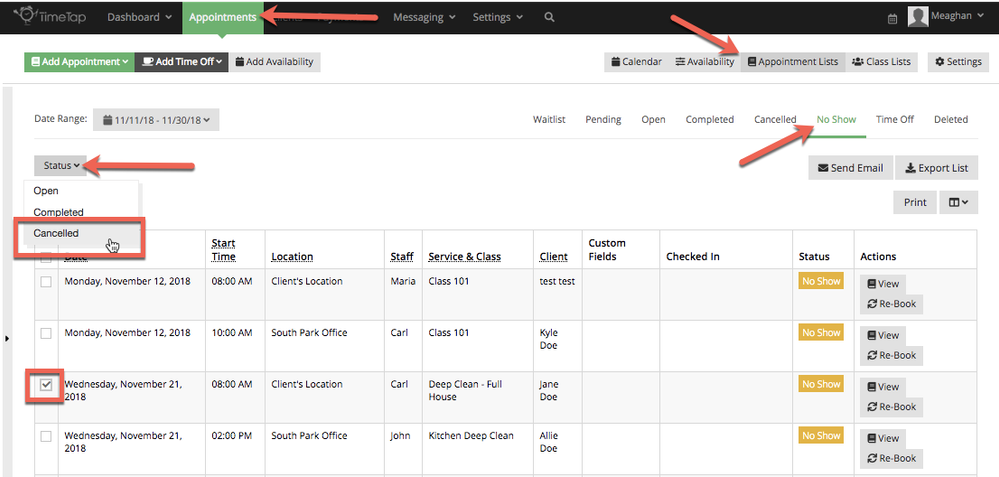
As mentioned, you can also change No Show Appointments to Cancelled from the No Show Appointments list. To do this, navigate to Appointments → Appointment Lists → No Show and select the appointments from the list that you want to mark as Cancelled. Then click the status down drop and select Cancelled
you will be prompted with the option to send an appointment cancelled email to the client and to the staff. You can select who you want to notify about the Cancelled appointment and then add a Cancellation Note that will be inserted into the body of the email:
After you confirm you want to move the No Show Appointments to Cancelled Status, the screen will update to show you the Cancelled Appointments list with the appointments you just cancelled in there.
Clients can cancel their appointments either from the Manage Appointment link in their appointment confirmation or appointment reminder emails or by logging into the scheduler.
In the emails your clients receive before their appointments (whether that is the confirmation for booking, a notice that the appointment was rescheduled, or a reminder 24 hours before the appointment start time), there is a link that they can click on to cancel or reschedule their appointment.
An example of this link is shown in the screenshot below. Please note that the email your clients receive from your business may look different than the email shown below, but the link should stay relatively similar:

Clicking on this link will take them to their appointment details page where they have access to a button to cancel their appointment. This is the same page that clients would see if they were to log into the scheduler and navigate to the detail page around an appointment:
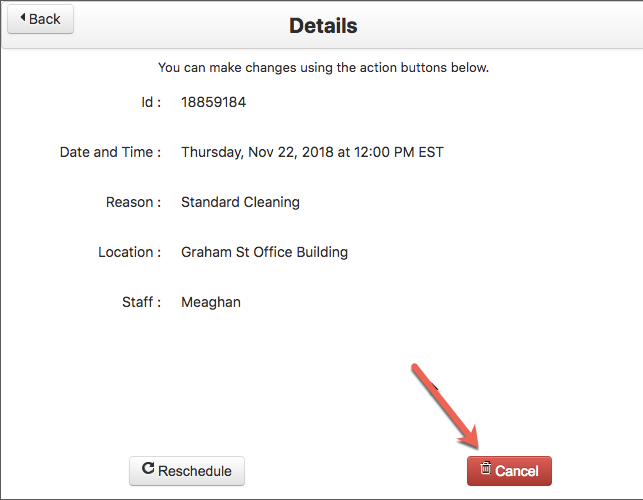
If this button is disabled when your clients click on the link, then the time when they are allowed to cancel their appointments as set by you, the business, has passed.
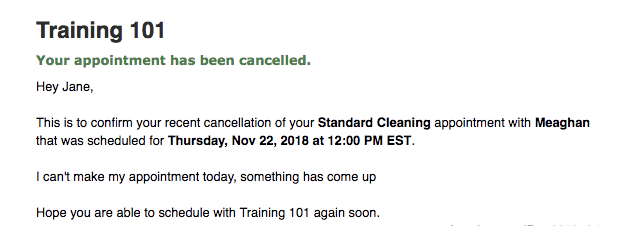
Clicking on that button will give them a small window where they can type in a reason for their cancellation if they'd like:
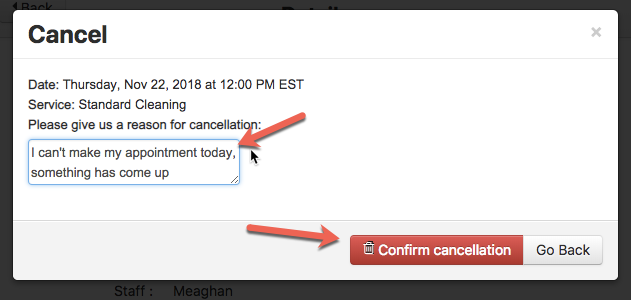
Pressing the red "Cancel this appointment" button will confirm their cancellation and they will receive a confirmation email that their appointment was indeed cancelled:
As mentioned above, clients can also cancel or reschedule their appointments by logging into the scheduler. Click that link to read our documentation on client login.
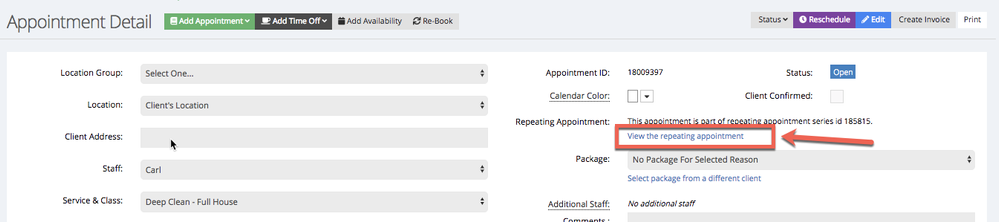
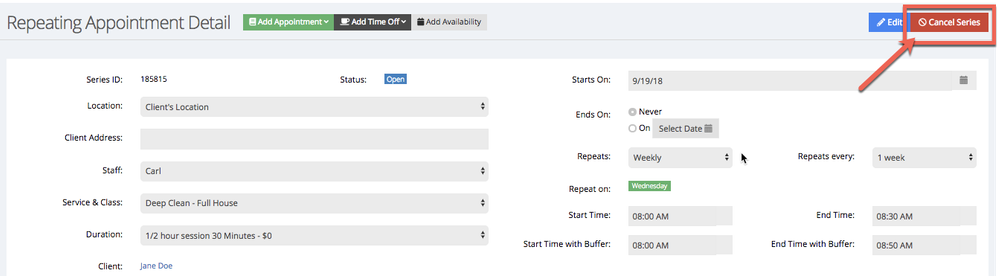
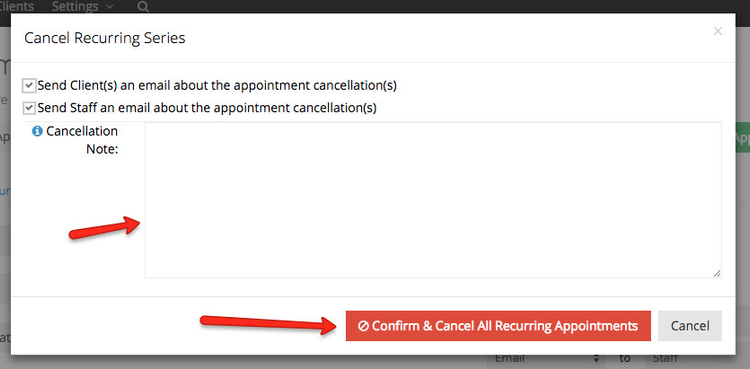
If you have added a repeating appointment series and need to cancel it for whatever reason, you can cancel the entire series from the Repeating Appointment Detail screen. To do this, first navigate to the Repeating Appointment Detail page by clicking on the "View the repeating appointment" link from the Appointment Detail page for an Individual Appointment within a Repeating Appointment Series:
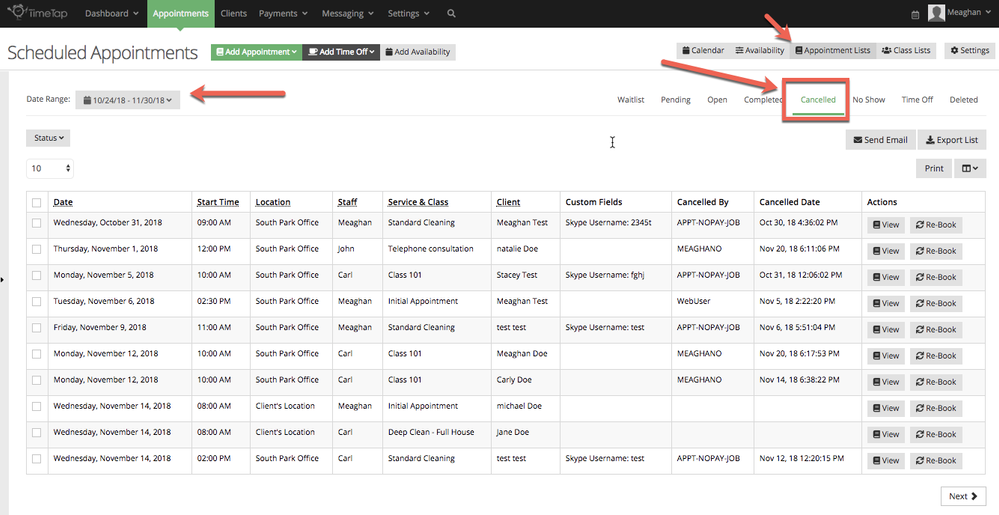
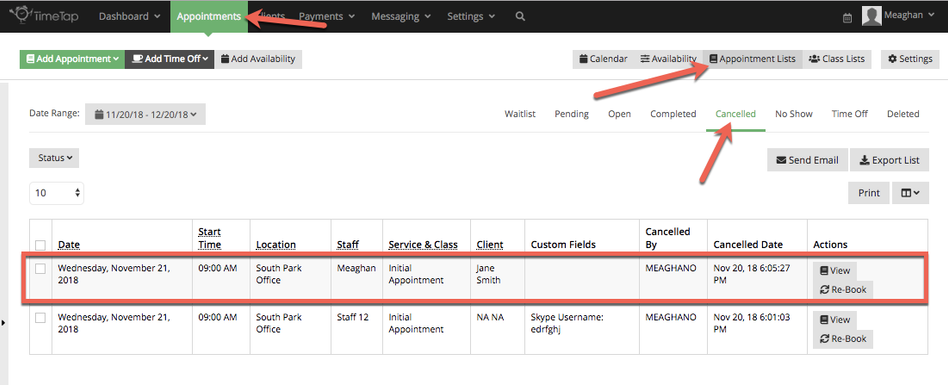
To see all the appointments you have marked as Cancelled, you can use the Cancelled Appointments list. This can be found under Appointments → Appointment Lists → Cancelled. If you customize the date range for this view, the appointments that you see are based on the date the appointment was set for, not the date that you marked the appointment as cancelled:
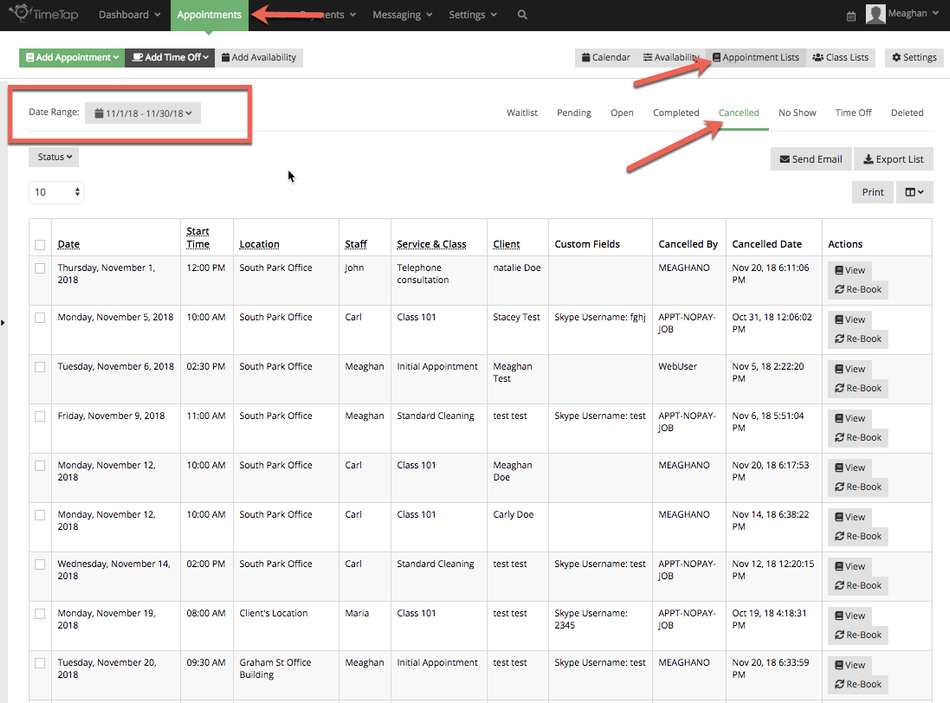
Cancelled appointments are the only appointments that do not display on the Calendar view. They can only be found in the List views as once an appointment is marked as cancelled, it is removed from your schedule so as to free up the appointment time for someone else to book.