Adding a New Class
- Lucy Barber (Deactivated)
- Elvis Merino (Unlicensed)
- Jalesa Campbell (Deactivated)
If you offer multiple types of group based bookings, you'll want to add a different class for each type of group-based appointment you have.
So, let's say you are a yoga instructor and you offer a 75 minute Vinyasa Flow class and a 60 minute Balance class. You would want to add in two different classes: one for Vinyasa Flow and one for Balance.
This documentation is going to walk you through how you'll create your different types of class offerings. Once you create those different types of class offerings, you'll then want to set up the schedule for when you offer those classes which we cover on our documentation here.
To add a service, navigate to your Services screen by going to Settings → Services and Classes and click the button to "Add New Class":

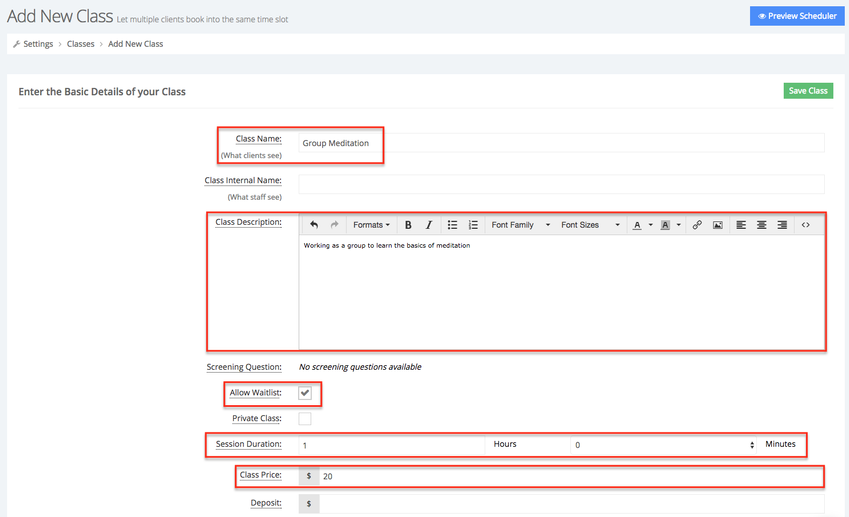
This will take you into the Add New Class screen, this screen is divided has different fields:
- Class Name: This class name is what your clients will see as what they are booking
- Class Internal Name: The class internal name is what your staff will see when logged into the backoffice
- Class Description: This appears under your class's name in the scheduling flow and can be used to provide more details around what clients are booking
- Screening Question BUSINESS PLAN FEATURE: Screening questions allow you to make sure that clients meet certain criteria before they are allowed to see the times the class sessions are scheduled. Only one screening question can be applied per class.
- Allow Waitlist BUSINESS PLAN FEATURE: Checkin this box will make it so that if a client is trying to book this class on a date where you are all booked up, it will prompt them to join a waitlist in case any times become available
- Private Class: Check this box if you would like to show this class only at the service's private URL and in the back office when staff are setting up appointments for clients.
- Session Duration: Once you save your class you'll be able to schedule sessions for when the class is being held. This will the default length of each scheduled session as you are adding them. You can override this on a per session basis if need be.
- Class Price: This is how much booking one session for this class costs. If you have a payment portal setup and require payment, then the clients will be asked to submit this amount upon booking (unless you have a deposit amount entered).
- Deposit: If you don't require the full price of the class upon booking, but only want to collect a deposit amount, enter that in this field. Note: You must have a price entered in order to put in a deposit.
In the example below a new class and name it Group Meditation, I set the default duration to 1 hour, added a brief description, allowed clients to join the waitlist if the session(s) are full for the day they would like to attend, and assigned a price of $20,
After reviewing the information entered, scroll down to the bottom of the page and click "Save Class" to be directed into the Class Profile:

Once in the class profile you will be able to view the details around the class as a whole as well as adding individual or recurring session dates that the class will meet on:
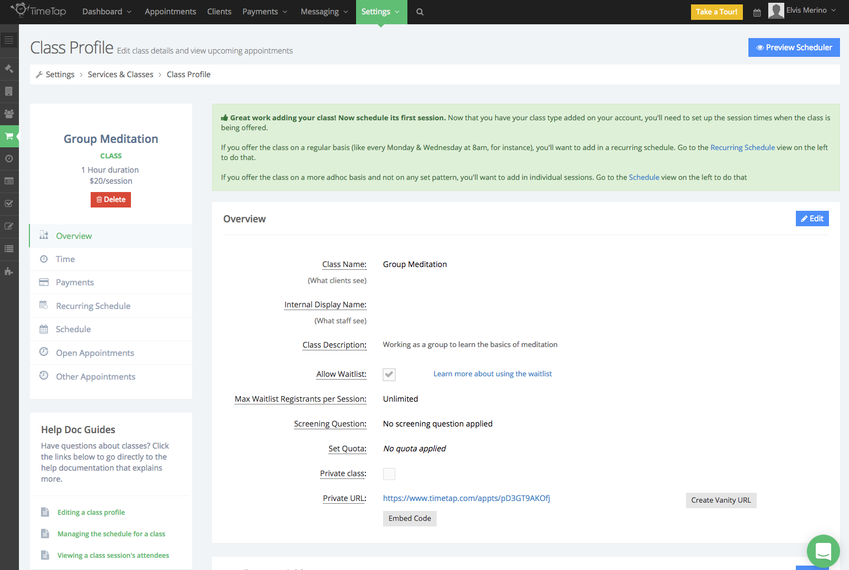
We have full documentation written on how to manage and edit your class profile available here on our documentation site.