Creating Course Sets
- Lucy Barber (Deactivated)
- Elvis Merino (Unlicensed)
Courses are offered in 'sets'. If you have a "Lifeguard Certification" course, you may have a "Summer Certification Set" that takes place from June - July. Each set is made up of a given number of sessions that are created based on the number of sessions that the course has on its overview section.
In this section we will cover:
- How to create a course
- How to add a course set
- How to edit course sets
- How clients can register for a course set
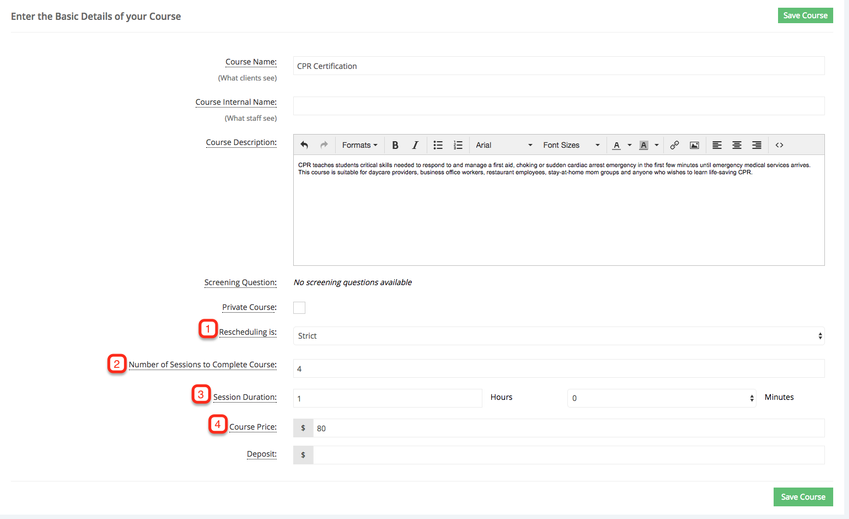
For this example we will create a new course and name it CPR Certification. Begin by going to Settings → Services & Classes, and click the Add New Course button:

After entering the name and a brief description of this course, I will set to rescheduling to Strict (1), set to number of sessions to complete the course to four (2), set the duration of each session to 1 hour (3), and finally set the price of this course to $80 (4), click the Save Course button to create the course:
After the course has been created, you will be taken to the course profile. To add a set select the "Scheduled Sets" tab and click the Add New Set button:

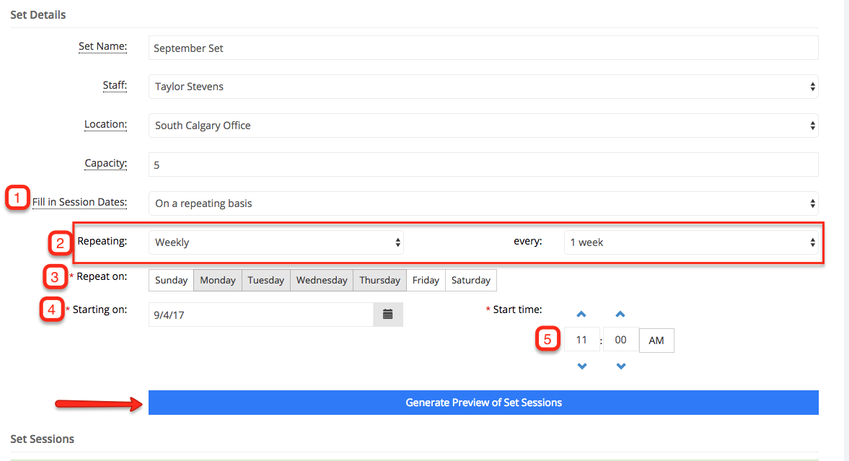
After the Add New Set button has been clicked the screen will update, this is divided in two sections "Set Details and "Set Sessions". First, we will cover the Set Details section. I've chosen to name this course set "September Set" (1), assigned staff Taylor Stevens to lead the course set (2), selected the location where the course set will be taking place (3), and set the maximum number of people who can register for this course set (4):
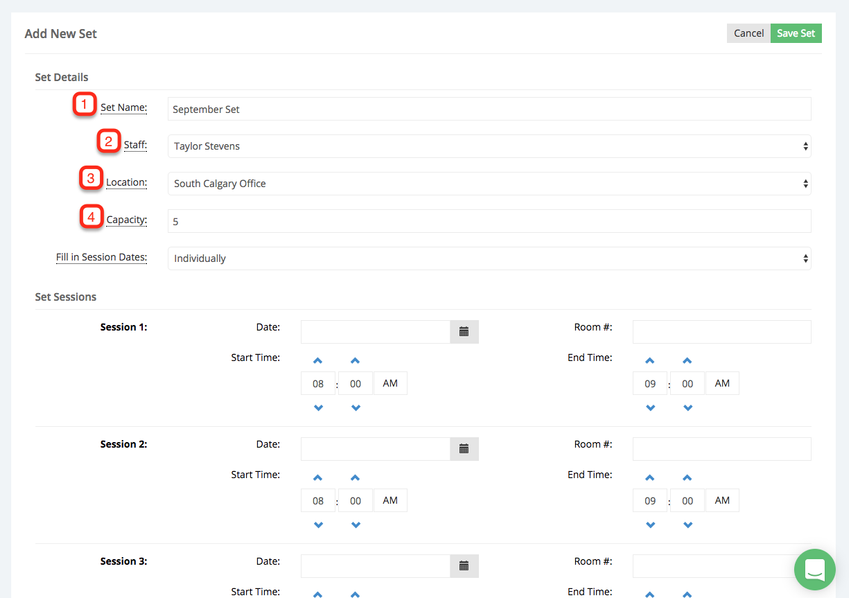
Within the Set Details section you will have two options to create the sessions dates:
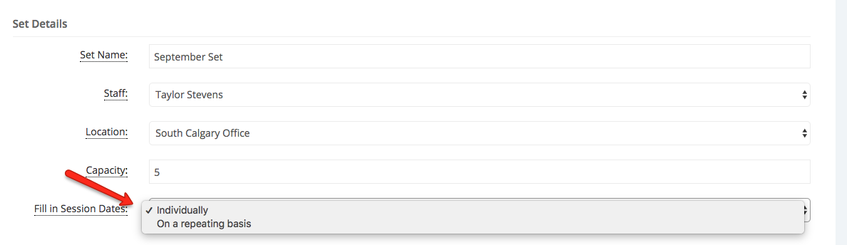
On a repeating basis: If your sessions meet on a regular basis, like every Monday at 3pm, or some kind of repeating pattern, select this option.
Indivuallty: if your sessions meet on a non repeating patter, select this option
Since the sessions will take place on repeating basis I will select the option "On a repeating basis" (1), then choose the pattern in which the sessions should meet (2), I'll also select the days when the sessions should take place (3), select the day when the sessions should being (4), and the time when the sessions will begin (5), and finally click the Generate Preview of Set Sessions button:
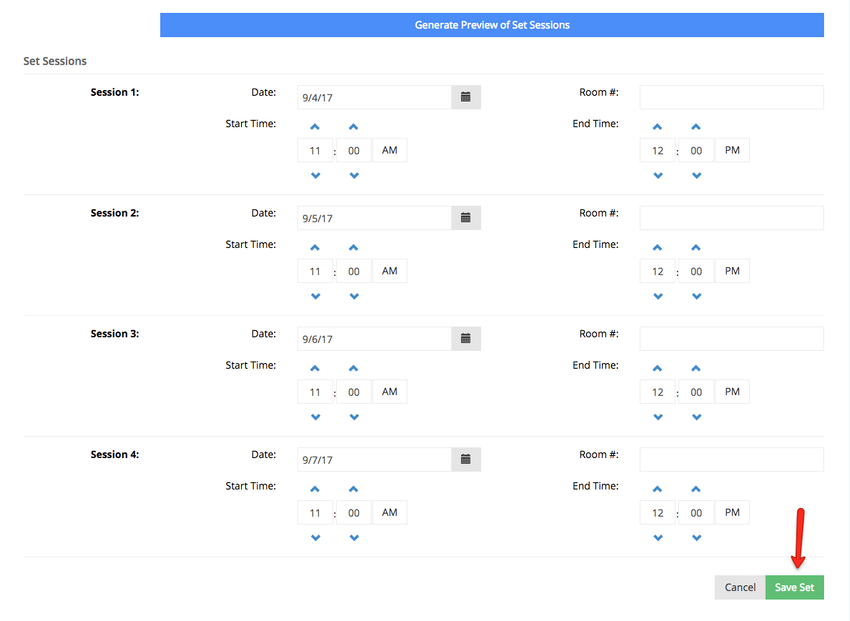
After the Generate Preview of Set Sessions button has been clicked a preview of all the sessions in the set will appear below, from this preview you can still make changes to the date, start and end times, as well as assign a room number to each session, if everything looks the way you want it click the Save Set button:
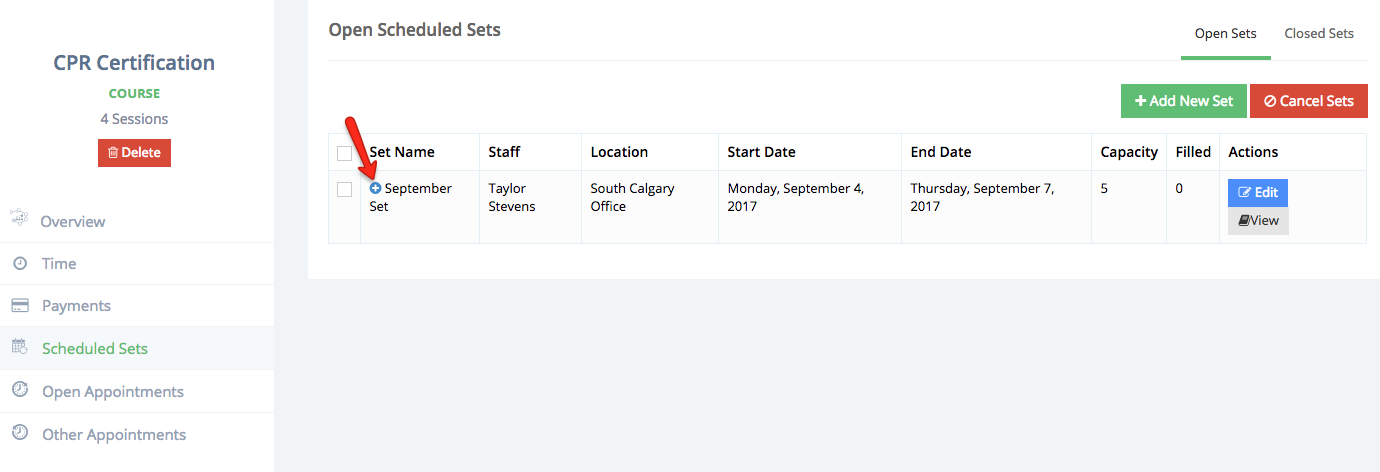
After the course set has been saved, it will be added to your list of open sets, click the "+" button to the left of the Set Name to view the sessions within the set and make changes if necessary:
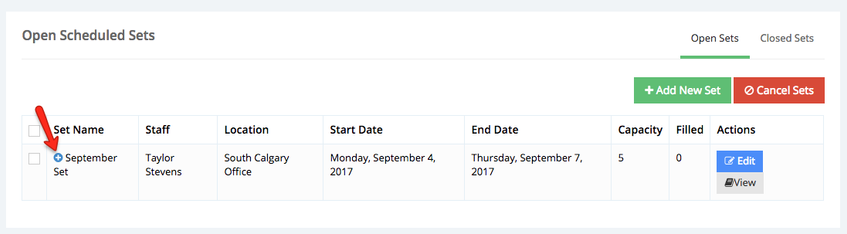
If you want to make changes to the course set details click the Edit button next to the course set you want to edit:

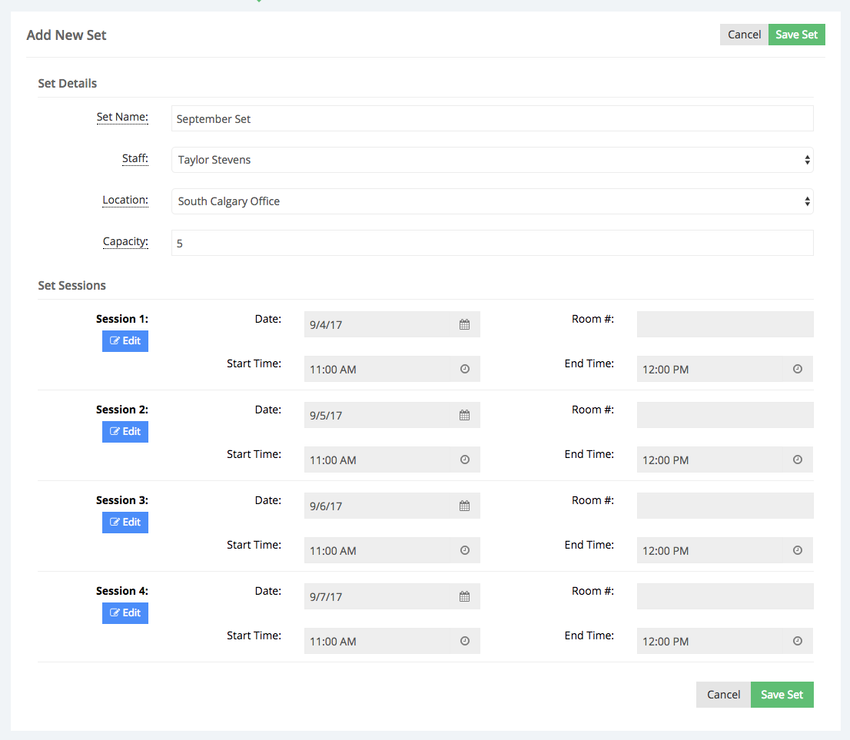
Once the Edit button has been clicked, the screen will go into edit mode where you can edit any of the course set details, you will also see a list of all the scheduled sessions within this set:
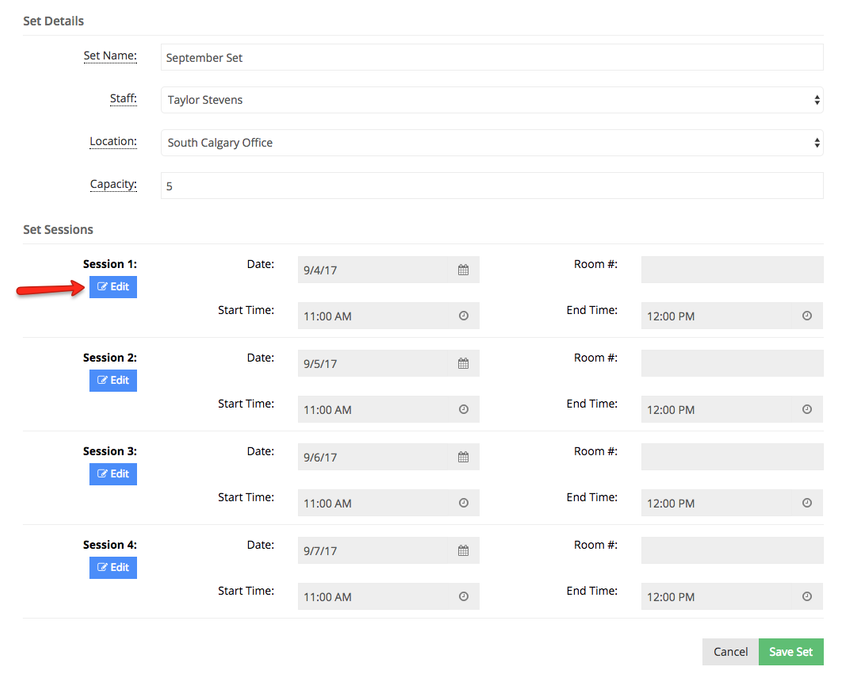
If you want to change any of the details for any of the sessions within the set click the edit button to the left of that session:
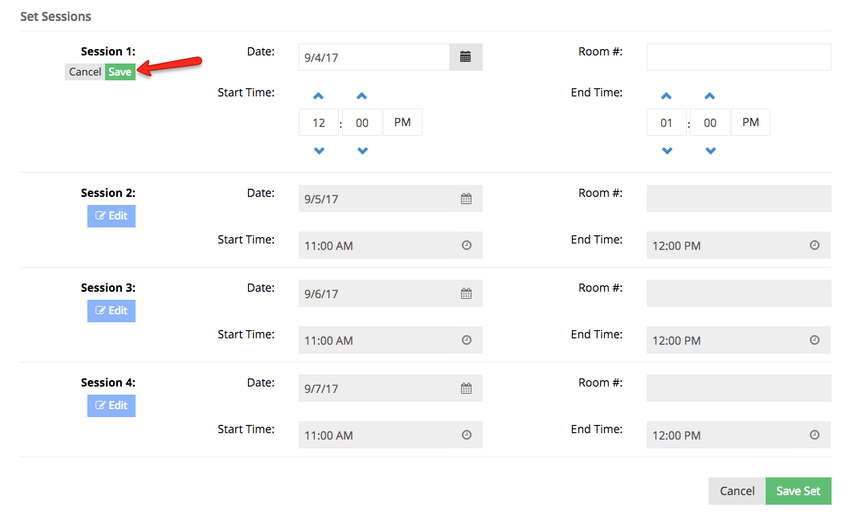
Once you've made the necessary changes to the session(s) click the Save button under the sessions number:
Once all the changes have been applied click any of the Save Set buttons:

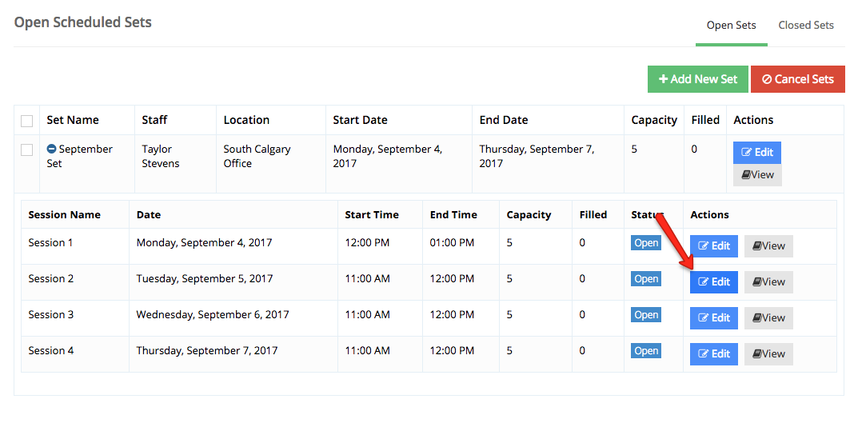
Alternatively, if you want to make changes to any of the sessions within a set click the  button to the left of the set name to display a list of all the sessions:
Once the list of sessions expands, click the edit button next to the session you want to edit:
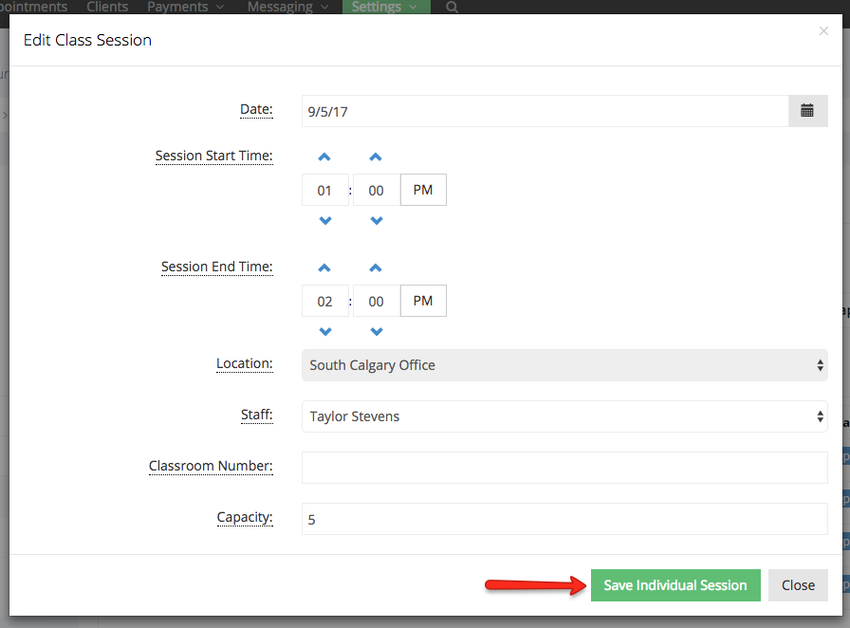
Once the Edit button has been clicked a window will appear where you can make changes to the date when the session will take place, the start/end time, location, staff, classroom number, and capacity, click Save Individual Sessions once your changes have been made:
Once the course sets has been added, your clients will be able to see them in the Time panel within your scheduler:
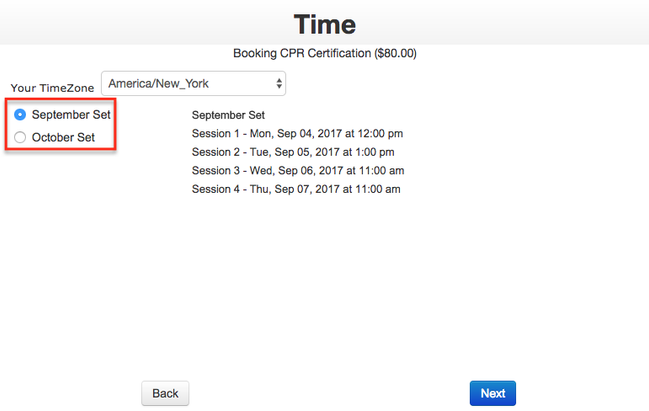
When the clients register they will be added as attendees to every session within the course set they chose:
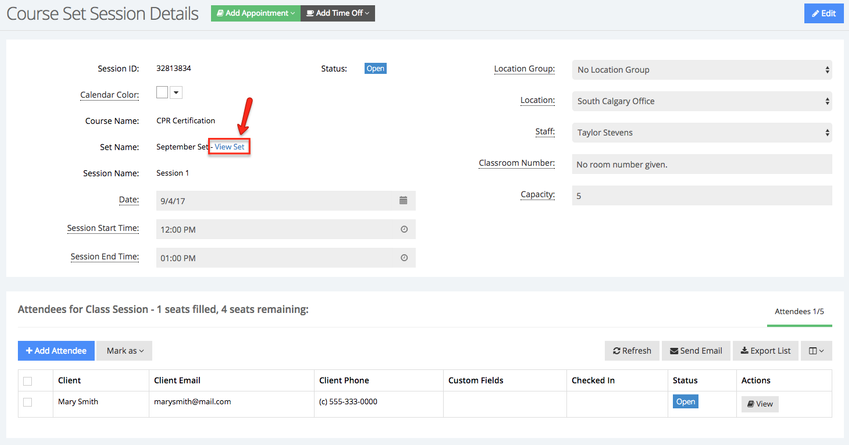
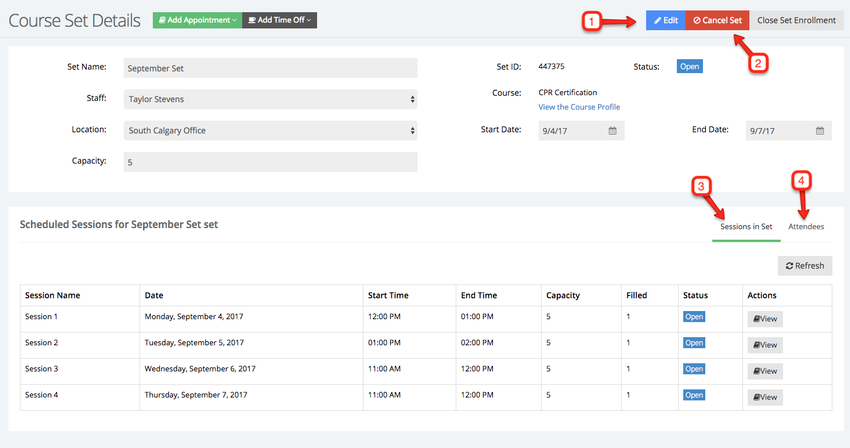
To see an overview of a course set, go to any sessions and click the "View Set" link next to the Set Name:
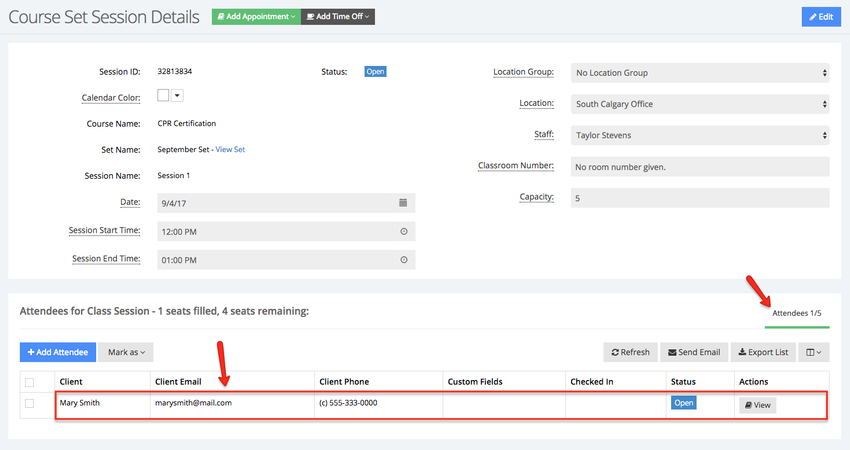
Once in the Course Set Details you can edit the set (1), cancel the set(2), see a list of the sessions in the set (3), and see a list of attendees (4):
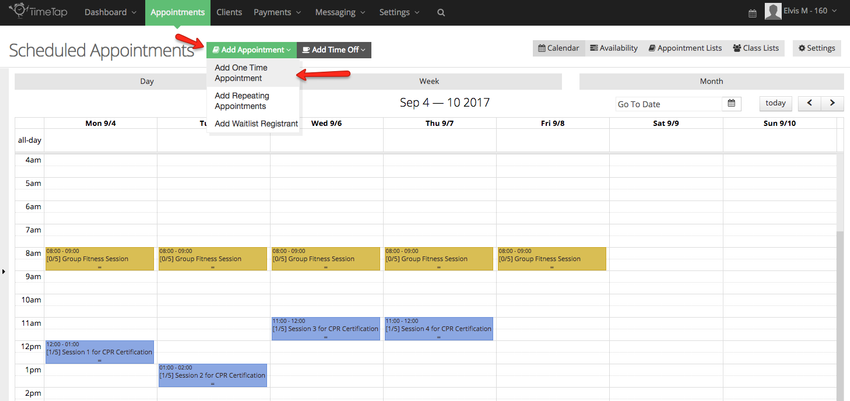
You can also add a client to a course set in the backoffice, while in the calendar or availability view click Add Appointment → Add One Time Appointment:
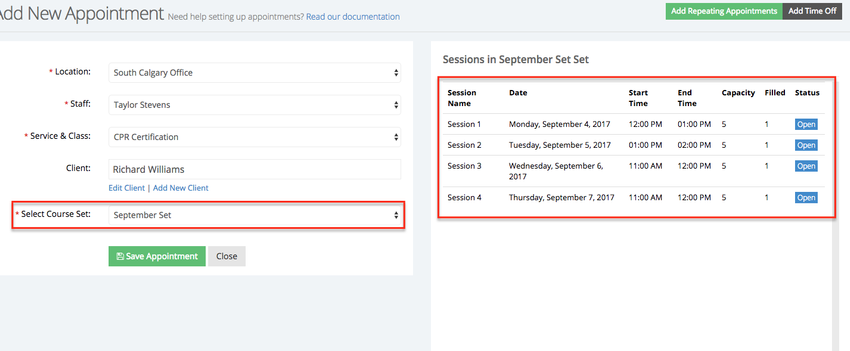
After selecting the course you will have the option to select the course set to which you want to add the client, notice that in the "Sessions in set" section you will see a preview of the sessions within the set:
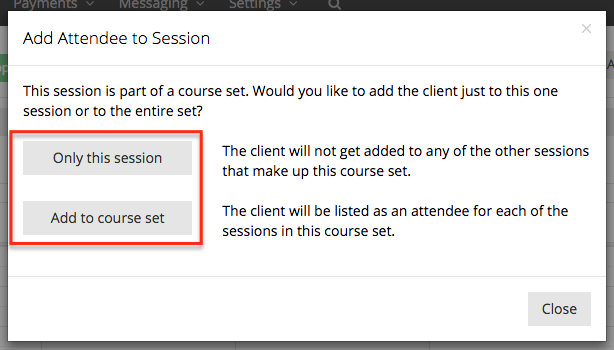
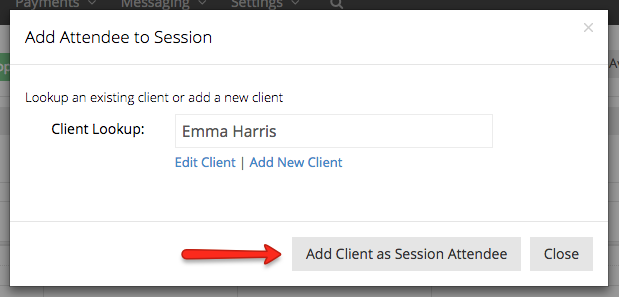
Alternatively, you can add a client to a course set or an individual session within the set by going to the calendar, clicking on any of the set sessions, and select to Add Attendee:
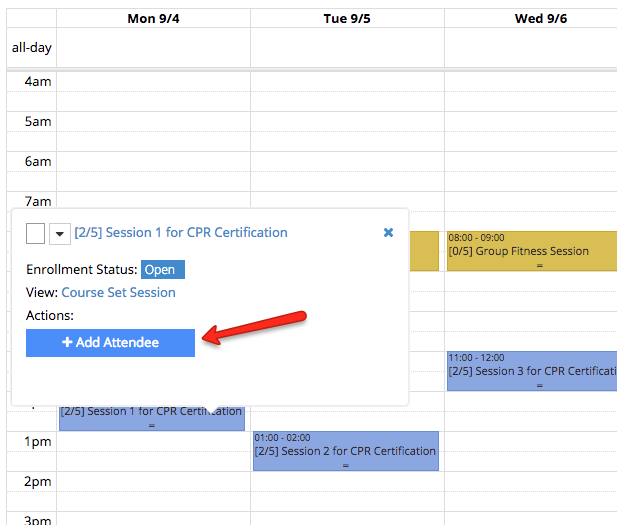
In the Add Attendee to Session window, search for an existing client or choose to add a new client. Once the client is selected click the "Add Client as Session Attendee" :
You will then have the option to add the client only to the session you selected or to the entire course set: